EASY Play Dough Circuits
This post may contain affiliate links.

Did you know that play dough can be conductive? Pretty cool, right? So we decided to use it to make some play dough circuits. I saw this a while back on the Squishy Circuits website and just had to try it out with my kids!! If you don’t want to make it, you can buy their pre-made kits!

This is a very easy way to introduce electric circuits to young kids!
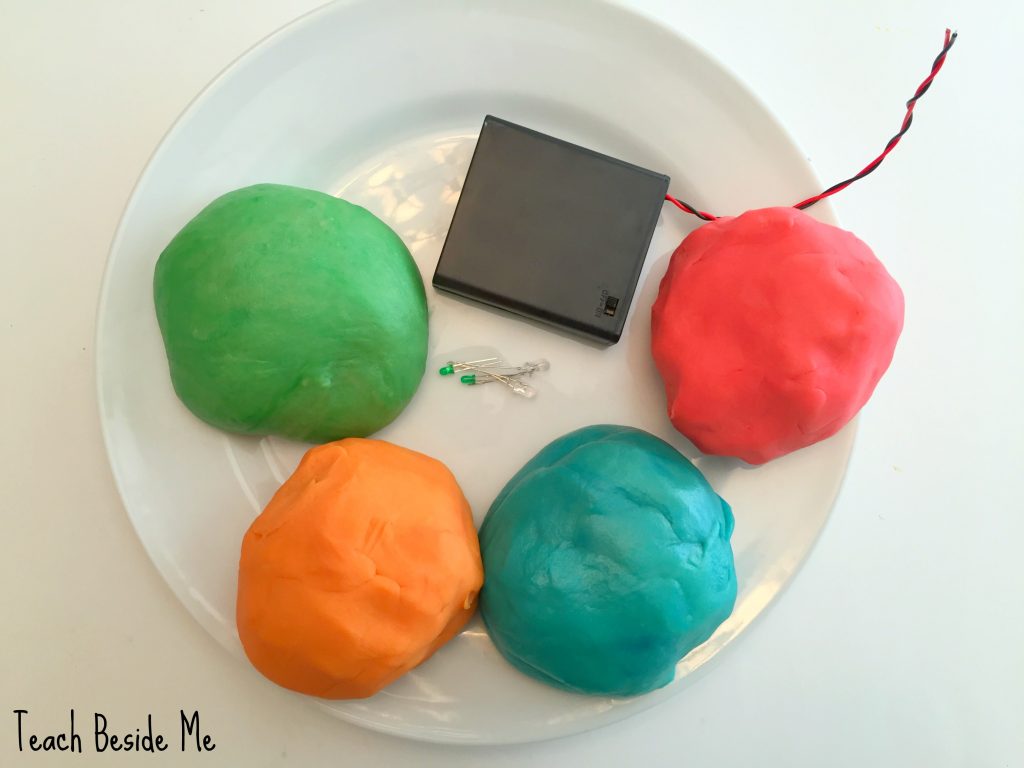
Regular play dough from the store can be used to make play dough circuits, or you can make homemade play dough. You need two different types of play dough. You need a conductive dough (the regular old salty recipe) and you need an insulating dough, too. This is made with sugar instead of salt.
Both conductive and insulating dough can be stored in a ziplock bag or other air tight container and kept for a few weeks. I suggest making the two dogs a different color so you can easily tell them apart.
Supplies for Play Dough Circuits:
- Conductive Play Dough (recipe below)
- Insulating Play Dough (recipe below)
- Battery Pack + AA batteries
- LED Pin Lights (LED stands for Light Emitting Diodes)
- You could also try buzzers instead of lights!
Conductive Play Dough Recipe: (salt dough)
Any old salty play dough recipe will do here! Or you can use your store bought dough.
1 cup Water
1 1/2 cups Flour
1/4 cup Salt
3 Tbsp. Cream of Tartar (or 9 Tbsp Lemon Juice gives the same results)
1 Tbsp. Vegetable Oil
Food Coloring, if desired
Mix in a medium size pot and cook over medium heat stir the mixture consistently. It will thicken into a dough as it cooks. Let it cool, then if it is still too gooey, knead in a bit more flour.
Insulating Play Dough Recipe (sugar dough)
1 1/2 to 2 cups Flour
1/2 cup Sugar
3 Tbsp. Vegetable Oil
1/2 cup Water (use distilled for better results)
Food Coloring, if desired
This dough does not need to cook. Mix well in a mixing bowl. Start with less flour, but add more if dough is too sticky. Mine was really sticky so I added quite a bit more flour to get it to the right consistency.
Now that you have both kinds of dough ready to go, it is time to experiment!

Here is how it works: Electricity flows in loops called circuits. This project is an example of a parallel circuit. The electricity always takes the path of least resistance. The conductive dough will allow electricity to flow while the insulating dough will not.
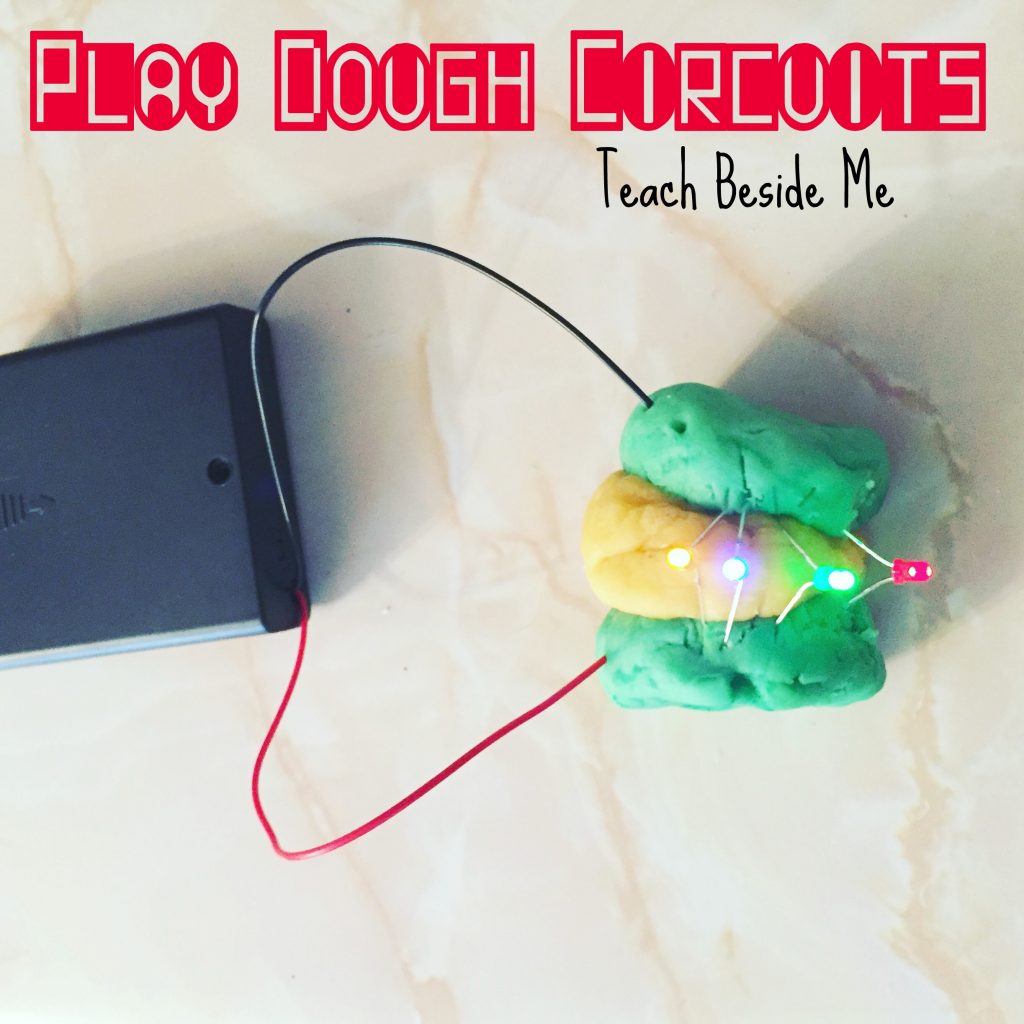
Your battery pack and pin light bulb each have positive and negative sides. The longer pin or leg is positive and the red wire is positive (just like on a jumper cable!) You need to match those up to create the circuit.
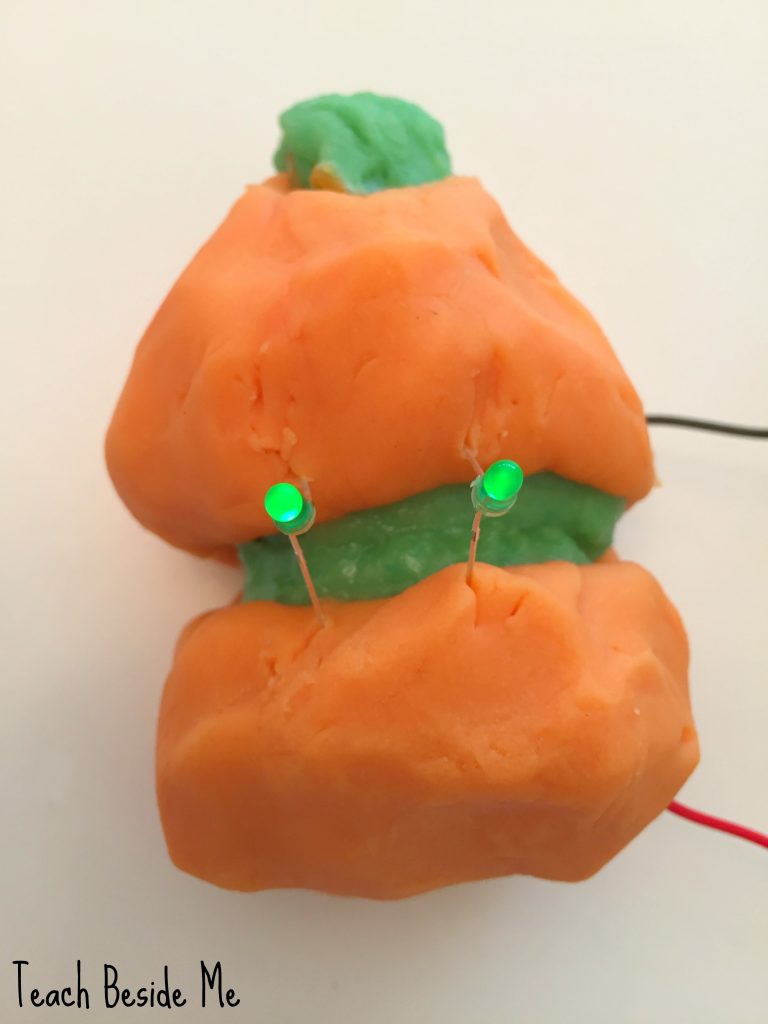
Layer two pieces of conductive play dough together with the insulating dough between them. Then put the wires into each of the pieces of dough and spread out the pins on the LED light and insert them. They need to be only touching the conductive dough with the matching (+ or – sign or it will not work.)
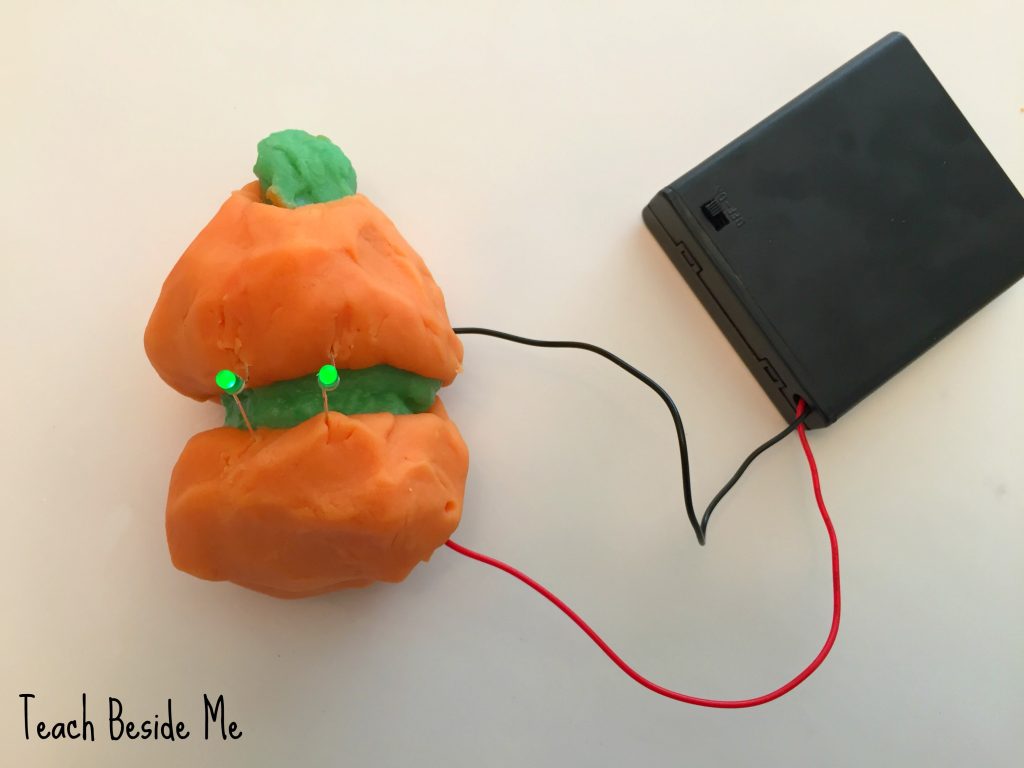
Once you figure it out, try experimenting with different designs! We made a pumpkin and a flower with ours! You can add in multiple lights, but the power dims a little with each one that is added.
Why Does Conductive Play Dough Work?
In the Conductive play dough salt and cream of tartar are included. These ingredients contain ions that allow electrical charges to flow through them.
In the insulating dough, the salt and cream of tartar are not included and distilled water is recommended. Sugar does not conduct electricity the way salt does. The water from our tap has minerals (including salt) in it. Using distilled water removes those conductive barriers.
Want more STEAM Ideas? See our STEAM Kids Book!! On Sale now as a PDF e-book or paper back!

See more circuit projects for kids:
Lemon Battery, Dirt Battery, Sewn Circuits