
Rotting Food Experiment for Kids: Create Your Own “Things That Rot” Museum
This post may contain affiliate links.
How do you feel about things that rot?
Not a fan? Well… my kids and I intentionally filled jars with rotting food and proudly displayed them on our kitchen table for an entire month! We called it our Rot Museum, and while it was one of the grossest science experiments we’ve ever done, it was also one of the most fascinating.

I’ll be honest—there were several times my husband practically begged me to throw it away. My daughter refused to sit anywhere near it, but my boys and I couldn’t wait to check on our jars every day to see what had changed.
Don’t worry, though! The experiment stayed completely contained inside sealed jars, making it a safe way to observe food decomposition up close.
If your kids enjoy gross science, this is one experiment they’ll never forget.
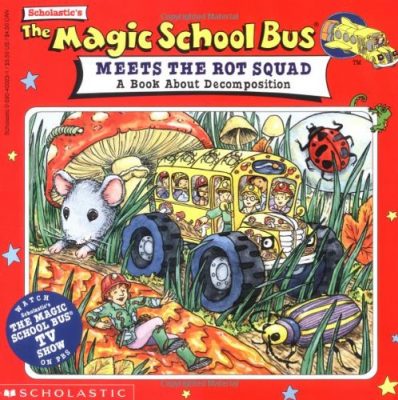
This activity was inspired by the Magic School Bus book The Rot Squad.
What Will Kids Learn?
This hands-on science investigation introduces children to important concepts including:
- Food decomposition
- Mold growth
- Bacteria and fungi
- Observation skills
- The scientific method
- Comparing variables
- Making predictions
- Recording data over time
Unlike many science experiments that happen in just a few minutes, this investigation unfolds over several weeks, teaching kids patience while they observe slow scientific changes.

Things That Rot Experiment
One of the most interesting parts of this experiment is choosing the things that rot.
Pick a variety of foods and compare how each one changes over time. Some foods mold quickly, while others resist decomposition much longer than you might expect.
For our Rot Museum, we used:
- Avocado
- Apple
- Carrots
- Piece of bread
- Lettuce
- Banana
You could also try:
- Strawberries
- Potatoes
- Cheese
- Grapes
- Cooked pasta
- Citrus fruits
Supplies
- Glass jars with tight-fitting lids
- A variety of foods
- Notebook for observation
- Permanent marker for labeling jars
How to Create a Rot Museum
Place one type of food into each jar.
Seal each jar tightly and label it with the food name and the date.
Set the jars somewhere they can safely remain undisturbed for several weeks.
Our jars sat on a sunny windowsill, which created condensation inside the jars. We suspect the extra warmth and moisture encouraged mold growth even faster.
For an interesting comparison experiment, try placing one set of jars in a sunny window and another in a cool, dark location.

Make Predictions
Before you begin, ask your young scientists:
- Which food will rot first?
- Which food will grow mold?
- Which food will change the least?
- Will processed foods rot differently than fresh foods?
- Which jar do you think will smell the worst?
Write down everyone’s predictions before the experiment begins!
Observe Over Time
Rather than opening the jars, simply observe them each day.
Record things like:
- Color changes
- Mold growth
- Condensation
- Changes in size or texture
- Liquid collecting inside the jar
Watching the gradual changes is one of the most exciting parts of this investigation.

What Happened in Our Rot Museum?
The very first food to grow mold was the avocado.
The carrots surprised us by barely changing at all. They showed almost no mold growth during the month.
The banana also surprised us. Since it was sealed in an airtight jar, it stayed looking fresh for several days before finally beginning to decompose.
Our store-bought wheat bread didn’t develop mold for almost two weeks. We suspect the preservatives slowed down the decomposition process.
The apple created one of the most dramatic displays of rot, while the lettuce became… well… let’s just say it wasn’t very pleasant to look at!

The Science Behind Food Rot
Why do some things that rot decompose faster than others?
Food doesn’t simply “go bad”—it goes through a decomposition process. During decomposition, tiny living organisms called decomposers, including bacteria and fungi, break down dead organic matter into simpler substances. This natural recycling process returns nutrients to the environment and is the same process that happens in a composting pile.
Because our jars were sealed, there was only a limited amount of oxygen available inside each container. Some decomposers need oxygen to survive, while others can continue breaking down food without it. The sealed jars created a unique environment that changed how the foods decomposed.
Mold spores are almost everywhere in our environment. When conditions are right—especially warmth and moisture—they begin growing and helping decompose food.
Different foods rot at different speeds because of factors such as:
- Water content
- Natural sugars
- Acidity
- Preservatives
- Exposure to microorganisms
This is why our avocado molded so quickly while the carrots remained almost unchanged.
Learning about decomposition also helps kids understand what happens to food waste after we throw it away. Foods break down much differently in landfills than they do in a healthy compost pile, where oxygen and decomposers help speed up the process.

Safety Tips
Although this experiment is completely safe when the jars remain sealed, keep these tips in mind:
- Keep the jars tightly sealed throughout the experiment.
- Do not touch mold directly.
- Wash hands after handling the jars.
- Have an adult open the jars outdoors.
- Dispose of the contents immediately after the experiment.
I have to warn you…
Opening the jars after a month was by far the worst part!
The lids actually popped as the built-up fermentation gases escaped. The smell was unbelievably awful—strong enough that I nearly lost my lunch!
As the food decomposed, microorganisms produced gases such as carbon dioxide, causing pressure to build inside the jars. That’s why several of our lids popped when we finally opened them after a month!
If you try this experiment, I highly recommend wearing a mask and dumping everything directly into an outdoor trash can.
Consider yourself warned!

Questions to Discuss
After the experiment, ask:
- Which food surprised you the most?
- Why do you think some foods rotted faster than others?
- How did the sunlight affect the jars?
- What would happen if the jars were refrigerated?
- Which food would you test next?
Extend the Learning
Try changing just one variable to turn this into a true scientific investigation.
Compare:
- Sunlight vs. darkness
- Refrigerated vs. room temperature
- Fresh bread vs. store-bought bread
- Airtight vs. loosely covered containers
Can your kids explain why one condition produced different results?
More Gross Science Fun
If your family loves delightfully disgusting science experiments, don’t miss these favorites:
Our Rot Museum may have been one of the smelliest science experiments we’ve ever tried, but it was also one of the most memorable. Sometimes the grossest activities end up teaching the biggest lessons!






Disgusting but cool science. What a fun exploration.
Blessings, Dawn