Mold Science Experiment for Kids
This post may contain affiliate links.
Have you ever wondered where the most mold and germs are hiding in your house? In this hands-on mold experiment for kids, we tested different surfaces around our home to see where mold spores would grow the fastest. The results were honestly surprising… and a little gross!
This mold growth experiment is a fantastic way to explore:
- fungi and mold spores
- scientific observation
- the scientific method
- food decomposition
- moisture and bacteria
- variables in science experiments
Kids love this activity because it feels like real science investigation work. Parents and teachers love it because it combines biology, microbiology, and STEM learning in a memorable hands-on way.
Just be warned… after doing this experiment, everyone suddenly wants to wash their hands a LOT more often.

What Is Mold?
Mold is a type of fungus that grows on organic materials. Tiny mold spores float through the air all around us, but they are usually too small to see. When spores land on moist surfaces with nutrients available, they can begin growing quickly.
Mold belongs to the fungi kingdom and spreads using thread-like structures called hyphae. Groups of hyphae form a network called mycelium, which helps the fungus absorb nutrients from its food source.
Mold can grow:
- on food
- in damp bathrooms
- on wet carpet
- around air conditioners
- on bread
- on fruit
- inside refrigerators
- or anywhere moisture is present
Different types of mold thrive in different conditions, which makes mold experiments fascinating for kids to observe.
Mold Experiment for Kids
This simple mold experiment allows kids to test different surfaces and observe mold growth over time.
We used gelatin and swabbed household surfaces to see where the most mold spores were hiding. You could also do this experiment with slices of bread, apples, cheese, potatoes, or other foods.
Supplies You Will Need
- Unflavored gelatin
- 2 cups boiling water
- Sanitized jars, plastic cups, or petri dishes
- Cotton swabs or q-tips
- Permanent marker
- Labels or masking tape
- Gloves
- Aluminum foil or lids
- Sealed bags if using bread
- Notebook or printable observation sheets
How to Do the Mold Experiment
Step 1: Prepare the Gelatin
Boil 2 cups of water and prepare the gelatin according to package directions. Stir until completely dissolved.
Pour a small amount into each sanitized container or petri dish.
Be sure your containers are clean before starting so you are only testing the mold spores collected during the experiment.
Cover the containers with lids, aluminum foil, or plastic wrap while the gelatin cools and solidifies.
The gelatin may develop condensation and moisture as it cools.

Step 2: Swab Different Surfaces
Once the gelatin is fully set, use damp cotton swabs to collect samples from around your house or classroom.
Some fun places to test:
- cell phones
- door handles
- kitchen counters
- stove burners
- refrigerator handles
- bathroom sinks
- TV remotes
- trash can lids
- keyboards
- toys
- hands
- desks
Try testing a variety of different surfaces to compare results.
Step 3: Add the Samples
Label each container using a permanent marker.
Gently rub the q-tip across the surface of the gelatin. Try not to puncture the gelatin surface.
Seal the containers tightly with lids or foil.
Step 4: Place in a Dark Warm Location
Store the containers in a warm location or dark place where mold spores can grow undisturbed.
Within a few days, you may begin to see:
- fuzzy mold colonies
- spots of different colors
- circular growth patterns
- white mycelium strands
- different textures and shapes
We allowed our mold growth experiment to continue for about a week so we could observe lots of mold growth.
Our Results
Before starting the experiment, we made a hypothesis about which surface would grow the most mold.
I was convinced the trash can lid would be the dirtiest surface. Surprisingly, the stove burner ended up growing far more mold than anything else we tested!
My guess is there were tiny food remnants left behind that provided extra nutrients for mold growth.
The kids thought this was both disgusting and fascinating.

Bread Mold Experiment Variation
One of the most popular versions of this activity is the classic bread mold experiment.
To do a bread mold experiment:
- Place slices of bread into separate sealed bags.
- Test different variables.
- Observe mold growth over several days.
Some variables to test:
- touched vs untouched bread
- washed hands vs dirty hands
- refrigerated bread vs room temperature
- moist bread vs dry bread
- bread with preservatives vs homemade bread
- bread stored in a dark place vs sunlight
This is a fantastic mold experiment for science fairs because kids can easily compare results and record observations.
Mold Experiment Variables to Test
Want to extend this activity? Try changing one variable at a time.
Different Foods
Test:
- bread
- apples
- lemons
- cheese
- potatoes
- tortillas
Moisture Levels
Compare:
- dry samples
- damp samples
- soaked samples
Temperature
Test:
- refrigerators
- warm locations
- near a stove
- outdoors
Preservatives
Compare:
- homemade bread
- store-bought bread
- foods with preservatives
- organic foods
Different Surfaces
Swab:
- phones
- keyboards
- bathroom counters
- toys
- shoes
- backpacks
Why Does Mold Grow?
Mold grows best when it has:
- moisture
- warmth
- nutrients
- organic materials
Mold spores land on surfaces constantly, but they only begin growing when conditions are right.
Foods and damp surfaces provide nutrients and moisture that help fungi thrive.
Scientific Method Questions
This mold experiment is perfect for practicing the scientific method. Check out my Scientific Method Printable Pack.
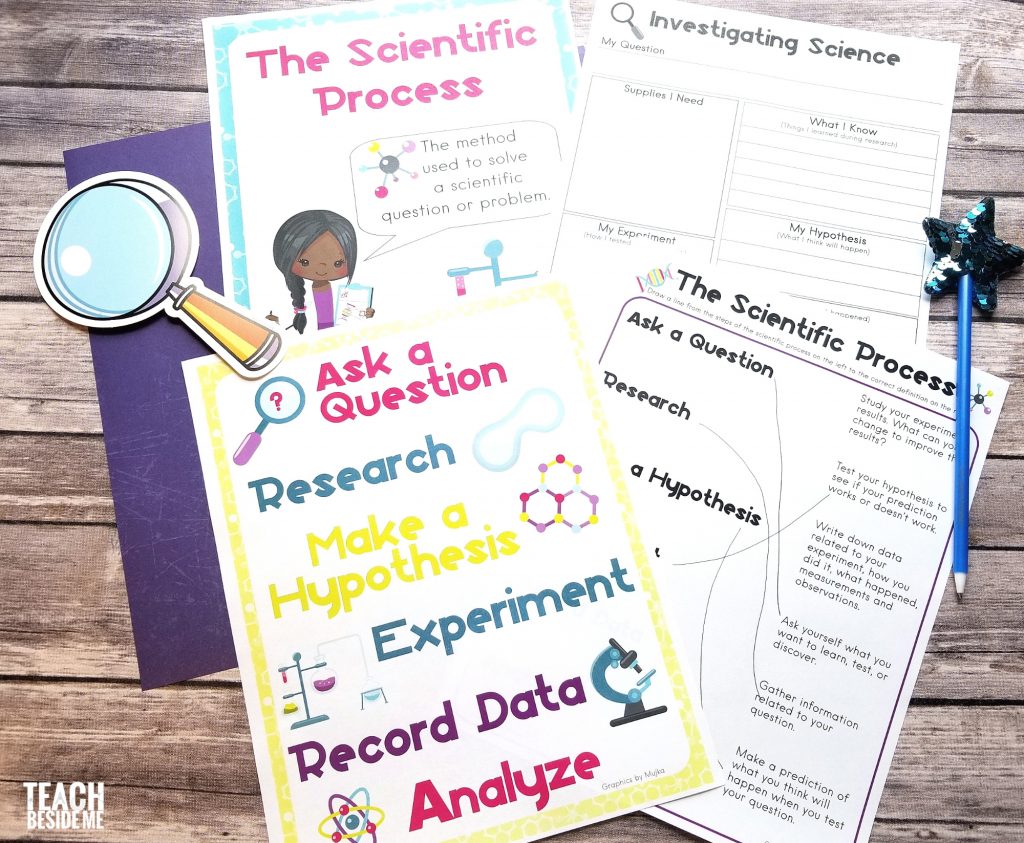
Kids can:
- make a hypothesis
- identify variables
- record observations
- compare results
- analyze data
- draw conclusions
Some questions to explore:
- Which surface grows the most mold?
- Does moisture affect mold growth?
- Which food molds fastest?
- Does refrigeration slow mold growth?
- Do preservatives reduce mold?
- Does light affect fungal growth?
Turn This Into a Science Fair Project
This activity works beautifully as a mold science fair project.
Students can:
- photograph daily changes with digital cameras
- create observation charts
- graph mold growth
- compare different foods
- measure colony size
- test environmental conditions
You could even create petri dish experiments comparing bacteria and fungi growth on different surfaces.
Mold Safety Tips
IMPORTANT: Mold spores can cause allergic reactions and breathing irritation.
For safety:
- keep containers sealed
- wear gloves
- do not inhale mold spores
- do not open containers once mold begins growing
- dispose of samples carefully
- wash hands thoroughly afterward
Adult supervision is recommended.
Book Recommendation
If you want a fantastic book to pair with this activity, we loved Fungus Is Among Us! by Joy Keller and illustrated by Erica Salcedo.
This fun science book teaches kids:
- about fungi
- different types of mold
- mycologists (scientists who study fungi)
- where fungus grows in nature
It makes a perfect companion to this mold experiment for kids.

What Kids Learn from This Mold Experiment
This activity teaches:
- biology
- microbiology
- fungi science
- scientific observation
- scientific method skills
- hypothesis building
- STEM thinking
- laboratory safety
Best of all, it makes science memorable, hands-on, and just the right amount of gross.

Want some other fun science experiments? Check out my post on Simple Science Experiments!
If your kids enjoyed this mold experiment, they may also love the Rot Museum experiment!


I loooooove this! I am totally going to this. It’s so gross and awesome! What a great idea. Thanks you sharing!
I don’t even want to think about all of the germs on our counters.
This is as cool as it is gross! What a great way to keep kids interested while learning.
Thank you for stopping by the Thoughtful Spot Weekly Blog Hop this week. We hope to see you drop by our neck of the woods next week!
Bleh! I bet my kids would love that. 🙂
Good luck with your birth!!!
Okay, I wouldn’t be able to do this experiment. I am totally 100% freaked out by mold. I get rid of food that I suspect has been in the fridge more than 5 days and I try not to look at it. It gives me the Heebie Jeebies.
Just looking at the pictures makes me shreek.
eek.
Thanks for linking up this nasty post to the #homeschoollinkup! It’s a totally fun experiment – but gross to look at mold.
🙂
Ha ha, Lisa! You are so funny. It is pretty gross, but at least it was contained 😉
That is both gross and cool at the same time. Funny how the places we think of as dirty were the cleanest. Probably because we tend to clean them more often. Thanks for sharing via Family Fun Friday.
My 10 yr old daughter did this experiment for her science project. It was amazing. I had bought a kit that did the samething and it did not work as well and was so much more expensive. She got an A+ for this. Thank you so much for the directions and and all the information.
Hello! I was wondering if you had any photos of her results? I’m a 1st grade teacher and am thinking about doing this in my classroom!
Jordan.barlow65@gmail.com
I am trying this experiment this week and nothing is growing. What could I have done wrong ????
Maybe you are a better cleaner than me! 😉 it actually took a while & it worked best in a dark location.
We did this with our Creative Tots Mason Preschoolers and they absolutely loved it! Thank you for sharing this with us!