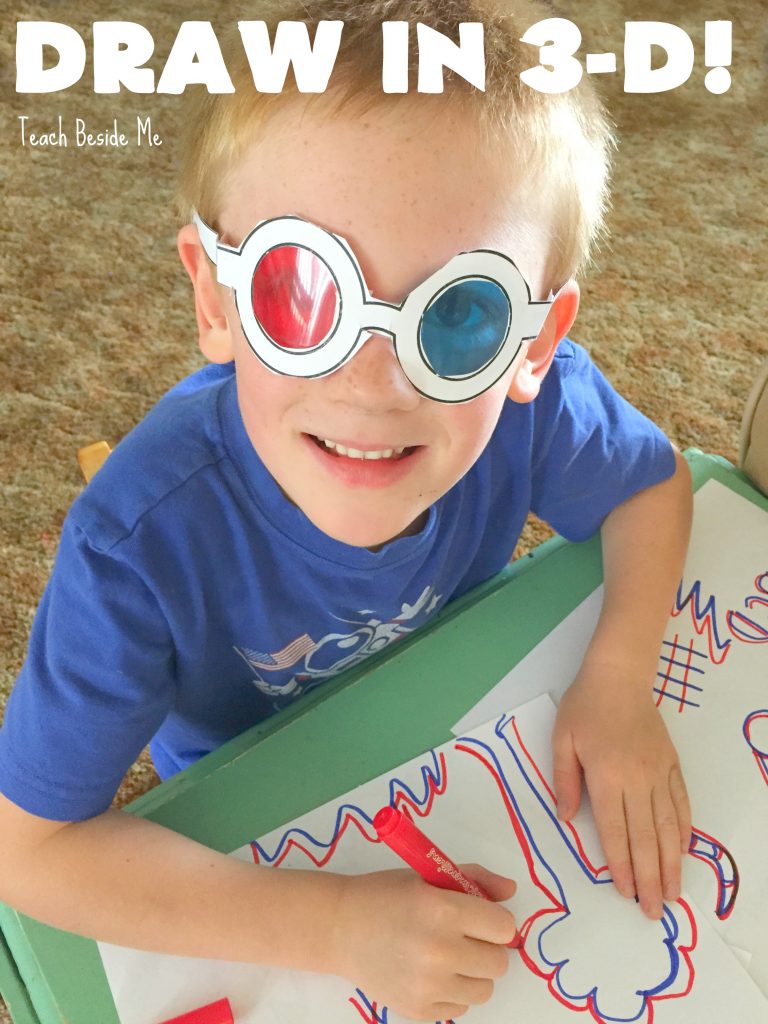
3-D Drawings with Kids: A Fun Science and Art Activity
This post may contain affiliate links.
Looking for a creative and educational activity to keep your kids engaged?
Try making 3-D drawings with homemade 3-D glasses! This simple project blends art and science for a hands-on experience your kids will love—and they’ll learn some cool visual science concepts along the way.

How to Make 3-D Glasses
Making your own 3-D glasses is easy and a fun project all on its own! Here’s what you need:
Supplies:
-
Printable glasses template – Download Below
-
Red and blue cellophane. or transparent film
-
Scissors
-
Glue, tape, or a glue stick

Instructions:
-
Print out a glasses template and cut out the frame and eye holes.
-
Cut two small squares of cellophane—one red and one blue.
-
Tape or glue the red cellophane over one eye hole and the blue cellophane over the other.
-
Let the glue dry if needed, and your 3-D glasses are ready to use!
Tip:
Make sure the red film covers the left eye and the blue film covers the right eye for best results.
How to Create 3-D Drawings
Now for the fun part—creating your own 3-D masterpieces!
Supplies:
-
White paper
-
Red and blue markers (crayons or colored pencils can also work)
Instructions:
-
Use a blue marker to draw your design first. It can be anything—shapes, doodles, patterns, or even names!
-
Then, using a red marker, trace over the design, slightly offsetting the lines to the right or left.
-
Put on your 3-D glasses and watch your drawings pop off the page!
Tip:
Simple, bold designs work best. Younger kids might enjoy making big, chunky shapes, while older kids can experiment with more detailed patterns and text.

Variations and Extensions
1. Try Different Designs:
-
Geometric shapes
-
Mazes
-
Abstract art
-
Simple words or names
-
Animals or characters
2. 3-D Coloring Pages:
Pre-draw shapes in blue for younger kids to trace over with red.
3. Create 3-D Posters:
Make a “Welcome” sign, party decorations, or even a giant collaborative mural.
4. Experiment with Distance:
Offset the red and blue lines more dramatically to create a more exaggerated 3-D effect.
5. Science Fair or STEAM Project:
Use this project to illustrate principles of vision and depth perception for a simple but fascinating science fair entry.
The Science Behind 3-D Vision
Why does this work? It’s all about how our eyes and brain work together!
-
Binocular Vision:
Our two eyes are spaced apart, meaning each sees a slightly different angle of the same object. Our brain merges these two images to create depth perception—a three-dimensional view of the world. -
Color Filtering:
The red and blue cellophane filters in the glasses force each eye to see only part of the image. The brain then blends the two slightly offset drawings into one image with the illusion of depth. -
Anaglyph 3-D:
This method is called anaglyph 3-D, and it’s been used for decades in comics, movies, and art!

Why This is a Great Learning Activity
This simple project teaches kids about:
-
Art and Design: Practicing drawing, coloring, and spatial awareness.
-
Optical Science: Understanding how human vision and perception work.
-
Fine Motor Skills: Cutting, coloring, and assembling projects.
-
Problem-Solving and Experimentation: Adjusting drawings to see what changes the effect.
-
Creativity and Confidence: Creating something that looks “magical” encourages excitement and pride in learning!
This easy project is a favorite at our house—both for its fun factor and the “wow!” moment when the drawings come to life.
Grab some markers and cellophane, and get ready to explore the world of 3-D art and science with your kids!
Download the 3D Glasses Template now!


This such a simple but fun project that teaches you so much about the science of how the brain processes images. Thanks for sharing!
This past week the Home School programs made your Penny Spinners!! It was so much fun! Thank you for sharing your ideas!! Connie/Children’s Librarian
Thanks for letting me know, Connie! I am so glad you enjoyed them.