Color Mixing With Light: Hands-On Science Experiment
This post may contain affiliate links.
Did you know mixing colored lights doesn’t work the same way as mixing paint? It’s true! With this fun and simple color mixing with light activity, your kids can explore how colored light behaves—and the surprising results that happen when you combine different light colors.
This is an easy STEM activity for kids that helps demonstrate additive color mixing, and it only takes a few minutes to set up!
Supplies You’ll Need
-
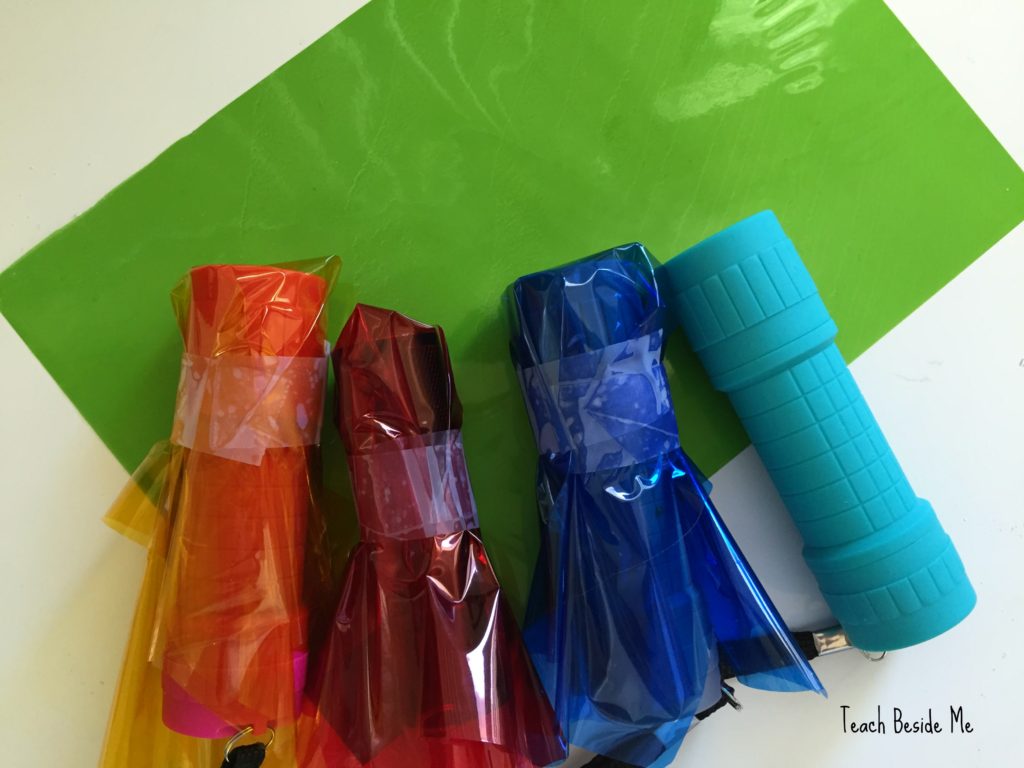
Colored cellophane sheets (red, blue, green, yellow)
-
Scissors
-
Tape or rubber bands
-
White wall or poster board
-
Optional: a dark room for better results
How to Do the Color Mixing with Light Experiment
Cover the flashlights
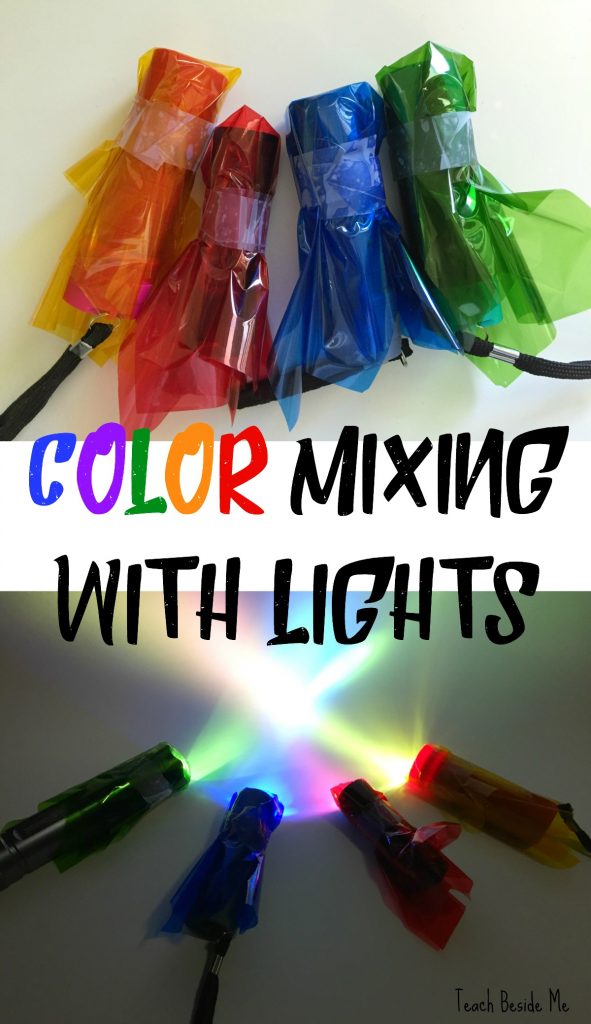
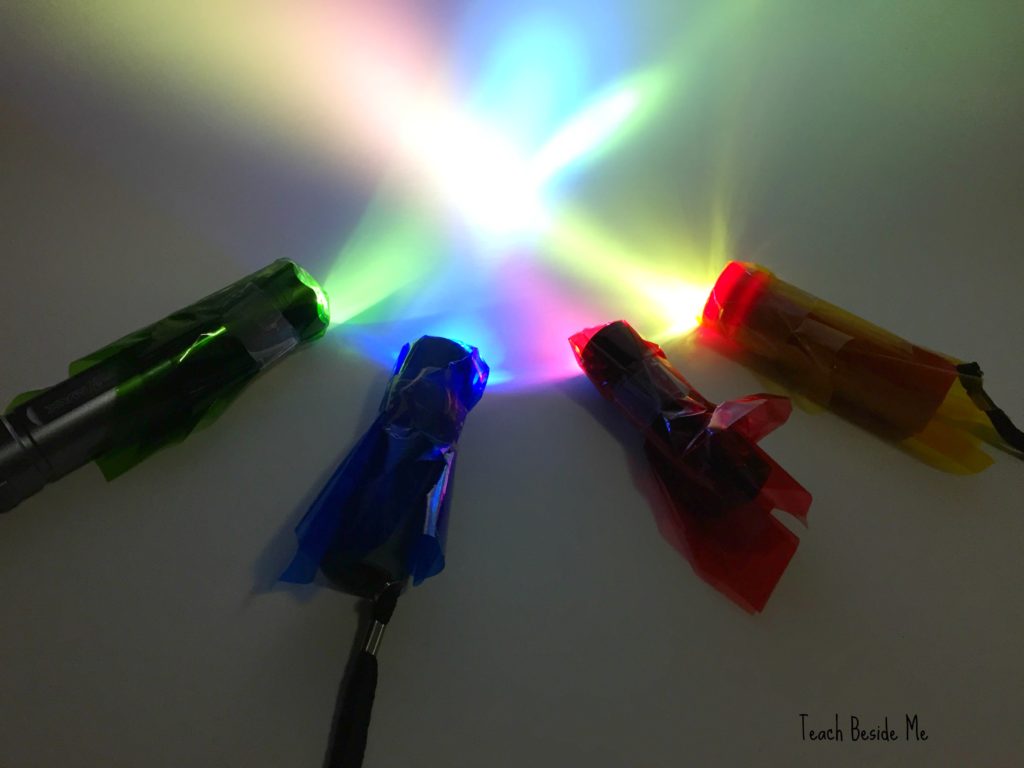
Cut squares of cellophane and place one color over the lens of each flashlight. Secure it with tape or a rubber band. We used red, green, blue, and yellow.
Darken the room
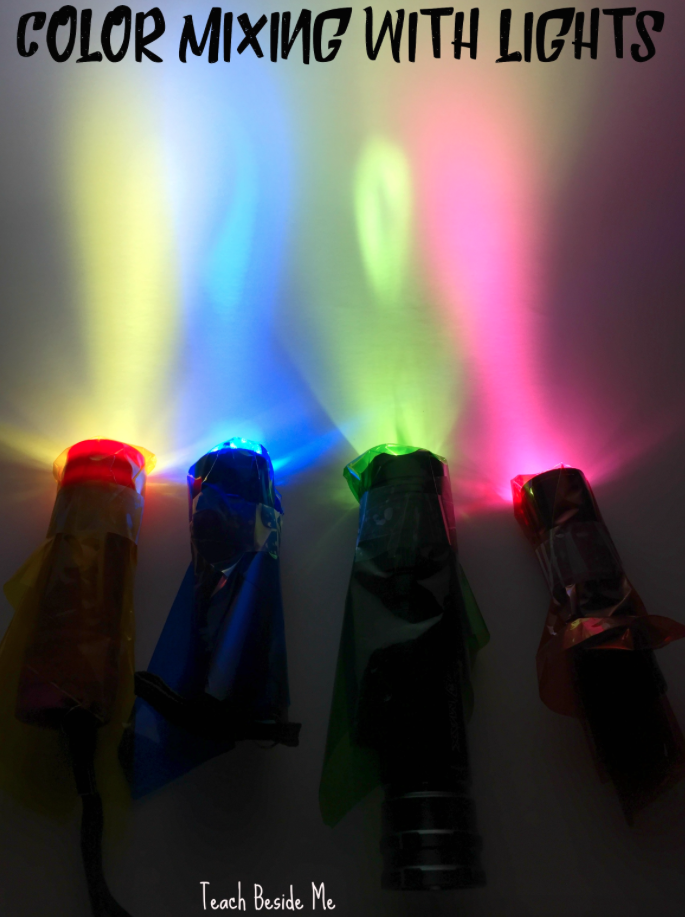
Head into a dark room to see the color changes more clearly. Shine the flashlights onto a white wall or poster board.
Overlap the light beams
Start mixing the colored lights by shining two or more flashlights at the same spot. See what new colors appear where the lights cross over!
Track your discoveries
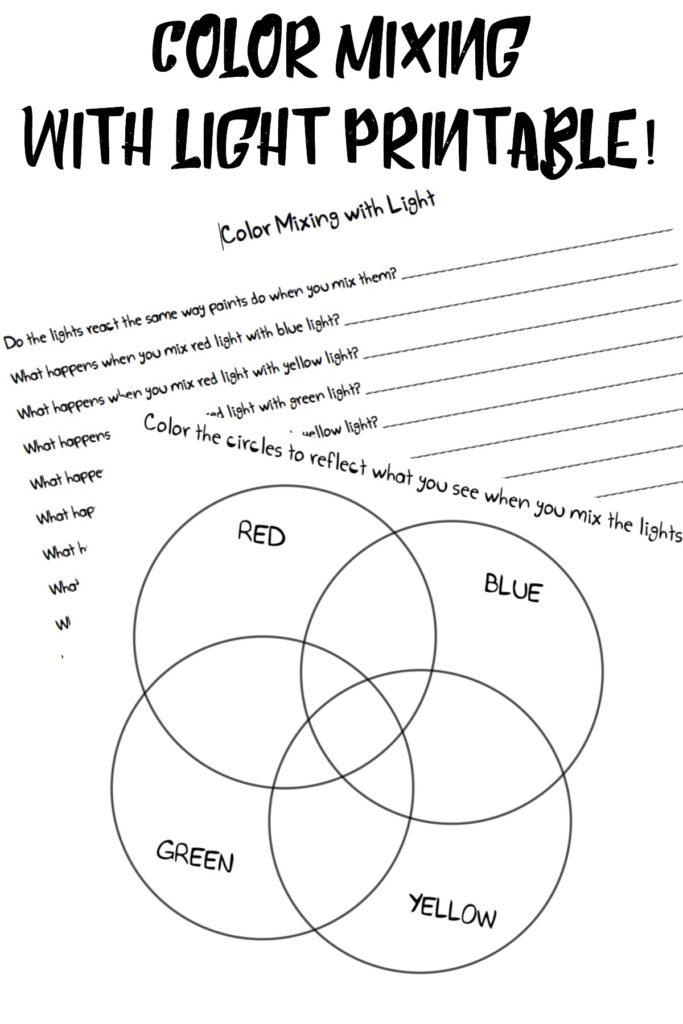
Use our Color Mixing with Light printable worksheet to record the colors you create. It includes:
- A coloring section to match what you see
- Questions to reflect on what happened
- A place to sketch your light combinations
Download the Color Mixing with Light Printable
What Kids Learn from This Experiment
Your kids will notice something surprising—mixing red, green, and blue light makes white light! This is the opposite of what happens when you mix paints.
Here’s why:
-
Red, green, and blue are the primary colors of light.
-
When combined in equal amounts, they form white light—this is called additive color mixing.
-
Mixing just red and green? You’ll get yellow!
-
Mixing blue and red? You’ll see magenta!
-
Mixing green and blue? You’ll get cyan!
This is the same principle used in stage lighting, computer screens, and TVs.
Extend the Learning
Here are some follow-up ideas to deepen the learning:
-
Try subtractive color mixing next with paints or colored water to compare how pigment mixing differs from light.
-
Use colored cellophane in creative ways—try layering the colors before placing them over the flashlight.
-
Explore everyday technology that uses RGB (red, green, blue) like tablets, cameras, or digital art.
Take photos of your kids shining the flashlights, mixing the beams, and filling out their worksheet. This makes it easy to share their learning and helps them feel proud of their experiment.
Whether you’re a teacher, homeschool parent, or just looking for a smart rainy-day activity, color mixing with light is a hit every time.
Check out some of my favorite STEM resource for families:
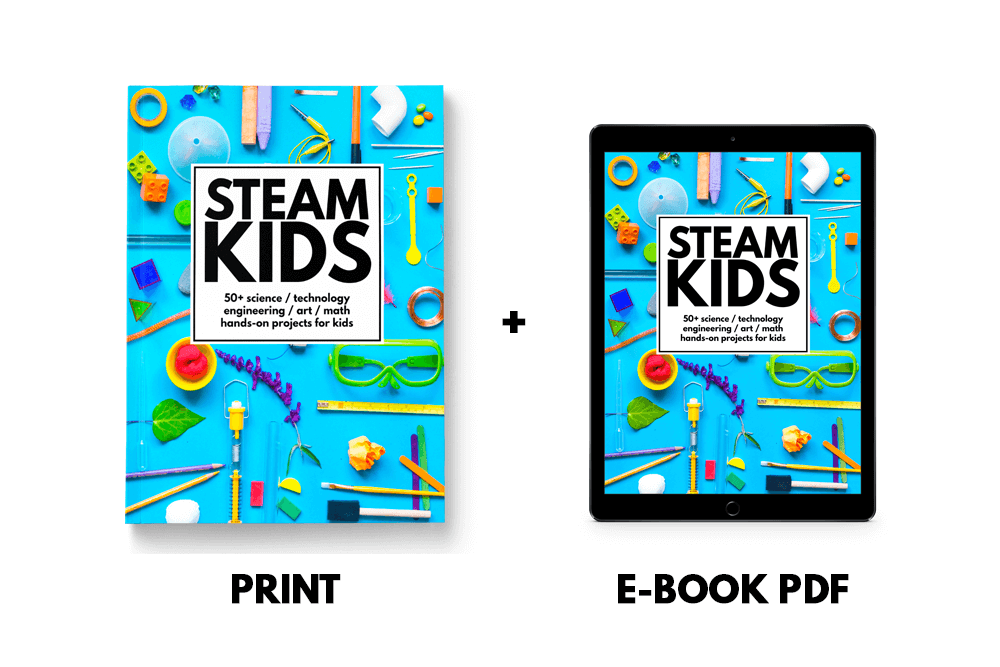
STEAM Kids book (I am a contributing author)– filled with creative, easy-to-do science projects just like this one.
Science Art and Drawing Games for Kids– My Book!

Or browse my site for more hands-on science activities and printables!


Wow! I have never thought of such experiment! Love it! Saving this idea for later
Could you use colored tissue paper instead of cellophane?
It may work but maybe not so clearly. It is definitely worth trying!
Yuo’re GREAT!!
I am LOVING these ideas. I used to be a classroom teacher for five years, but changed directions and currently work as an After School Teacher. I get to teach the STEM activities to grades 2-5. And started a ‘Glow’ unit recently. We are doing blacklight/glow in dark related activities but I’m going to transition it to colored light next and wow, love this! So simple yet so awesome to dive into colored light and all sorts of directions we can head in a hands on, fun way. Thanks for always posting such amazing stuff!
Thanks so much for your comment!! I am glad you found it useful. We sure had fun with it.
Could you publish a link to the worksheets? I cannot find them.
where i can find the worksheet the colour mixing with the lights
I was looking for the worksheets on the light color mixing.
thanks so much for the freebie