
How to Make Floam: Easy Homemade Floam Recipe
This post may contain affiliate links.

Have you ever played with floam? It’s stretchy, squishy, colorful, and filled with tiny foam beads that give it a wonderfully bumpy texture!
If you’re wondering how to make floam at home, it’s actually pretty simple. Homemade floam is made by combining slime with small polystyrene foam beads to create a fun sensory material kids can stretch, squish, and shape.
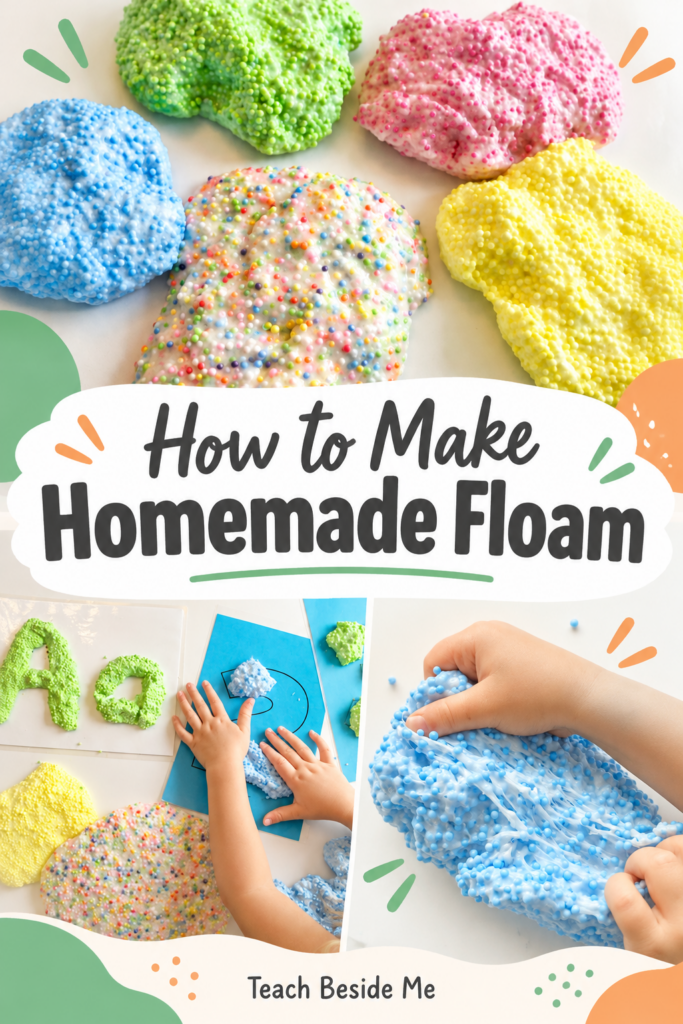
We made several different colors of homemade floam, including a rainbow version that was my favorite!
And because I love turning sensory play into learning activities, we also used our floam with printable letter and number tracing mats.
I’ll show you how to make your own floam, share some troubleshooting tips, and give you a few fun ways to use it for learning.

What Is Floam?
Floam is a type of slime filled with tiny foam beads.
It has a stretchy, moldable texture similar to regular slime, but the beads add a bumpy, slightly crunchy feeling when you squeeze it.
You might also hear it called foam bead slime or crunchy slime.
Floam can be stretched, rolled, flattened, and pressed into shapes, which makes it a fun material for supervised sensory play.
I first got the idea for making it when I spotted a children’s learning set at Target that combined floam with letter and number activities.
I thought it looked like such a fun way to practice early learning skills, and I wanted to recreate something similar at home!
We had already experimented with several different kinds of slime, so adding foam beads seemed like the perfect next project.

Homemade Floam Ingredients
Here’s what we used for our original homemade floam recipe:
- 1/3 cup white school glue
- 2/3 cup warm water, divided
- 1 cup small polystyrene foam beads
- Up to 2 teaspoons borax powder, for preparing an activator solution (you will not necessarily use all of the solution)
- Food coloring, optional
You’ll also need two mixing bowls, measuring cups, a spoon, and a sealable container for storage.
Important safety note: This recipe uses borax, which can irritate skin and eyes and is harmful if swallowed. An adult should prepare and handle the borax solution. Floam is not edible, and the tiny foam beads can also be a choking hazard. Use only with children old enough not to put materials in their mouths, supervise closely, avoid contact with eyes and broken or irritated skin, and wash hands afterward. Stop using it if irritation develops.
For a food-based alternative, see my Edible Gummy Bear Floam recipe. Even edible sensory recipes still require supervision.
Watch How to Make Homemade Floam
You can see how we mixed the ingredients and created our colorful batches of floam.

How to Make Floam Step by Step
Step 1: Prepare the Slime Activator
Have an adult dissolve the borax powder in 1/3 cup warm water, stirring until dissolved.
Set the solution aside.
You won’t necessarily need the entire amount. The activator should be added gradually so you can control the texture.
Step 2: Mix the Glue and Water
In a separate bowl, combine the white school glue with the remaining 1/3 cup warm water.
Stir until smooth.
If you want to make a specific color of floam, add a small amount of food coloring to the glue mixture now.
Step 3: Add the Foam Beads
Pour the foam beads into the glue mixture and stir to distribute them.
The beads will give your finished floam its distinctive texture.
You can use one color of beads or combine several colors to make rainbow floam.
Step 4: Gradually Add the Activator
Slowly add a little of the prepared borax solution to the glue mixture while stirring.
Continue adding small amounts only as needed until the mixture begins to pull together into a cohesive slime.
Don’t pour in the entire activator solution at once. Too much activator can make the floam stiff, rubbery, or crumbly.
The exact amount needed can vary with the glue and other ingredients.

Step 5: Mix Until the Floam Comes Together
Continue mixing until the foam beads are incorporated and the slime holds together.
An adult can finish working the mixture until it reaches a manageable consistency.
Your finished floam should be soft and stretchy enough to shape without being excessively sticky.
If the mixture becomes firm or starts breaking apart, stop adding activator.
Now it’s ready for supervised sensory play!

Tips for Making the Best Homemade Floam
Here are a few things to keep in mind.
Add activator slowly. This is probably the most important part of making slime. Adding too much can change the texture dramatically.
Choose small foam beads. Tiny beads distribute more evenly throughout the slime and create the classic floam texture.
Try different bead colors. You can use colored foam beads or add food coloring to the glue mixture.
Protect your work surface. Food coloring may stain some materials, so use a washable surface or protective covering.
Make small batches first. If you’re experimenting with different glues or foam beads, start with one batch before making several colors.

How to Fix Common Floam Problems
Sometimes homemade slime takes a little experimenting!
Why Is My Floam Too Sticky?
It may need a little more activator.
Add a very small amount of your prepared solution and stir thoroughly before deciding whether more is needed.
Be careful not to overactivate the mixture.
Why Is My Floam Too Stiff?
Too much activator can make floam rubbery or difficult to stretch.
If this happens, stop adding activator. A small amount of additional glue may help, but severely overactivated slime isn’t always recoverable.
Why Are the Foam Beads Falling Out?
The slime may not be holding the beads together well, or you may have added more beads than the slime can contain.
Try incorporating fewer beads into a small amount of slime and see whether the texture improves.
Why Isn’t My Slime Forming?
Different glue formulations can react differently to activators.
Make sure you’re using a suitable PVA-based school glue and that the activator was prepared correctly.
Avoid adding large amounts of activator in an attempt to force the mixture to thicken.
Make Rainbow Floam!
One of my favorite parts of this project was experimenting with different colors.
We made five different kinds of floam:
- Blue
- Green
- Yellow
- Pink
- Rainbow
The rainbow floam was definitely my favorite!
Using colorful beads creates such a fun look, and kids can experiment with mixing colors and comparing the different batches.
You could also make seasonal floam using different color combinations.

Floam Learning Activities for Preschool and Kindergarten
After making our floam, I wanted to do more than just squish and stretch it. I gave my preschool-aged daughter some printable learning mats so she could use the floam to build letters and numbers. She loved it!
And the older kids had just as much fun playing with the floam. Everyone wanted a turn, including me!
Here are some ways to incorporate learning into your sensory play.
1. Build Alphabet Letters
Print alphabet tracing mats and encourage children to shape the floam into letters. They can roll it into long pieces, bend it into curves, and press it along the letter outlines.
Talk about the letter names and sounds as they build.
2. Practice Number Formation
Use number tracing mats to help children practice recognizing and forming numbers. Have children build the numbers with floam and then say each number aloud.
3. Count with Floam
Roll small pieces of floam into balls or shapes and use them for counting practice. For example, ask children to make five little balls or create three different shapes.
4. Explore Shapes
Challenge children to form circles, triangles, squares, and other shapes. Compare the shapes and talk about their sides, corners, and curves.
5. Create Patterns
Use different colors of floam to make repeating patterns. Try an AB pattern with two colors or an ABC pattern with three colors. These activities are especially useful for children who enjoy hands-on learning.
Free Printable Letter and Number Tracing Mats
Want to try some learning activities with your homemade floam?
I have a free set of letter and number tracing mats that you can use with floam or play dough!
Download the Free Letter and Number Tracing Mats
I recommend laminating the pages or placing them inside reusable page protectors before using them with floam. That way, you can reuse the mats with different sensory materials.
The Science Behind Floam
Why does glue turn into slime when an activator is added?
Many white school glues contain polyvinyl acetate (PVAc), which forms a water-based polymer mixture. When a borate-containing activator is added, it can create connections between polymer chains in the glue mixture. These connections change how the mixture moves and stretches, creating the stretchy, gel-like material we call slime.
The foam beads don’t cause this chemical change. Instead, they become trapped within the slime and give floam its bumpy texture.
This is a fun opportunity to talk about how adding different materials can change the properties of a mixture.

How to Store Homemade Floam
Keep your floam in a sealed container when it’s not being used. Store it out of reach of young children and pets.
Check it before each use, and discard it if it develops an unusual odor, visible mold, or a significant change in texture. Homemade floam doesn’t have a guaranteed shelf life, so don’t assume it will remain suitable for play for a particular number of days or weeks.
Avoid washing floam or loose foam beads down the drain. Dispose of them in the trash to help prevent plumbing problems and environmental litter.
Is Homemade Floam Safe for Kids?
Floam made with glue and borax is not edible and isn’t appropriate for children who may put it in their mouths.
Borax-containing slime mixtures may irritate skin or eyes, particularly with prolonged contact or sensitive skin.
Adults should handle the powdered borax and prepare the activator. Children should use the finished material only with appropriate supervision.
Contact lens solution is sometimes suggested as an alternative activator, but many slime recipes using it still rely on boric acid or borate compounds. It should not automatically be considered a borate-free or non-toxic substitute.
If you prefer a food-based sensory activity, try my Edible Gummy Bear Floam.
More Homemade Slime and Sensory Play Recipes
If you enjoyed learning how to make floam, you might also like these activities:
- Traditional Homemade Slime – Try a classic slime recipe.
- Edible Slime Recipes – Explore food-based sensory mixtures.
- Edible Gummy Bear Floam – Make a different version of floam with gummy bears and sprinkles.
- Rainbow Play Dough Color Mixing – Experiment with colorful homemade play dough.
- How to Make Cloud Dough – Try another fun sensory material.
- How to Make Oobleck – Explore a fascinating mixture with unusual properties.
Making homemade floam is such a fun way to combine sensory play, creativity, and learning.
I especially love that we were able to use it for letter and number activities after making it.
And that rainbow floam? Still my favorite!
Have fun experimenting with your own colorful batches!


