Architecture STEM Project: Build an Area and Perimeter City
This post may contain affiliate links.
Looking for a creative way to teach area and perimeter? This hands-on Area & Perimeter City STEM project combines math, engineering, architecture, map skills, geometry, and art into one engaging activity kids absolutely love.
Children design and build their own miniature paper city while exploring important math concepts in a meaningful, visual way. It is one of those rare projects that blends creativity and academics so naturally that kids hardly realize how much they are learning.
This activity is perfect for upper elementary or middle school students and works beautifully in homeschool settings, classrooms, STEM clubs, or enrichment programs.
I used to dream about becoming an architect when I was younger. I have always been fascinated by the way architects combine creativity with math, engineering, and problem-solving to design the spaces where we live, work, and gather.
Architecture is such an incredible STEM career because it naturally incorporates all aspects of science, technology, engineering, and math, while also bringing in art and design. In many ways, it is the perfect example of STEAM learning in real life.
When I found a giant roll of graph paper, I immediately started imagining all the possibilities. I knew it would be perfect for creating a large-scale city project, and eventually this Area & Perimeter City idea was born.
Supplies Used
For this project we used:
- large graph paper roll
- markers and colored pencils
- scissors
- tape or glue
- rulers
- toy cars (optional)
The oversized graph paper really helped make the city feel immersive and interactive.
Building the Area & Perimeter City
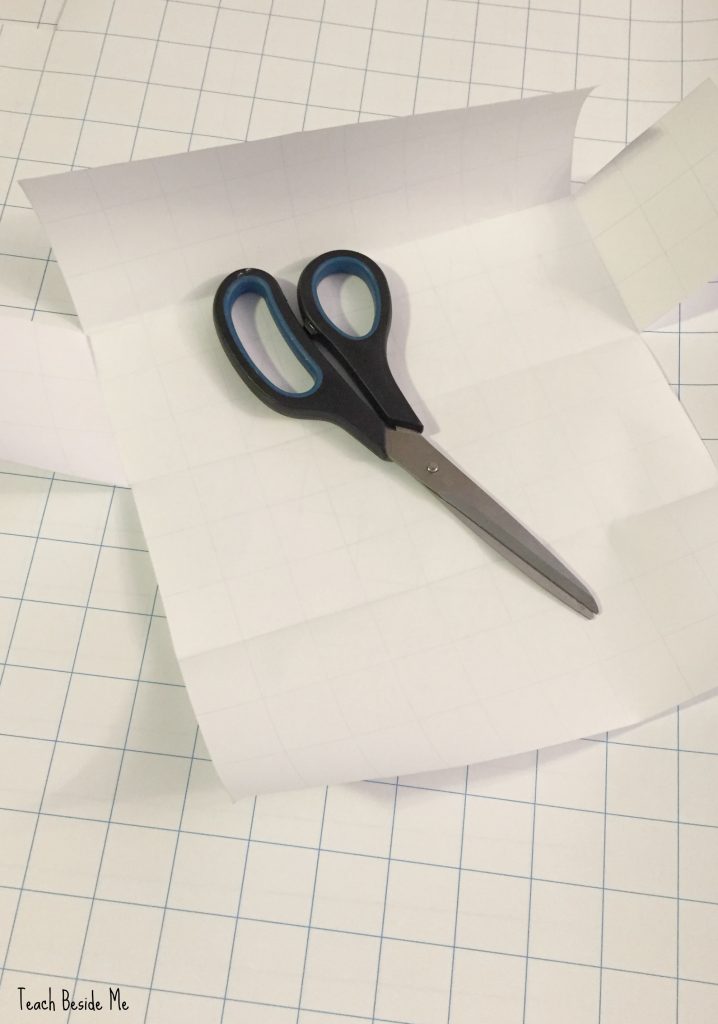
We began by using the graph paper to create three-dimensional geometric shapes that would become our buildings.
Using the grid lines made it much easier for kids to measure dimensions, count squares, and understand how shapes fit together. We created cubes, rectangular prisms (cuboids), pyramids, and combinations of shapes to make more detailed buildings. Learn how to make many of the 3-D paper shapes here.
One of our favorite designs was combining a cube with a pyramid roof to create a little house shape.
You can keep the structures very simple for younger students or challenge older kids to design more complex buildings with multiple connected forms.
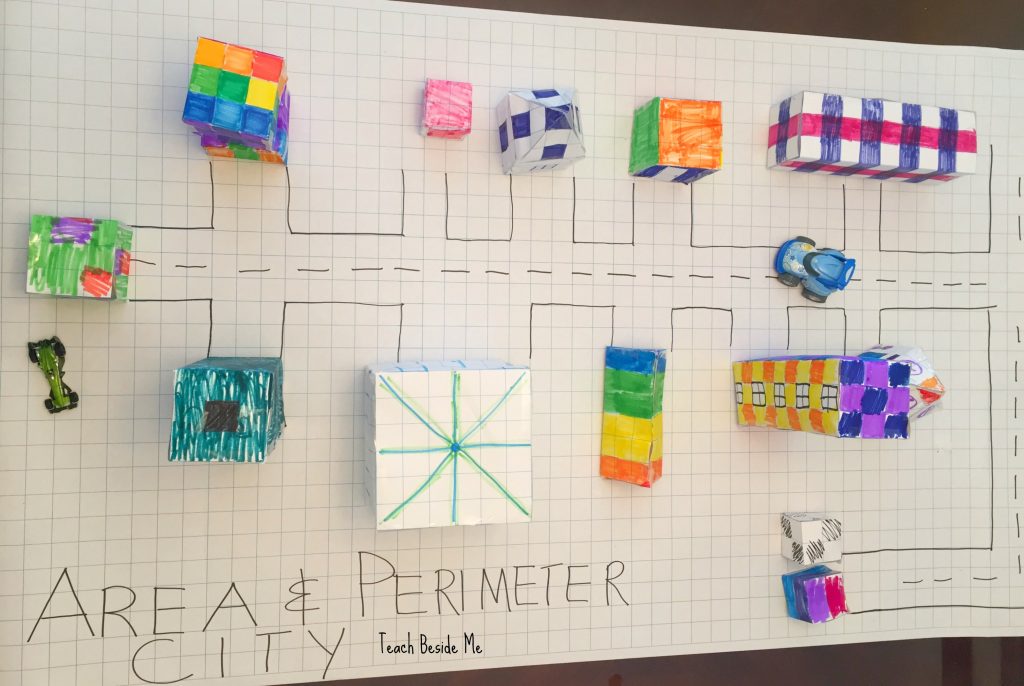
After cutting out the shapes, we colored and decorated each building to give our city personality. Some became skyscrapers, some became houses, and others turned into stores or office buildings.
Once decorated, we folded and taped the shapes together to create sturdy 3D structures.
This part of the project felt like a combination of engineering, architecture, and art all at once.

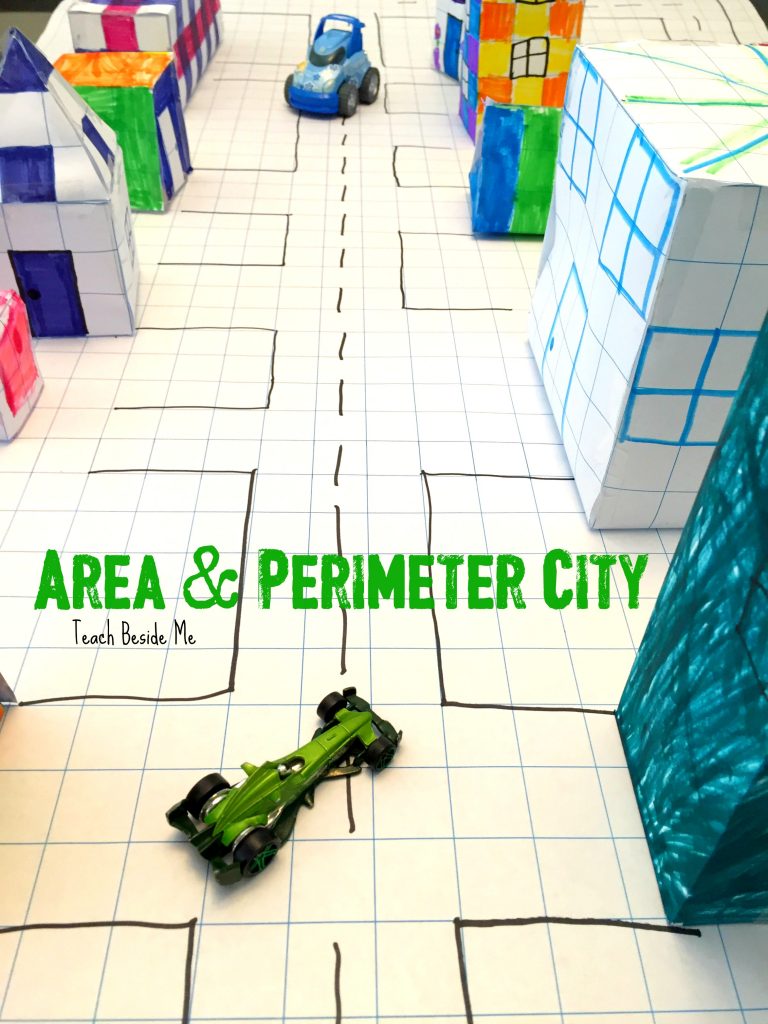
Creating the City Map
After the buildings were assembled, we arranged them across the large graph paper and began designing the city layout.
The kids added roads, intersections, parking areas, and city blocks. Of course, toy cars quickly became part of the project too.
This stage naturally introduced conversations about city planning, spacing, design, transportation, and how real cities are organized.
Because the entire city was built on graph paper, students could easily measure distances and calculate dimensions throughout the activity.
Teaching Area and Perimeter Through the Project
Once the city is complete, the real math exploration begins.
Students can calculate the area and perimeter of individual buildings, parking lots, parks, or city blocks. Since the structures are built directly on a measured grid, children can physically count and measure as they work.
This makes abstract math concepts much more concrete and understandable.
For older students, you can even extend the activity into volume by measuring the dimensions of the 3D buildings and calculating cubic units.
Instead of solving disconnected worksheet problems, students are applying math to something they designed themselves.
That kind of learning tends to stick.
![]()
Why Hands-On Math Matters
Projects like this help children see math as something useful and creative rather than just numbers on a page.
By combining geometry, engineering, architecture, mapping, and design, kids begin to understand how math connects to the real world.
Hands-on STEM projects also encourage:
- critical thinking
- spatial reasoning
- problem-solving
- creativity
- collaboration
- perseverance
Most importantly, they make learning memorable and fun.

Ways to Extend This Project
There are so many directions you could take this activity depending on the ages of your students.
You could:
- label streets and create a city map key
- add parks, rivers, or bridges
- calculate population density
- design zoning areas
- measure scale and distance
- add coordinate graphing
- create a transportation system
- compare city layouts from around the world
You could even turn it into a multi-day project across math, engineering, geography, and art lessons.
Check out the A to Z Guide to Understanding STEM from Little Bins for Little Hands. This massive guide has ideas for teaching STEM for EVERY letter of the alphabet!
Also, check out my STEAM Kids book for even more ideas.
Also check out my book: Math Art & Drawing Games for Kids!
More STEM & Math Projects Kids Will Love
If your kids enjoyed this activity, you may also like:


What a fantastic way to bring geography to life!
A wonder project. Inspired by your idea, I used this with a middle school pandemic learning pod math class. I let the students pick task cards such as, “Create a 5-story building with a perimeter of 24 units”, “Create a building with a volume of 128 cubic units” or “Create a building with a 48 square unit footprint”. I had a couple of harder (I thought) task cards, such as “Create a regular octagonal museum with 32 unit perimeter”, but the kids figured these out in a snap. What I hadn’t anticipated with these task cards was all the factoring practice the kids had to do to figure out the various possible designs from which to pick. It was handy to have a long, straight-sided box on hand to help them figure out the orientation of their buildings: Where will the front entrance be? Do you want it to be tall or squat? The box can be rotated to help show them the possibilities.
Thank you for sharing this creative idea.