How to Make Paper 3d Shapes
This post may contain affiliate links.
Learning about 3D geometric shapes doesn’t have to be boring! This hands-on 3d paper shapes folding craft is a fun way for kids to explore geometry while practicing math vocabulary like faces, edges, and vertices. With just paper, scissors, and tape, kids can cut, fold, and build their own cubes, pyramids, cones, prisms, and more.
This activity works well for math lessons, homeschool projects, or creative STEM play, and I’ve included free step-by-step instructions below. You can also grab my printable 3D paper shape templates for an easier option—they’re available in my shop.
My kids thought these were really cool. They played around with them for a while. Then they tried making lots of other kinds of shapes out of paper. They were pretty fascinated by it all.

Materials Needed
-
Paper (cardstock works best for sturdier models)
-
Scissors
-
Pencil and ruler
-
Tape or glue
-
Optional: Printable 3D shape templates (available in my shop)
Use my templates if you want a simpler way to make them!

![]()
Ways to Use Your 3D Paper Shapes in Learning
Once you’ve built your 3D paper shapes, the fun doesn’t have to stop there! These simple models can become powerful teaching tools. Here are a few engaging ways to use them with kids:
-
Geometry Challenge
Have kids count the faces, edges, and vertices of each shape. Record the results in a chart to compare different solids. -
Shape Sorting
Line up the shapes from the fewest faces to the most faces, or group them by type (prisms vs. pyramids). -
Build and Compare
Try stacking the shapes to see which ones are the most stable. Talk about why cubes and rectangular prisms are easier to build with than pyramids or cones. -
Explore Volume
Fill the shapes with small objects like beans or rice, then pour them out into measuring cups to compare volumes. -
Creative Art Projects
Decorate the shapes with markers, stickers, or paint. Turn them into ornaments, dice for games, or even characters in a story. -
STEM Extension
Rebuild the same shapes as “skeleton models” using toothpicks and marshmallows or clay. Compare the paper and skeleton versions to see how structure changes strength.
These activities extend a simple craft into meaningful hands-on learning—perfect for math lessons, STEM explorations, or creative play.
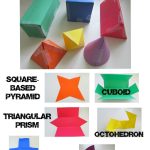
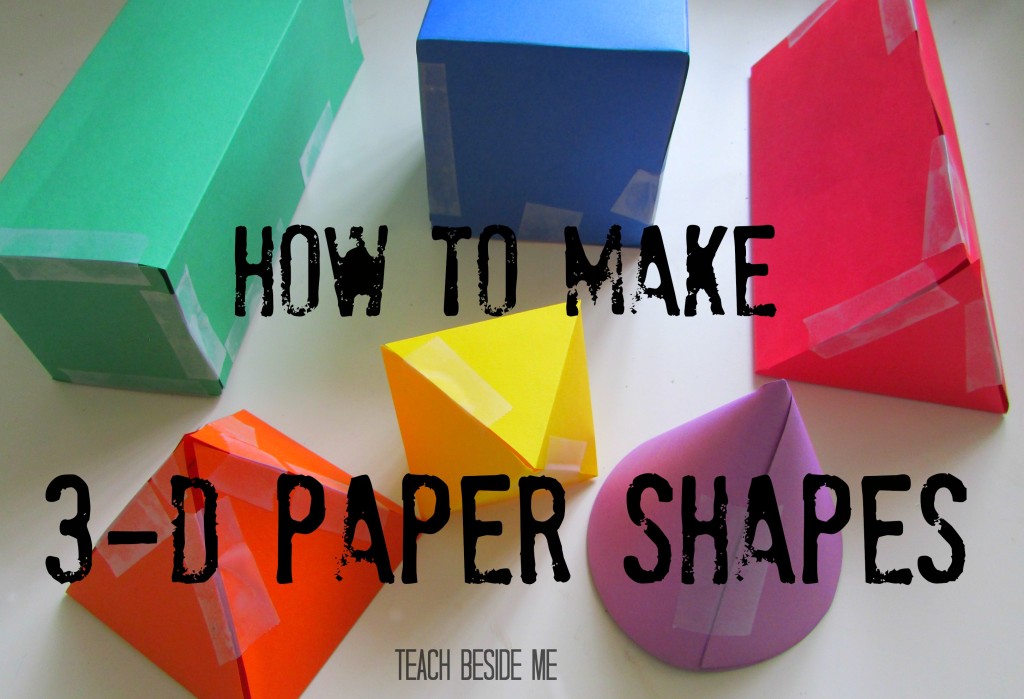
How to Make 3D Paper Shapes
Here are six common 3D shapes you can build with paper:
-
Cube
-
Cuboid (rectangular prism)
-
Cone
-
Square-Based Pyramid
-
Triangular Prism (tent shape)
-
Octahedron (diamond-like shape)
Each one can be created by drawing and folding a net (the flat pattern of a 3D shape). I used standard 8.5 x 11 paper for these.
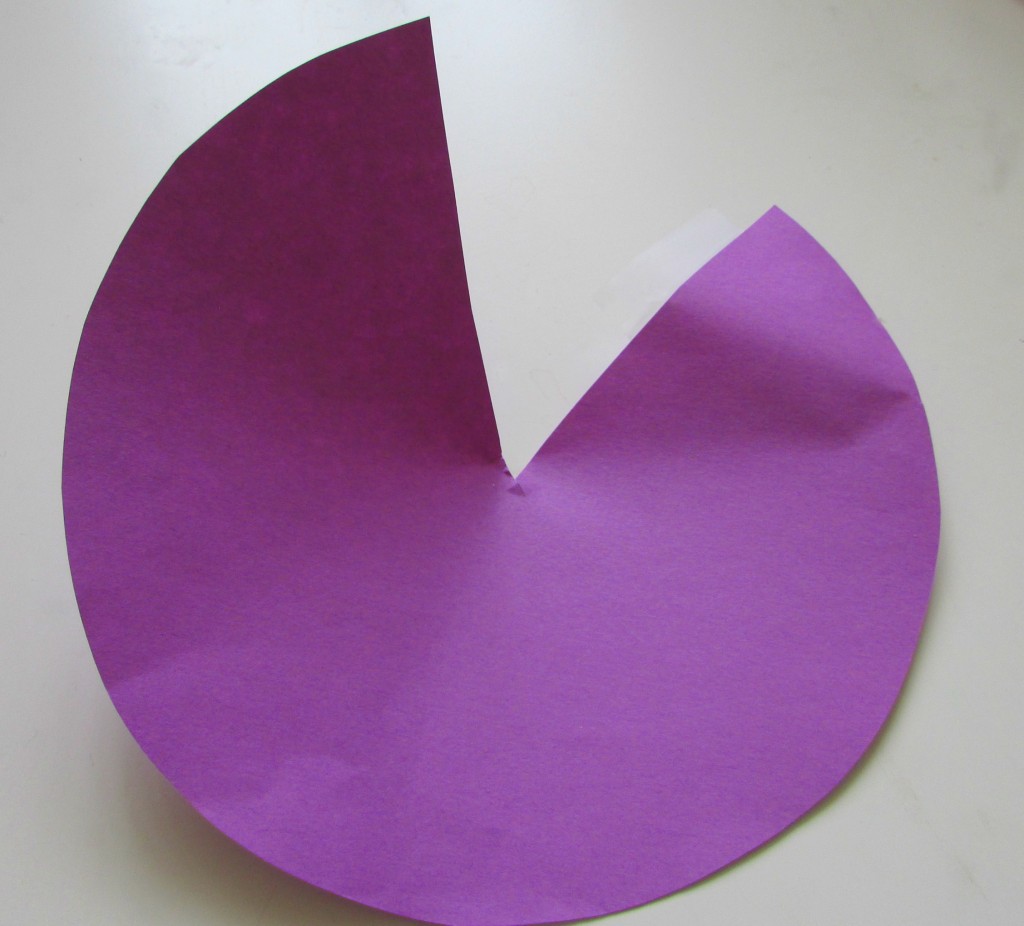
How to Make a 3D Cone:
Trace a large circle, then cut out a wedge. Wrap it into a cone shape and tape the edges to secure.
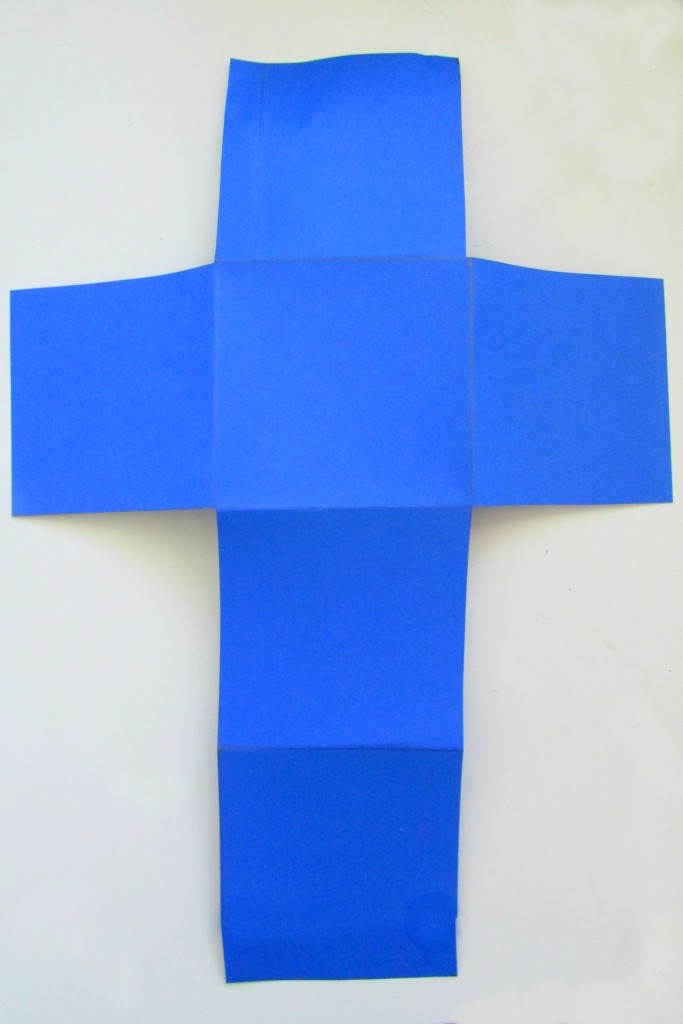
How to Make a 3D Cube:
Draw a cross-shaped net with equal squares (mine were 2.5 inches per side). Cut, fold, and tape into a cube.

How to Make a 3D Triangular Prism:
Divide the paper into thirds. In the center, draw triangles for the ends, making sure each side is equal (mine were 2.75 inches per side). Cut, fold, and tape into shape.
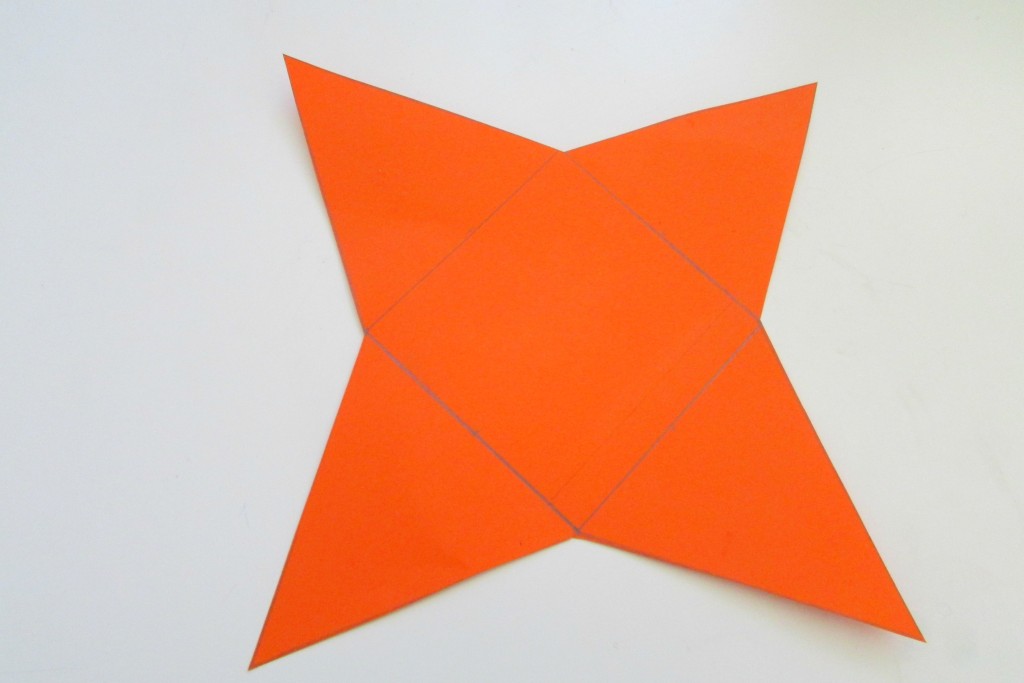
How to Make a 3D Square-Based Pyramid
Draw a square base, then attach four equal triangles (3 inches per side) to each edge. Fold and tape into a pyramid.
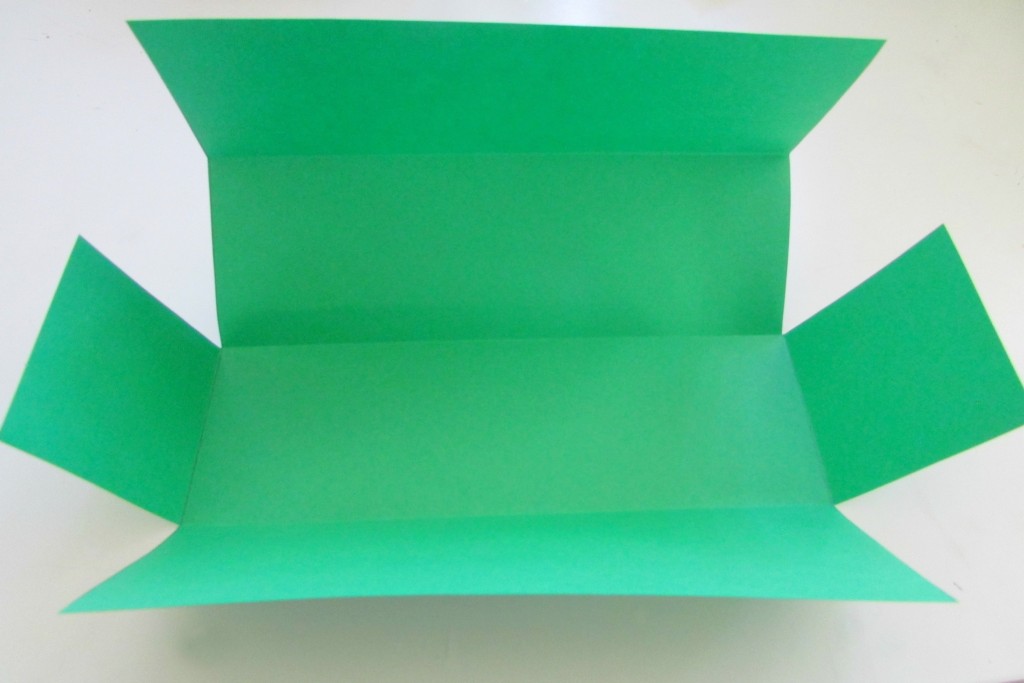
How to Make a 3D Cuboid (Rectangular Prism)
Divide the paper into fourths, then add flaps where needed to glue the sides together. Fold and tape into shape.

How to Make a 3D Octahedron
This one is trickier! Draw a strip of six connected equilateral triangles with two more triangles attached at the ends. (Each side was 2 inches in my version.) Fold carefully and tape into an octahedron.
Creative Extensions
-
Hang your finished shapes as a mobile decoration.
-
Build a 3D shape display on a shelf or bulletin board.
-
Use them to play math games like “Guess the Shape” or a geometry scavenger hunt.
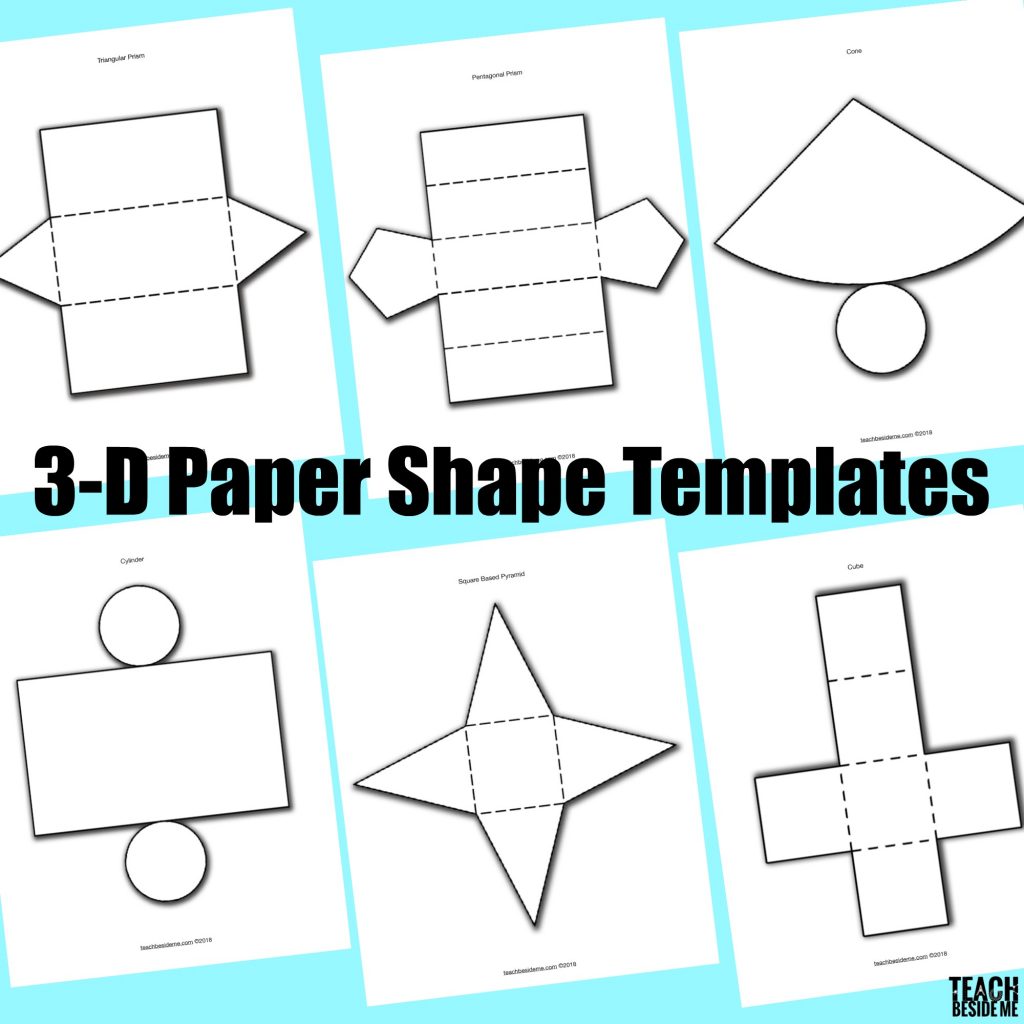
Printable 3D Shape Templates
Want a simpler way? I’ve created ready-to-use printable templates with additional 3D shapes included. These are available in my shop so you can print, cut, and build without measuring.
The 3d shapes set pictured below is available in my shop.
![]()
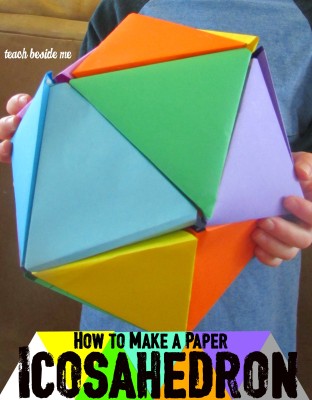
Related Geometry Crafts
If you loved this project, check out these other fun 3D paper creations:


I love this idea. My six year old is learning about shapes and would love this activity. Thanks for taking the time to show each step. Arts and crafts are not my natural gifting. 🙂
Interesting ! Shall introduce it to my kid soon 🙂
Wow!!!!!!!!
I was searching for a way to make 3D shapes and I didn’t find better than this shapes
So glad you found me & that I could help!
hi, Thanks so much for this….. remembered doing it when i was a child but couldn’t exactly remember how to put them together. My six year old needed this for school. Thanks again.
Thanks, Quite useful for my kids.
this is amazing
Thanks , my little sister ♀️love activity