Life Skills: How to Sew a Button for Beginners
This post may contain affiliate links.
It’s Saturday — the perfect day to slow down, learn something new, and build a skill that lasts a lifetime. Today’s hands-on activity is a practical one: how to sew on a button step by step. Whether you’re a mom teaching a child, or learning for yourself, this is a basic sewing skill everyone should know.
This family-friendly (or classroom-friendly) tutorial walks you through exactly how to sew a button with a needle and thread — no sewing machine needed.

Why Learn How to Sew a Button?
Learning how to sew on a button is a small but powerful skill. Whether it’s fixing a loose button on your favorite shirt or saving money by repairing instead of replacing, this practical sewing skill builds:
-
Confidence in fixing things yourself
-
Fine motor skills for kids and teens
-
An important life skill for responsibility and independence
-
A great foundation for beginner sewing
Hand sewing is a great life skill to teach kids at home or in homeschool settings — plus, it’s easy to learn in under 30 minutes!
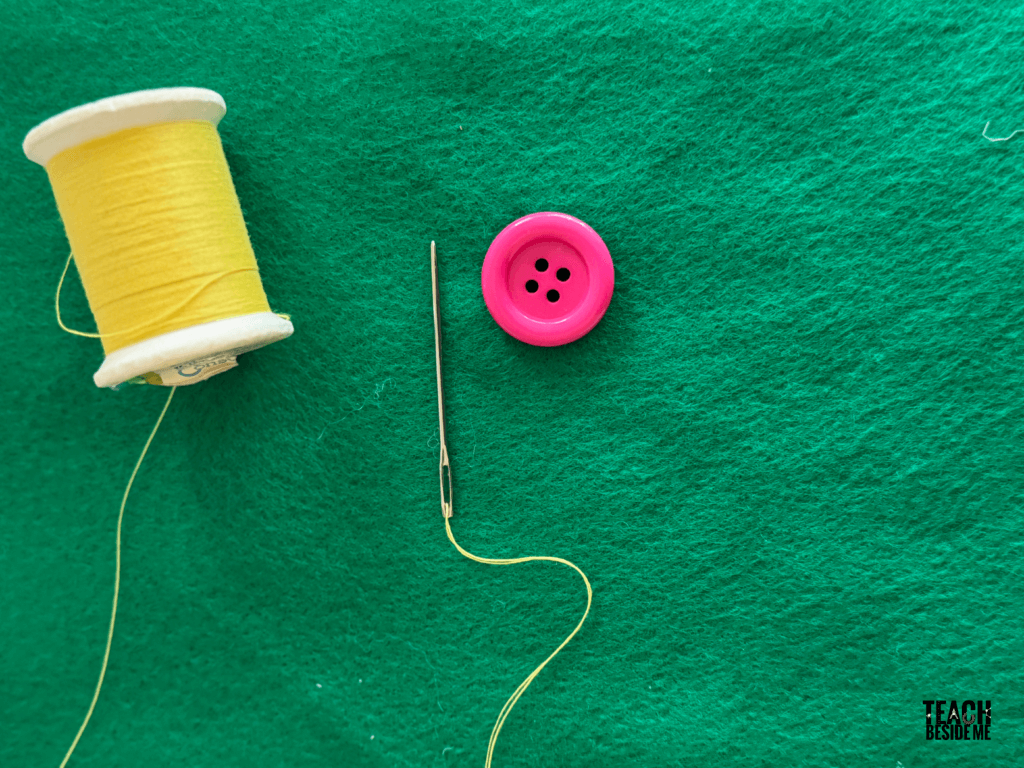
What You’ll Need:
-
A needle
-
Thread (any color for practice)
-
A button (start with a large one)
-
Scrap fabric or old clothes
-
(Optional: A thimble)

How to Sew a Button – Step-by-Step Instructions
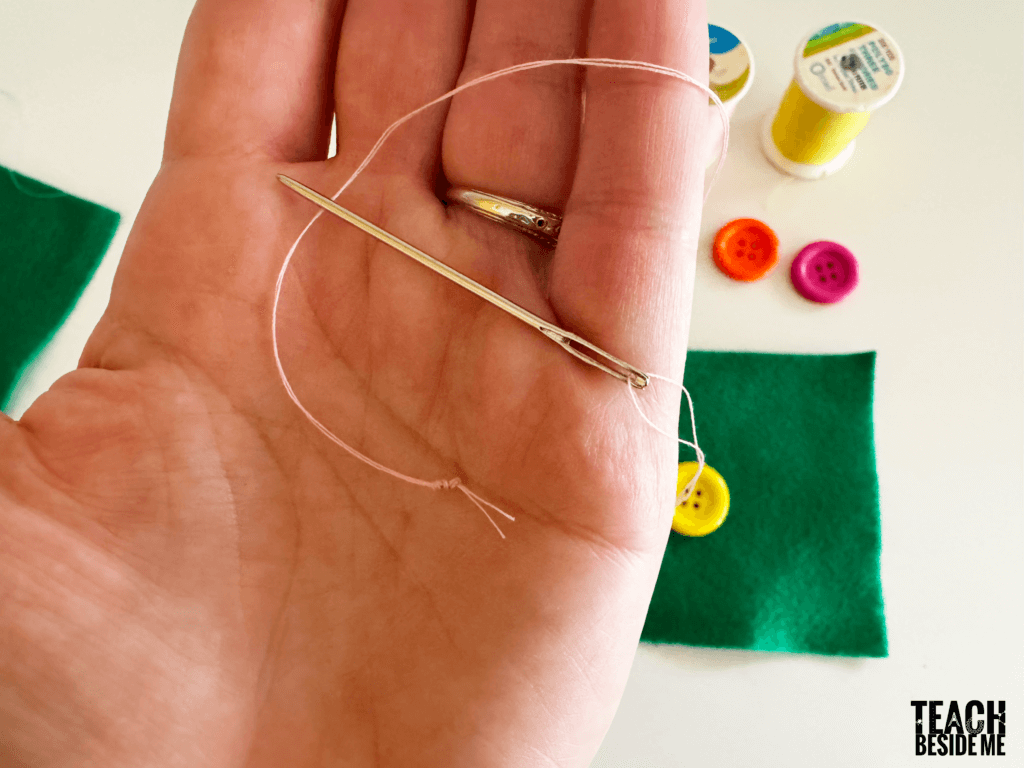
1. Thread the needle
Cut about 18 inches of thread. Thread your needle and tie a knot at the end of the thread. I usually make a small knot by rolling the thread between my thumb and fingertip.
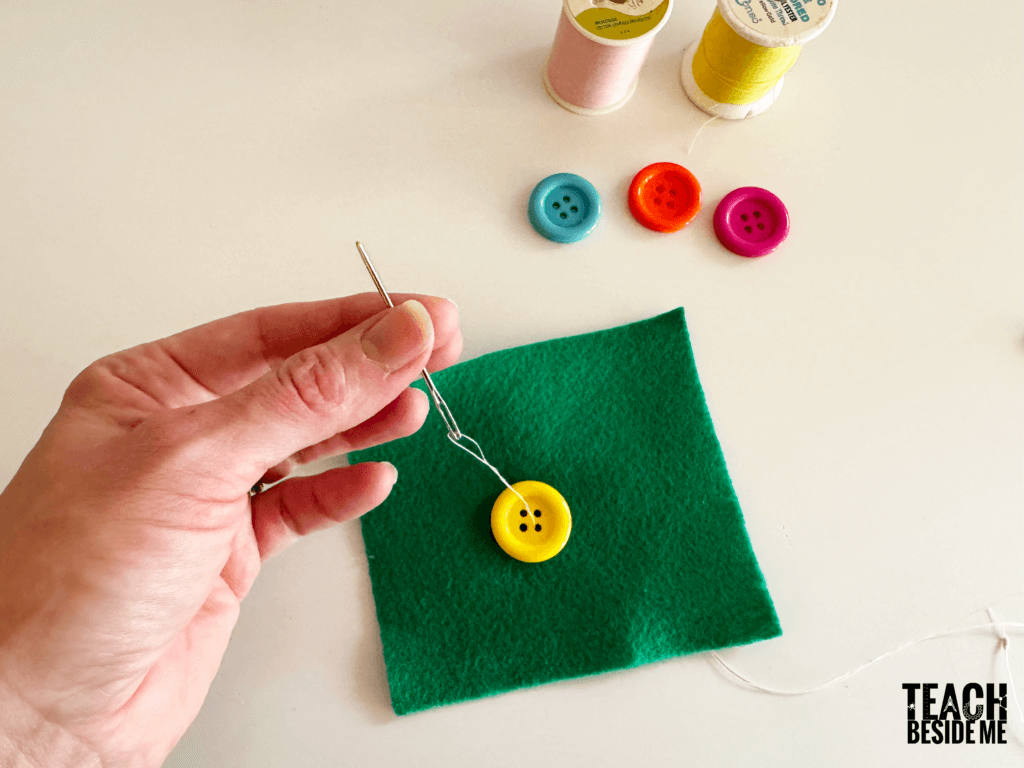
2. Place your button
Line up the button where it needs to go. Hold it in place with your fingers.
3. Stitch through the holes
Push the needle from the back side of the fabric up through one buttonhole. Then down through the opposite hole. Repeat this step 3–5 times to make it secure.
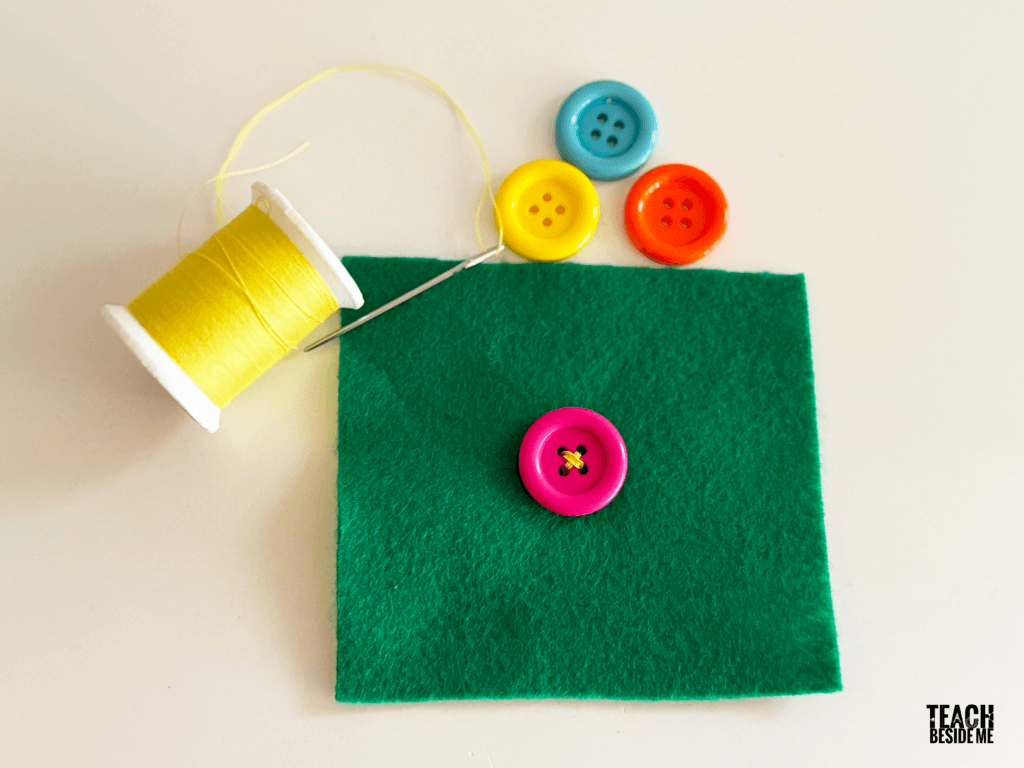
4. Make a shank (anchor)
Wrap the thread around the stitches underneath the button a few times. This creates space so the button can move and won’t pull too tight.
5. Knot and finish
Push the needle to the back, make a tight knot close to the fabric, and snip off the extra thread.

Watch it in Action:
Skill Builder Tip Box
Family-Friendly Adjustments:
-
Let younger kids practice on felt or burlap — easier to hold and sew through
-
Use a larger dull needle with embroidery floss for little hands
-
Turn it into a mini sewing kit activity!
Bonus Tip: Once you’ve sewn a flat button, try practicing with a four-hole button or a shank-style button for a fun challenge.
Common Button-Sewing Mistakes (And How to Avoid Them)
-
Using thread that’s too short: You’ll run out mid-way. Use at least 18 inches.
-
Skipping the shank: Your button will pull too tight and be hard to fasten.
-
Not tying the final knot securely: The button may fall off again after one wear.
-
Forgetting to match thread color: For visible buttons on nice clothes, match thread to the garment color for a clean finish.
Teach Kids to Sew a Button in the Classroom
Sewing a button isn’t just a practical life skill — it’s also a fantastic fine motor and cognitive development activity that works beautifully in classroom settings. Whether you’re teaching in a homeschool co-op, life skills class, or after-school club, this simple sewing task offers big benefits.
Skills This Activity Builds:
-
Fine Motor Coordination: Handling a needle and thread strengthens finger muscles, hand-eye coordination, and precision.
-
Bilateral Integration: Using both hands together in a coordinated way (one holding the button, the other stitching) helps with overall motor planning and development.
-
Visual-Motor Integration: Kids practice translating what they see into fine, controlled hand movements — critical for writing and other academic tasks.
-
Focus & Patience: Sewing takes time, attention to detail, and persistence — great for building concentration and frustration tolerance.
-
Confidence & Independence: Completing a tangible task like fixing a button builds self-esteem and shows kids that they can solve real-life problems.
Why It Works in a Group Setting:
-
Inexpensive and low-prep
-
Easy to adapt for different ages and skill levels
-
Can be completed in 30–45 minutes
-
Encourages teamwork, peer teaching, and pride in accomplishment
Classroom Tips:
-
Use felt, burlap, or cardstock with pre-punched holes for beginners
-
Pre-thread needles for younger students
-
Set up rotating skill stations or small-group instruction
Bonus Ideas:
-
Connect this activity to a unit on textiles, home economics, or historical clothing
-
Add it to a life skills or “adulting” series for older students
-
Incorporate storytelling: Read Joseph Had a Little Overcoat) for younger learners
Take It Further:
-
Sew a button onto a real item of clothing
-
Practice using different button types
-
Build your own sewing kit
Teaching kids how to sew on a button is about more than saving a shirt — it’s about building confidence, life skills, and memories. Whether you’re prepping your kids for the future or learning something new together, this simple weekend activity is a true win.
I am planning to do a whole series of life skills lessons that you can do with your family or classes! Stay tuned for more of them.
Find my video on YouTube, too!
Learn More Life Skills:
How Many Quarts in a Gallon? Gallon Man
How Many Centimeters In an Inch?
Life Skills: How to Write a Resume -Even if You’ve Never Had a Job
Kids Cooking Lesson: German Pancakes
Kitchen Skills for Kids: Age-by-Age Checklist and Easy Recipes
Oh, the Skills You’ll Need Before You Leave: Life Skills for Teens