Watercolor Alcohol Art: A Fun Science Art Project for Kids
This post may contain affiliate links.
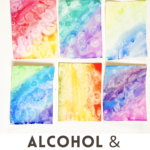
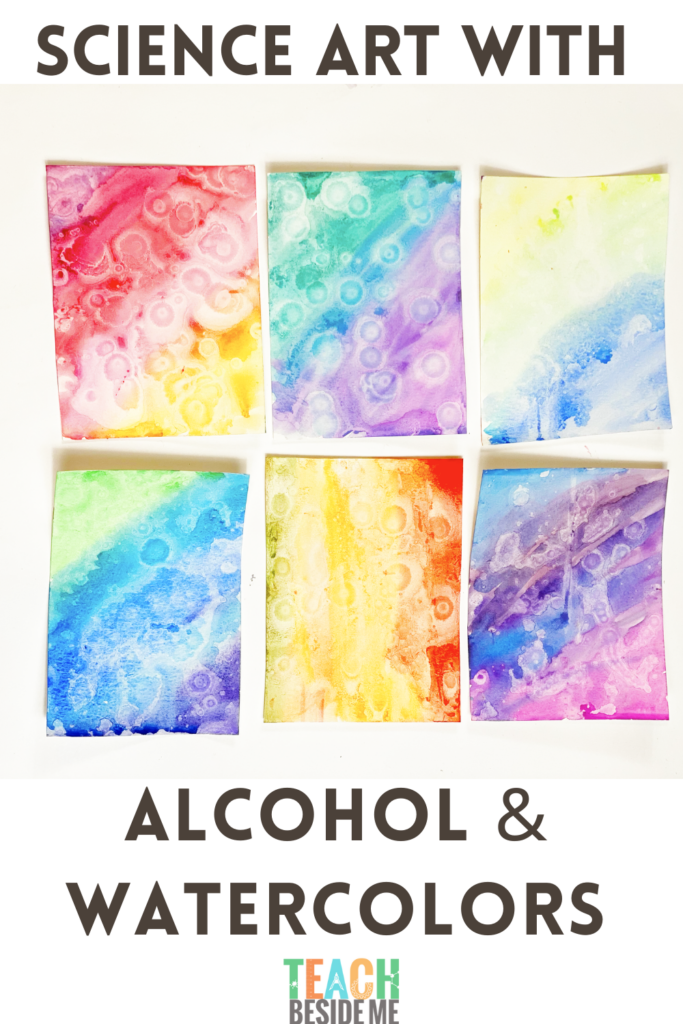
Have you ever dropped rubbing alcohol onto wet watercolor paint and watched it magically spread apart? This watercolor alcohol art project combines science and art to create beautiful textures, patterns, and designs while teaching kids about chemistry and how different liquids interact.
This simple science art activity is one of my favorite ways to combine creativity with hands-on learning. Kids love watching the paint move and change before their eyes, and every finished painting turns out completely unique.
Whether you’re teaching an art lesson, a science unit, or simply looking for a fun creative project, alcohol and watercolor painting is always a hit.
If your kids love creative projects that combine science and art, this activity is just one example of the hands-on ideas featured in my book, Science Art and Drawing Games for Kids. The book is filled with dozens of projects that help children explore STEM concepts through drawing, painting, engineering, and creative experimentation.
What Happens When You Add Alcohol to Watercolor Paint?
The magic happens because rubbing alcohol and water behave differently.
Watercolor paints contain pigments suspended in water along with binding agents that help the color stick to the paper. When rubbing alcohol is added to wet watercolor paint, it pushes the water and pigments away.
This creates:
- light spots
- circular patterns
- interesting textures
- tie-dye effects
- starburst shapes
The alcohol repels the wet paint, causing the pigments to separate and move across the paper.
This makes the activity both an art project and a simple chemistry experiment.

Supplies for Watercolor Alcohol Art
- Watercolor paper
- Watercolor paints
- Paint brushes
- Eye dropper or pipette
- Rubbing alcohol
- Small cup or bowl
- Clean water
Optional:
- Cotton swabs
- Spray bottle
- Salt
- Stamps
- Paper towels
How to Make Watercolor Alcohol Art
Step 1: Paint Your Design
Use watercolor paints and a brush to cover your paper with color.
The paint should be fairly wet and vibrant for the best results. Try:
- rainbow washes
- abstract designs
- flowers
- sunsets
- galaxy paintings
- geometric patterns

Step 2: Add the Alcohol
Pour a small amount of rubbing alcohol into a cup.
Use an eyedropper, pipette, paintbrush, or cotton swab to place small drops of alcohol onto the wet paint.
Watch carefully as the paint begins to separate and spread.

Step 3: Observe the Reaction
As the alcohol touches the watercolor paint, lighter spots and textured patterns will begin to appear.
Every drop creates a slightly different effect.
This is a great opportunity to talk about observation skills and scientific thinking.

Step 4: Let It Dry
Allow the artwork to dry completely before displaying it.
Once dry, you’ll be able to see all of the unique textures created by the alcohol.

Watercolor Alcohol Art Variations
One of the best things about this project is how many ways you can experiment.
Try using:
Cotton Swabs
Create controlled dots and patterns.
Spray Bottles
Mist rubbing alcohol over larger painted areas for dramatic effects.
Stencils
Paint around stencils and then add alcohol for interesting designs.
Salt and Watercolor
Sprinkle salt onto wet paint before it dries to create additional texture.
Different Colors
Test how alcohol affects various watercolor colors and combinations.
Turn This Into a Science Experiment
Want to add more STEM learning?
Ask kids:
- What happens if you use more alcohol?
- What happens if the paint is already dry?
- Do some colors react differently than others?
- Does a paintbrush create a different effect than an eyedropper?
- What happens if you use a spray bottle instead?
Record observations and compare results.
This transforms a simple art project into a true science investigation.
What Kids Learn
This watercolor alcohol art activity teaches:
Science
- chemistry
- liquids and solutions
- observation skills
- experimentation
Art
- color blending
- texture
- composition
- creative expression
STEM Skills
- making predictions
- recording observations
- testing variables
- analyzing results
Safety Tips
Because rubbing alcohol is flammable, adult supervision is recommended.
- Use in a well-ventilated area.
- Avoid open flames.
- Wash hands after completing the project.
- Keep rubbing alcohol away from younger children unless supervised.
Why We Love Science Art
Science art projects are some of my favorite activities because they naturally combine creativity and curiosity.
Kids get excited about the beautiful artwork they create while secretly learning science concepts at the same time.
The process encourages experimentation, problem-solving, and observation—all important STEM skills.
Love Science Art Projects?
This watercolor alcohol art activity is just one of many creative projects from my book, Science Art and Drawing Games for Kids.
If you’re looking for ways to make science more engaging, artistic, and hands-on, you’ll find dozens of unique activities that blend STEM learning with creativity. From engineering-inspired drawing challenges to chemistry-based art projects, every activity is designed to help kids explore science through making, building, painting, and creating.
It’s perfect for homeschool families, teachers, STEM clubs, summer camps, and any child who loves both science and art.
Grab a copy and discover even more ways to turn science into a creative adventure!

More Science Art Projects
If you enjoyed this watercolor alcohol art project, be sure to try:
- Conductive Paint Circuits
- Animal Magnet Face Drawings
- Homemade Paintball Bombs
- Homemade Pantograph Drawing Machine
- Grow the Earth Seed Paper
These projects are part of my Science Art series and are designed to help kids explore both science and creativity together.