Science Art: Conductive Paint Circuits
This post may contain affiliate links.

Learn how to make your own homemade conductive paint to light up your art projects!
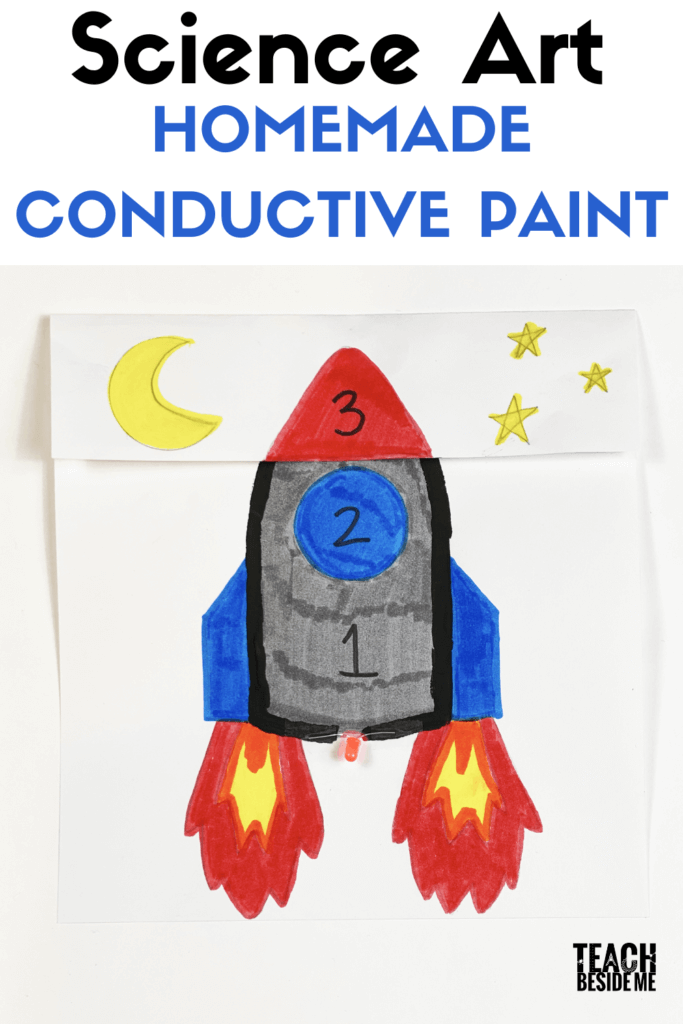
This science art project brings together the design of the rocket, or whatever design you choose, plus the science of electricity and conductivity. It is a wonderful STEM project for kids.
Order my latest book : Science Art and Drawing Games for Kids to get even more Science Art projects!

Science Art: Homemade Conductive Paint
Can you imagine making paint that can conduct electricity? In this project we drew a rocket, but you can use your imagination to make your own creation, too!
This homemade conductive paint is made using graphite powder. Graphite is a form of the element carbon and under a lot of pressure it will turn into a diamond. Pencil lead is also made of graphite.
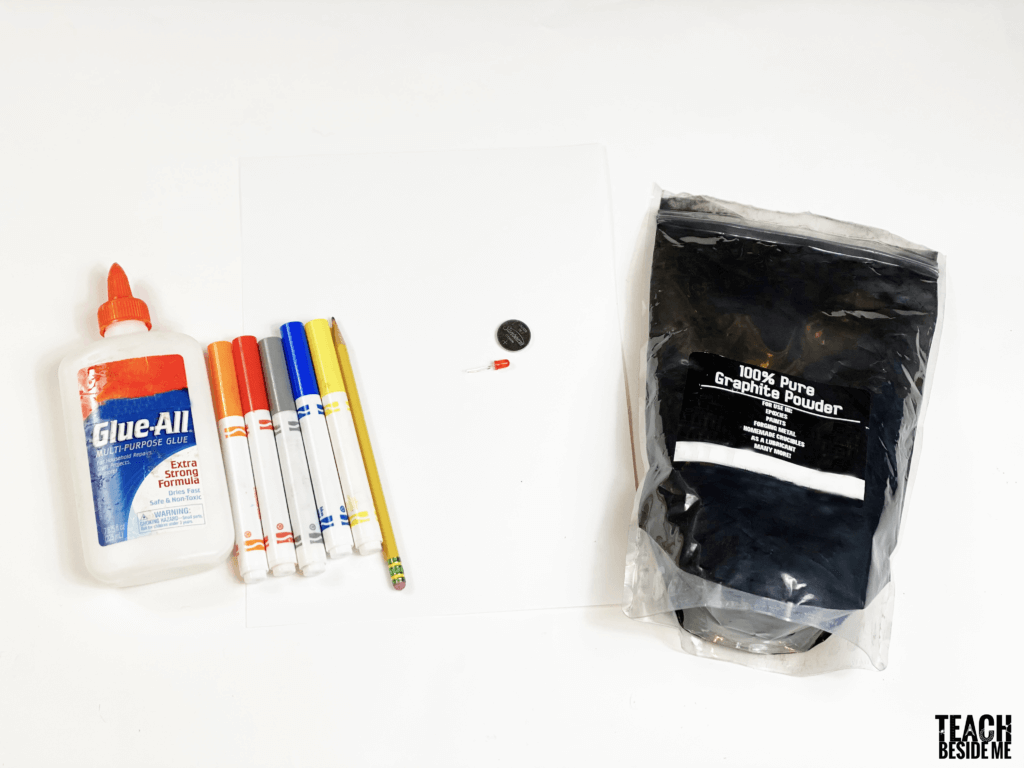
Supplies for Homemade Conductive Paint
How to Make Conductive Paint

Make the paint by mixing a small amount of school glue with a few spoons full of graphite powder. You want it to make a thick paint consistency, but it needs to be more graphite than glue to work. Keep the paint covered when not in use so it does not dry out. It will keep for several days.

How to Make Your Circuit
Draw a rocket, or other picture of your liking on a piece of paper. Leave room at the top to fold over about 2 inches at the top of the paper. A smaller image will allow the light to work better than a large one.
At the bottom end of your rocket drawing, leave an opening where your light will go. Make sure you do not connect the lines, especially if drawing with pencil.

At the top of the drawing, under the fold, extend the two lines up to make a spot for the battery. When you fold the top of the page down, you want the top circle to touch the bottom one, but make sure the lines are not connected.

Color and decorate your picture with markers or colored pencils.

Paint the outside edge of the rocket with your graphite paint. Again, make sure to leave an open space at the bottom of the rocket, and follow the lines pictured at the top. to make the spot for the battery. Let the paint dry completely.

Test it out. Attach the light at the bottom by spreading out the pin wires. The longer pin is positive and the shorter pin is negative. Match those up with your coin cell battery. Attach both with a small piece of tape. Do not cover the battery with tape, just a small piece on the sides.

The graphite paint will create a circuit lighting up your pin light when you press down on the folded top of your drawing.
See More Circuit and Electricity Experiments!
Building Electric Circuits: STEM Challenge Cards
Light-Up Alligator Circuits STEAM Project
Halloween STEM~ Paper Circuits
Origami Firefly Paper Circuits


Can I use sandpapered pencil lead as alternative for the graphite powder for this STEM project?
I think that would work, it just would take a lot of pencils to get enough!