Dirt Battery Experiment
This post may contain affiliate links.
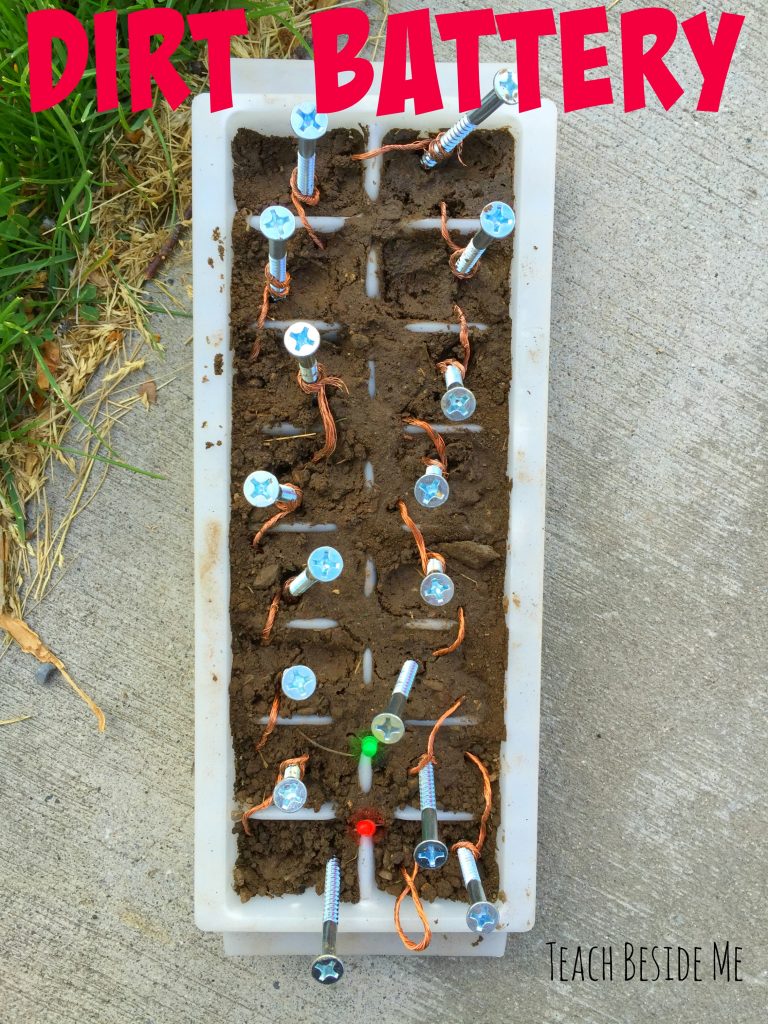
Did you know you can make a battery out of dirt? We tried making a dirt battery this week to light up a little LED light. It’s pretty amazing!
How to Make a Dirt Battery:
Supplies-
Ice cube tray
Galvanized Steel Screws
Copper Wire
Dirt
LED Pin Lights
The important thing is that your screws are made of galvanized steel. It has nickel in it and that is what helps it to conduct. You should be able to find them at any hardware store. You will need one for each cell of the ice cube tray. We used 16.
Fill your ice cube tray with moist dirt. If it is dry, add a little liquid to each cell of the tray to moisten it. You could make it even more conductive by adding lemon juice or vinegar to the soil.
For my copper wire, I stripped an old extension cord of the plastic and used the wire from the inside. If you have a wire stripping tool, this is easy, if not, it will take forever!
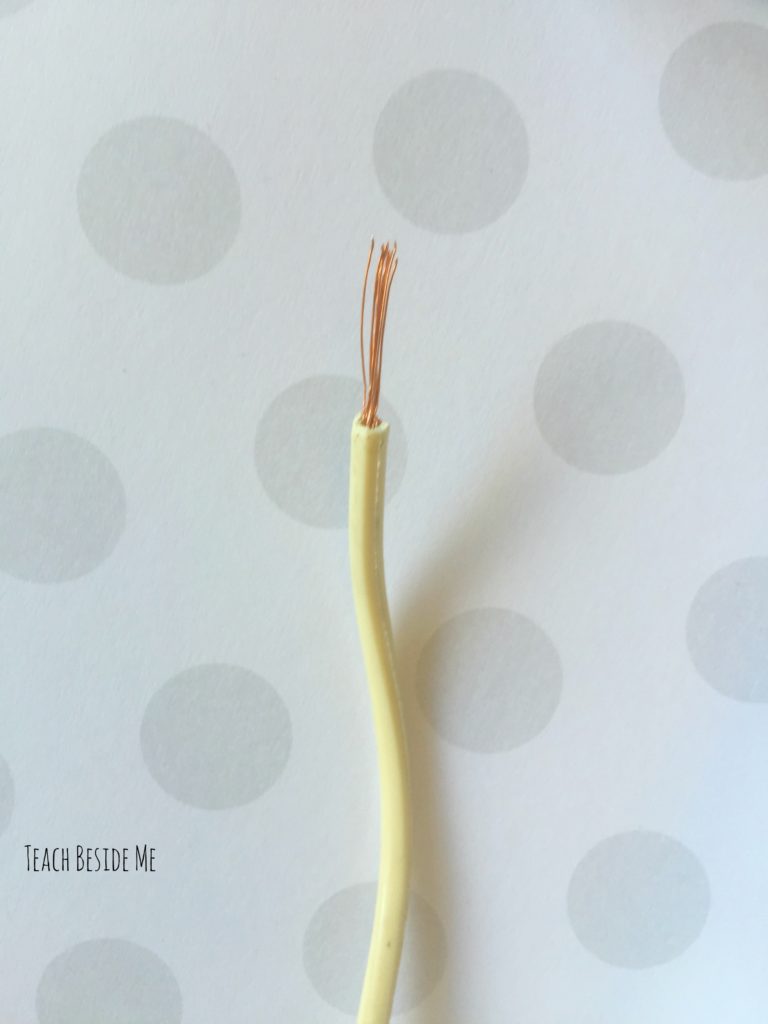
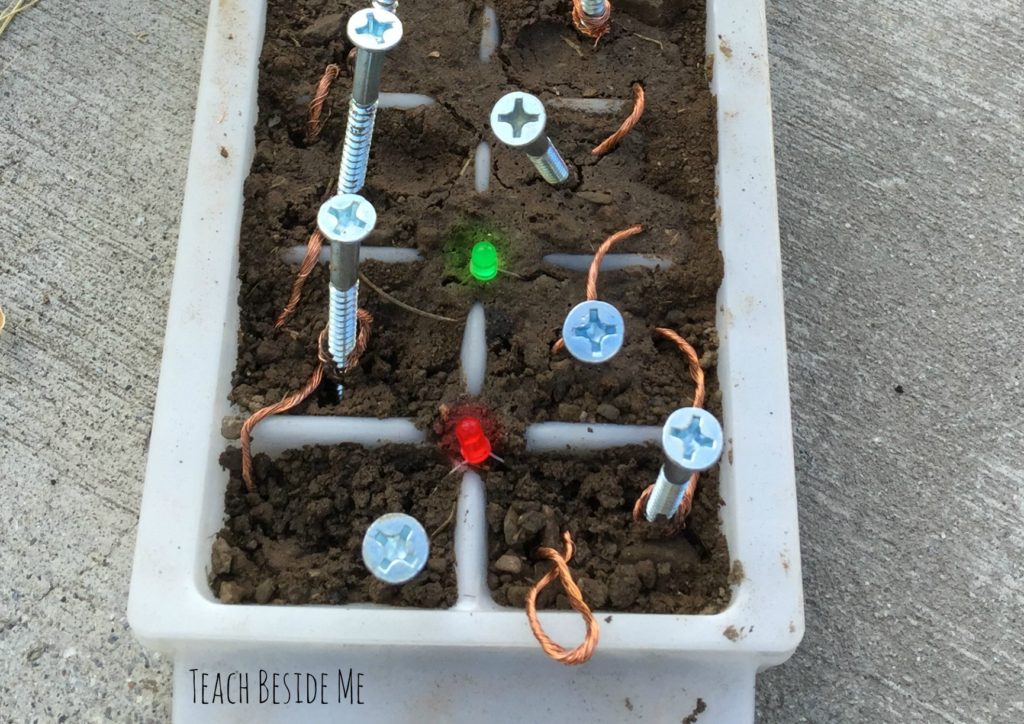
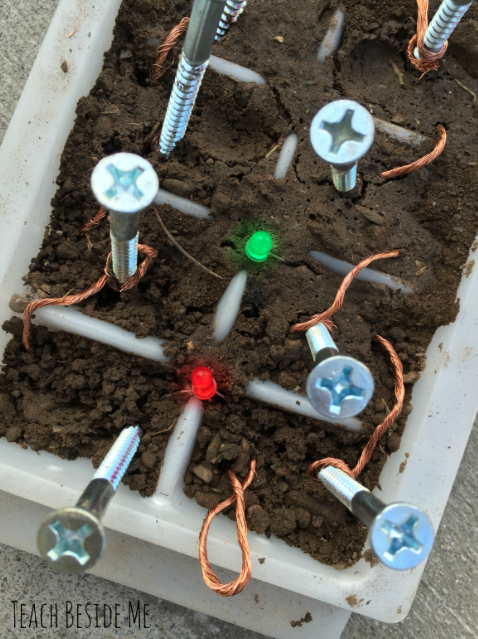
You can purchase copper electrical wire at the hardware store or online. Cut the copper wire into strips about 3 inches long and twist all of the strands together. Wrap it one end around the screws then put the other end into the soil in the cell next to it. Go all the way around the circle of the ice tray connection all of the cells except for the last two.
At the ends leave the last screw without wire wrapped around it and the other one give it an extra piece of copper wire coming out of the final one.
The lights are jut placed into the dirt at the end and they will light up from the charge created with the nails and wire!
This is a really neat experiment to try with your kids! Try measuring the output with a digital multimeter. It will tell you how many volts your battery is creating.
You can also try this on a larger scale in buckets or right in the ground. Pretty amazing!

This is part of the 31 Days of Outdoor Stem series from Little Bins for Little Hands.


You said nothing about incorporating the LED lights into the project.
Ah!! Not sure how I left that step out! I updated the directions. Thanks for letting me know.
I wonder if I can use this for my 6th grade science fair