Fire Extinguisher Science Experiments for Kids
This post may contain affiliate links.

These two fire extinguisher science experiments use simple supplies to teach kids how fire works and how it can be safely extinguished. Kids learn about the fire triangle, carbon dioxide, and fire safety concepts in an engaging, hands-on way.

What Are Two Easy Fire Extinguisher Experiments?
Today I’m sharing two simple and fascinating fire extinguisher experiments for kids. Both require just a few basic supplies, and both clearly demonstrate why fire goes out when oxygen is removed.
These activities are perfect for:
-
Firefighter units
-
Fire safety week
-
STEM lessons
-
Science demonstrations
My kids loved these so much that they made us repeat each experiment four or five times just to watch the reaction again!
Watch the Experiments Here
Fire Extinguisher Experiment #1: Can You Put Out a Candle by Removing Oxygen? (Candle Under a Jar)

Supplies Needed
-
Matches or lighter
-
Jar or drinking glass

Instructions
-
Place the tea light on a flat surface.
-
Light the candle.
-
Carefully place the jar upside down over the candle.
-
Watch how long it takes before the flame goes out.
Kids are usually surprised by how quickly it happens!

The Science Behind It
Fire needs three things to burn: heat, fuel, and oxygen. (This is called the Fire Triangle.)
When you place a jar over the candle, the flame uses up the small supply of oxygen trapped inside. Once the oxygen is gone, the fire can’t continue — so the flame extinguishes itself.
This is the same principle firefighters use when they smother a fire.

Experiment #2: How Does a CO₂ Fire Extinguisher Work? (DIY Fire Extinguisher)
How This Works
Some fire extinguishers spray carbon dioxide (CO₂) to put out flames. CO₂ pushes away oxygen and “suffocates” the fire. This is especially useful for electrical fires, where water would be dangerous.
In this experiment, you’ll make CO₂ using a simple chemical reaction!
How to Make the DIY Fire Extinguisher:

Supplies Needed
-
Tea light candles
-
Baking soda
-
Vinegar
-
Funnel
-
Bottle or pitcher with a lid
-
Matches or lighter

Instructions
-
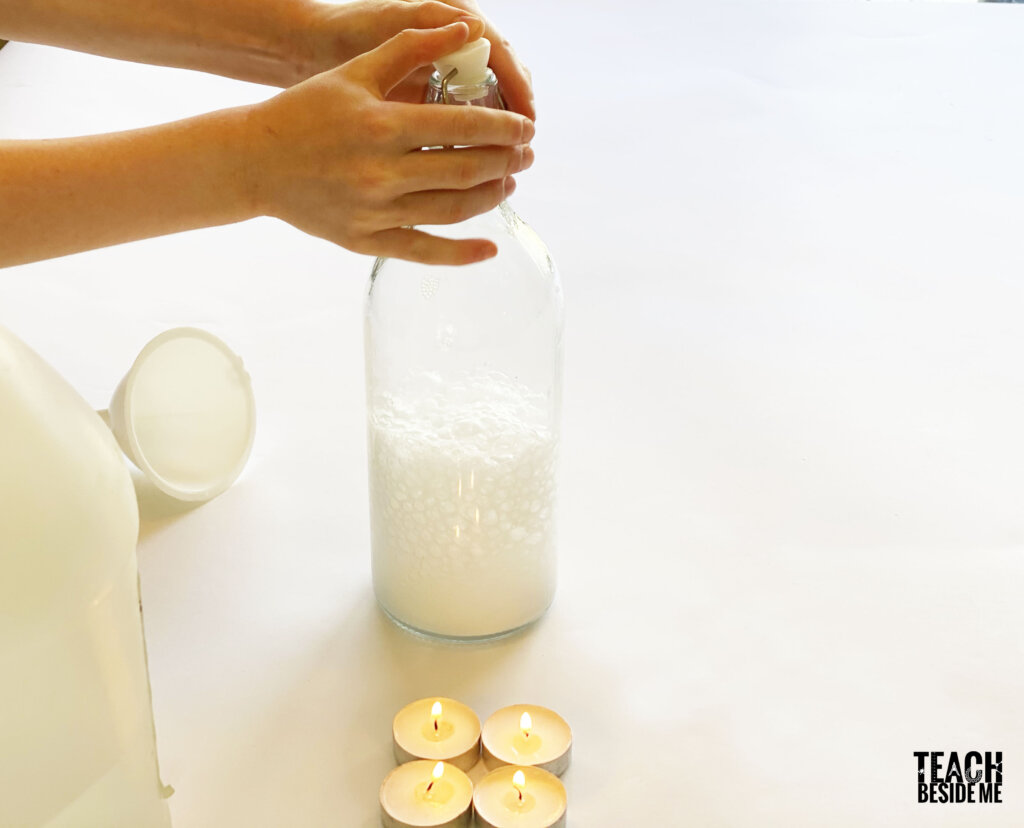
Add 3 tablespoons baking soda to your bottle.
-
Pour in ½ cup white vinegar.
-
Quickly place the lid on to trap the gas that forms.
-
Light your candles while the mixture bubbles.
-
When the bubbling slows, tip the bottle toward the candles.
-
Open the lid and “pour” the invisible CO₂ over the flames.
The candles extinguish instantly — it feels like a magic trick!
The Science Behind It
Baking soda (a base) reacts with vinegar (an acid) to produce carbon dioxide gas.
CO₂ is heavier than air, so when you tilt the bottle, the gas “pours” out and settles on the candles.
The CO₂ displaces oxygen around the flame, starving it and causing it to go out immediately.
This is the same principle real CO₂ fire extinguishers use.

What Kids Learn From These Experiments
-
The fire triangle: heat, fuel, oxygen
-
How smothering a fire works
-
What carbon dioxide does
-
Chemical reactions
-
Basic fire safety concepts
-
Why firefighters use different types of extinguishers
These concepts fit beautifully into lessons about community helpers and firefighters, making the activity both exciting and meaningful.
More Hands-On Fire Science Experiments
If you liked this activity, try these next!
100+ Easy and FUN Science Project Ideas for Kids
See Also our Rising Tide Experiment with Fire!
Kids love experiments that feel magical — and these fire extinguisher activities offer big reactions with simple supplies. They’re perfect for teaching fire safety, exploring chemical reactions, and giving kids a hands-on look at how real fire extinguishers work.
Let me know if you try these with your kids or your class or homeschool!


I teach science and these are great experiments for light and science. Thank you!
So glad to hear! Thanks for your comment!