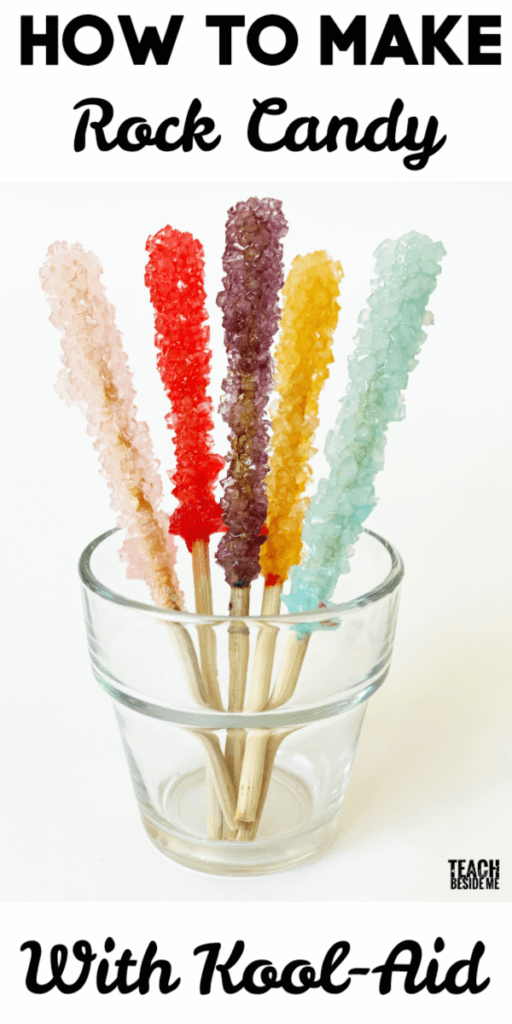
How to Make Rock Candy Crystals with Kool-Aid
This post may contain affiliate links.
Looking for a colorful and delicious kitchen science experiment? Learn how to make Kool-Aid Rock Candy! This vibrant at-home STEM activity teaches kids about crystal formation while keeping them entertained and engaged for days. It’s the perfect project for summer break, a rainy day, or any time you’re looking to mix learning with fun.
I took a lot of pictures of this project. They were just so pretty and colorful!
How to Make Rock Candy Crystals with Kool-Aid
Supplies Needed:
- Granulated sugar
- Water
- 6 inch Wooden Skewers
- Mason jars or tall glasses
- Kool-Aid packets (variety of flavors/colors)
- Large pot
- Clothespins
- Optional: aluminum foil (to cover jars while crystals grow)
Rock candy crystals are easy to make, but take some time. You’ll need to plan ahead for this one! We let ours grow for 2 weeks.
Step 1: Prepare the Skewers
- Cut the sharp ends off the skewers for safety.
- Soak skewers in water for 30–60 minutes.
- Roll the wet ends in sugar to create seed crystals.
- Let them dry completely on a plate.
These sugar-coated sticks provide a base for the rock candy crystals to grow.

Step 2: Make the Supersaturated Sugar Solution
Use a ratio of about 2 to 2.5 cups of sugar for every 1 cup of water.
For five Kool-Aid flavors:
- 8 cups water
- ~17 cups sugar (add gradually until no more dissolves)
- Combine sugar and water in a large pot.
- Heat on medium until the sugar dissolves completely and the mixture just begins to boil.
- Remove from heat and let cool for 10–15 minutes.
Pouring Sugar Syrup Into Mason Jars

Step 3: Prepare Your Jars
- Add 1 packet of Kool-Aid to each clean jar (optional: split one packet between two jars).
- Carefully pour the cooled sugar syrup into each jar and stir to mix.
- Attach a clothespin to each skewer and lower it into the jar, sugar-coated end down. Make sure it’s suspended in the center and not touching the sides or bottom.

Tip: Cover the jars loosely with foil to keep dust out.

Step 4: Let the Crystals Grow!
- Place the jars in a cool, undisturbed place.
- Let the crystals grow for 10–14 days.
- Check every few days and gently break up any surface crystals.

Now the waiting game begins!

We peeked at them a lot over the days. Crystals form on the top of the jar and I broke them up every couple of days. You want to disturb them as little as possible, though.

When you finally decide to pull them out to eat, they will be drippy and messy. Just lay them on the side of the pan to drip dry.

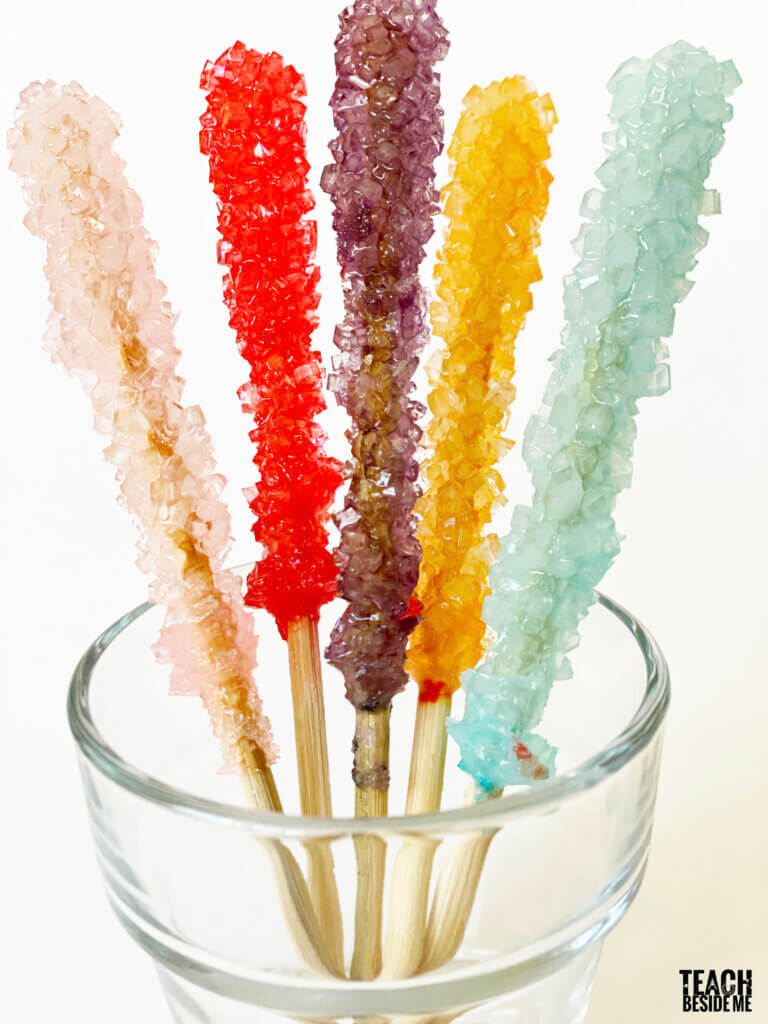
Now you get to eat them! This is the best part. My kids all wanted to try all of the flavors.
Luckily there was a lot of crystal growth left in the bottom of the jars. They could all try the different flavors!

The Science Behind Rock Candy Crystals
This experiment demonstrates crystallization and supersaturation:
- Supersaturated solution: Heating allows more sugar to dissolve than would normally be possible in water. As the solution cools, excess sugar begins to form crystals.
- Seed crystals: The sugar on the stick gives the crystals a place to begin forming.
- Evaporation: As water slowly evaporates, more sugar is forced out of the solution, helping crystals continue to grow.
It’s a delicious way to explore science and chemistry!

Try Some More Kitchen Science Experiments:
Kitchen Science: Homemade Hard Candy Lollipops
Kitchen Science: Homemade Butter in a Jar


Can you add multiple sticks in each jar?
Yes, as long as they are not touching each other, They would grow together otherwise.
How long do they keep?