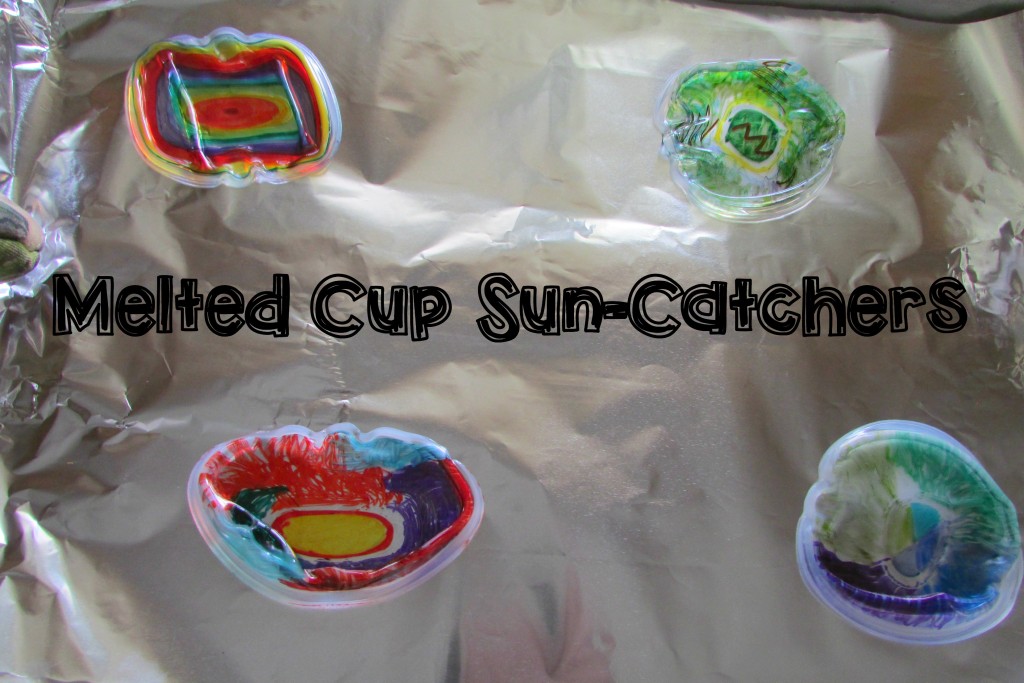
Science + Art: Melted Cup Sun-Catcher
This post may contain affiliate links.
Looking for a simple yet stunning art project your kids will want to make again and again? These Melted Cup Sun-Catchers are a vibrant, hands-on craft that’s perfect for all ages. My kids became absolutely obsessed with this activity—so much so, they made them all week long!
The best part? These melted plastic discs look like colorful glass and make a beautiful sun-catcher garland when strung together. If you’ve never tried this before, you’re in for a treat—it’s easy, inexpensive, and super fun!

What You’ll Need:
-
Clear plastic disposable cups (#6 plastic works best)
-
Permanent markers (like Sharpies)
-
Aluminum foil
-
Baking sheet
-
Hole punch
-
Yarn, string, or ribbon for hanging
-
Scissors
-
Optional: suction cups or window hooks
How to Make Melted Cup Sun-Catchers:
1. Color the Cups
Decorate the outside of your clear plastic cups with permanent markers. Rainbow stripes, dots, hearts, swirls—anything goes! Encourage kids to get creative with their designs.

2. Melt the Cups (Adults Only!)
Preheat your oven to 350°F (175°C).
Line a baking sheet with aluminum foil and place the colored cups upside down on the tray.
Bake for 3–5 minutes—watch closely! The cups will begin to shrink and flatten into colorful disc-like shapes.

3. Cool Completely
Once melted, remove the tray from the oven and let the pieces cool fully before touching. The plastic hardens as it cools.
4. Create a Melted Cup Garland
Use a hole punch to make a small hole near the edge of each disc.
String them together with yarn or ribbon to make a hanging sun-catcher garland for your window. You can also hang individual ones as ornaments!

Why We Love The Melted Cup Sun-Catcher Project:
-
It’s colorful, open-ended, and totally mesmerizing.
-
Great for working on fine motor skills, color recognition, and design.
-
Kids can make it their own and repeat the project with different themes or holidays.
-
It looks beautiful in natural light!
Safety Tips
-
This project involves melting plastic—adults only should handle the baking.
-
Use a well-ventilated area and open windows during and after baking, as some plastic may produce a slight odor when heated.
-
Only use #6 plastic or products labeled microwave/reheat safe. Avoid any cups with unknown materials.
The Science Behind It
This sun-catcher project is a fun introduction to thermoplastics—a type of plastic that softens when heated and hardens again when cooled. When you place the plastic cups in the oven, the heat causes the long polymer chains in the plastic to relax and shrink, allowing the cup to collapse and flatten into a new shape. As it cools, the plastic holds its new form.
It’s a simple, hands-on way to explore how heat can change the physical properties of materials—just like in real glass or metalwork!
Artist Connection: Dale Chihuly
This melted cup project is a great introduction to glass-inspired art and can be tied to the work of Dale Chihuly, a world-renowned glass artist known for his colorful, organic sculptures.
Like Chihuly’s pieces, these melted plastic sun-catchers play with:
-
Color and transparency (just like blown glass)
-
Organic, fluid forms created through heat shaping
-
Light interaction, especially when hung in a window
This project is an approachable way for kids to explore the look and feel of Chihuly’s famous installations using everyday materials—making it ideal for both art history lessons and hands-on STEAM education.
Related Project: Chihuly Art Project with Melted Plates
Love the look of melted plastic art? Be sure to check out our Chihuly-Inspired Art Project for Kids using clear plastic plates! It’s a vibrant group project that mimics glass sculpture and makes a stunning ceiling or wall display.


Neat! I hadn’t thought of using cups. We’ve used lids and empty take out boxes. They’re like shrinky dinks, only free, lol.
It doesn’t work. I used the clear Solo cups, in the oven for over 15 minutes on 350 degrees and the parchment paper was burning. I had to take out the parchment paper and put tin foil under them. They shrunk and the tops of the cups melted a little but so far that is all we got for our time and money and a big disappointment for my son.I tried the microwave oven on high for 5 minutes and that didn’t work. Now, I’m desperate so they are not heating in the NuWave oven. How can these clear, plastic Solo cups be any different than any other Solo cups. This just is not working.
Weird! I don’t know why it is not working. You could try a lower temperature for a longer time?