Play Dough Human Anatomy: Hands-On Body Systems Activity for Kids
This post may contain affiliate links.

Learning about the human body is fascinating, especially when kids can build what they’re learning!
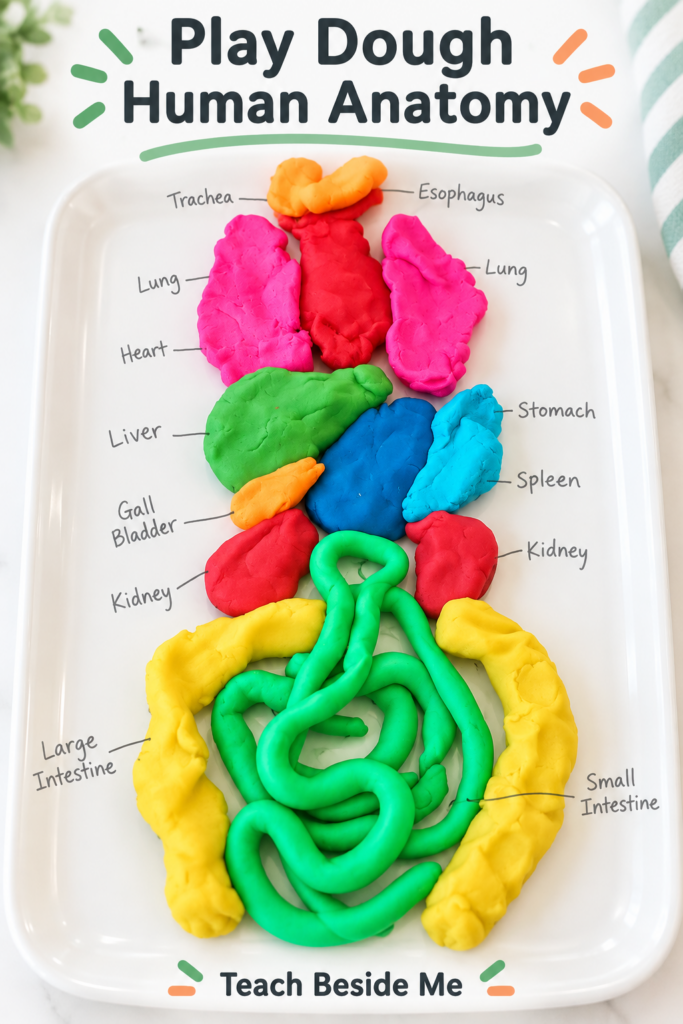
This play dough human anatomy activity lets children explore the organs and systems inside their bodies using colorful play dough. Instead of simply looking at diagrams in a science book, kids can roll, shape, and arrange their own models of the human body.
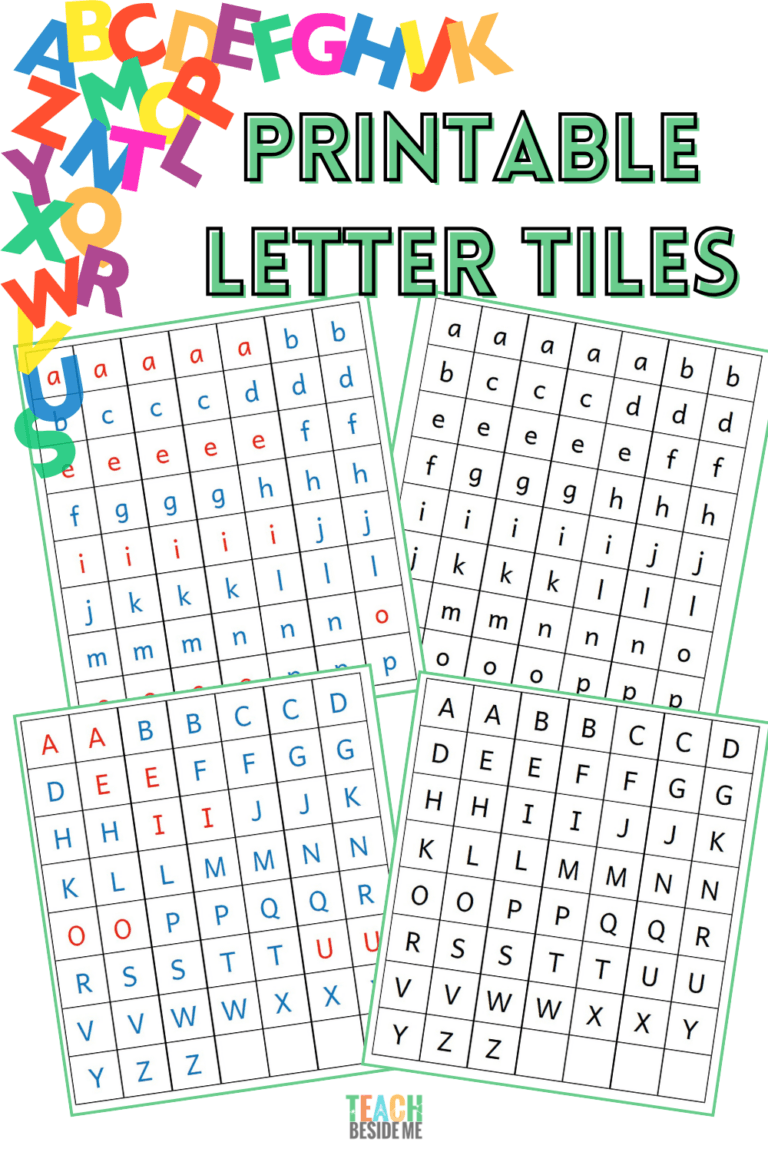
I’ve also created four printable human anatomy play dough mats to make this activity easy to recreate at home or in the classroom.
Kids can explore the respiratory, circulatory, digestive, and nervous systems while learning how different parts of their bodies work together.
It’s a wonderful hands-on science activity for elementary students, homeschool anatomy lessons, and human body units!

A Creative Way to Learn Human Anatomy
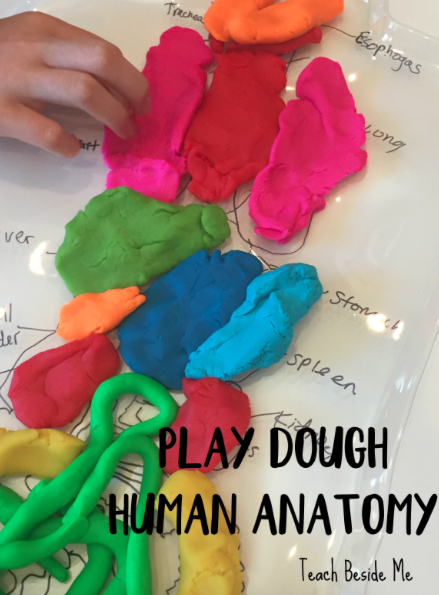
This activity actually started with a bathing suit I bought for my daughter at Costco! The swimsuit came packaged around a clear plastic body-shaped mold. I thought the shape was much too interesting to throw away. As I looked at it, I realized it would be perfect for a human anatomy lesson! We could use colorful play dough to build the organs inside the body and learn what each one does.
My kids loved it! They thought creating their own organs out of play dough was so cool. Of course, those plastic packaging molds aren’t something you can easily find anymore. So I created a set of printable anatomy mats that make it possible for anyone to try this activity. You can use the printable mats, draw a large body outline on paper, or even create a model on a cookie sheet.

Printable Human Anatomy Play Dough Mats
The printable set includes four different body systems for children to explore:
- Respiratory system – Learn about the lungs and how we breathe.
- Circulatory system – Explore the heart and blood vessels.
- Digestive system – Follow the path food takes through the body.
- Nervous system – Discover how the brain, spinal cord, and nerves help control and coordinate the body.
Each mat provides a visual starting point for building a model with play dough.
Children can work on one system at a time or compare the systems to see how they work together.
Download the Human Anatomy Play Dough Mats
You can also download my basic human anatomy diagram to use as a reference when building your models.


Supplies for the Play Dough Anatomy Activity
You won’t need many materials to get started.
- Printable human anatomy play dough mats
- Play dough in several colors
- A printed human anatomy diagram or children’s anatomy book
- Optional: Laminator or reusable page protectors
- Optional: Play dough tools or small rolling pins
If you’d like to make your own play dough, try my Rainbow Play Dough Color Mixing activity.
I recommend laminating the anatomy mats or placing them in reusable page protectors so you can use them repeatedly.
How to Make a Play Dough Human Anatomy Model
Step 1: Choose a Body System
Start by choosing one of the four printable anatomy mats.
For younger children, I recommend beginning with the digestive or respiratory system because they can connect these systems to familiar experiences like eating and breathing.
Look at the picture together and talk about the different organs and body parts shown.

Step 2: Choose Your Play Dough Colors
Set out several colors of play dough. You can use different colors to represent different organs or structures. For example, you might choose pink for the lungs, red for the heart, and yellow for the nerves. The colors don’t need to match the actual appearance of the organs. They’re simply a way to help children distinguish the different structures.
Step 3: Build the Body Parts
Have children roll, flatten, pinch, and shape the play dough to create the organs and other structures on their mats. Encourage them to look carefully at the reference picture. Some body parts may need long, thin pieces of dough, while others require rounded or flattened shapes.
As they work, help them identify the different parts of the system.

Step 4: Talk About What Each Part Does
As your children build their models, discuss the jobs of the organs.
Ask questions such as:
- What does this organ do?
- Where is it located in the body?
- How does it help keep us alive?
- What other body parts does it work with?
You don’t need to explain every anatomical detail. Focus on helping children understand the basic functions of the systems they’re building.
Step 5: Explore Another Body System
When children finish one model, take a photo of their work before removing the play dough. Then choose another mat and begin again!
You can also have children compare the different body systems and look for connections between them.
Learning About the Four Human Body Systems
Here are some simple explanations and teaching ideas to use alongside the printable mats.
1. Respiratory System: How We Breathe
The respiratory system helps bring oxygen into our bodies and remove carbon dioxide. Some of its important structures include the trachea, bronchi, and lungs.
Try this: Have children take a slow, deep breath and notice how their chest expands.
Then build the lungs and airways using play dough.
Explain that when we inhale, air travels through our airways into our lungs. Oxygen passes into our blood, where it can be carried to the rest of the body.
Ask: Why do you think our bodies need oxygen?
2. Circulatory System: How Blood Travels
The circulatory system moves blood throughout the body. The heart pumps blood through a network of blood vessels. Blood delivers oxygen and nutrients to body tissues and carries away waste products.
Try this: Have children place two fingers on their wrist or neck to feel their pulse.
Then build a heart and blood vessels with play dough. Roll thin pieces of red or blue dough to represent different blood vessels.
Explain that diagrams often use red and blue to distinguish oxygen-rich and oxygen-poor blood, even though blood itself is never blue.
Ask: What do you think happens to your heartbeat when you run or jump?
3. Digestive System: What Happens to Our Food?
The digestive system breaks down food so our bodies can absorb and use nutrients. Important parts include the mouth, esophagus, stomach, small intestine, and large intestine. Other organs, including the liver and pancreas, help with digestion too.
Try this: Use play dough to build the digestive organs and trace the path food travels through the digestive tract. Roll a long, thin piece of dough to represent the intestines. Children may be surprised by how long the intestines are!
Explain that most nutrient absorption takes place in the small intestine, while the large intestine absorbs water and helps form waste.
Ask: What happens to food after we swallow it?
4. Nervous System: How the Body Sends Messages
The nervous system helps the body receive information, respond to its surroundings, and coordinate its activities. It includes the brain, spinal cord, and nerves.
Try this: Build the brain and spinal cord with play dough, then add thin branches to represent nerves.
Talk about how the nervous system carries signals between the brain, spinal cord, and the rest of the body. Have children gently touch something soft, listen to a sound, or move their fingers.
Ask: How does your brain know when you’ve touched something?
What Do Kids Learn from Play Dough Anatomy?
This activity brings together several kinds of learning.
Human anatomy: Children become familiar with major organs, body structures, and their functions.
Body systems: They learn that organs work together rather than functioning independently.
Spatial awareness: Building a model helps children think about where organs are located in relation to one another.
Fine motor practice: Rolling, pinching, and shaping play dough gives children opportunities to practice controlled hand movements.
Scientific vocabulary: Words such as lungs, trachea, intestine, heart, and spinal cord become more meaningful when children can connect them to a model.
Observation and comparison: Children can examine diagrams, build their models, and compare the results.
The models are simplified representations rather than anatomically exact replicas, but they’re a fun starting point for understanding how the human body works.
Ways to Adapt This Anatomy Activity for Different Ages
One thing I love about this project is how easily it can be adapted.
Younger Elementary Students
Focus on recognizing and naming the major organs. Ask children to build a few key structures and explain what they do in simple terms. You might work on just one body system per lesson.
Older Elementary Students
Challenge children to label more structures and explain how different organs work together. For example, ask how the respiratory and circulatory systems work together to deliver oxygen throughout the body.
Middle School Students
Have students research the functions of additional organs and structures. They can build more detailed models, compare organ systems, and explain how the systems depend on one another. For an extra challenge, have students draw and label their own diagrams before building their models.
Alternative: Build Human Anatomy Without the Printable Mats
When we first did this activity, we used that unusual plastic bathing suit mold as the base for our anatomy model.
I printed a diagram of the internal organs and roughly sketched the shapes onto the mold with a permanent marker. Then my kids used different colors of play dough to build the organs inside the body.
If you don’t have the printable mats available, you can create something similar using a large piece of paper or a cookie sheet.
Draw a simple body outline, add the major organs using a reference diagram, and let children build over the drawing with play dough.
You can also draw on a suitable reusable surface with wet-erase markers, following the manufacturer’s instructions.
It’s a fun, open-ended alternative that lets children create larger models.
Human Anatomy Books for Kids
I love pairing hands-on science activities with good books!
Here are a few books to explore as you learn about the human body:

- Inside Your Outside: All About the Human Body by Tish Rabe
- My First Human Body Book (Dover coloring book)
- The Way We Work by David Macaulay
- My First Human Body Encyclopedia by DK
- The Way We Work by Katie Daynes~Colin King
- Basher Science Human Body
More Hands-On Science and Play Dough Activities
If your children enjoy building models with play dough, try some of these other activities:
- Printable Dinosaur Play Dough Mats
- 40+ Edible Slime and Play Dough Recipes
- EASY Play Dough Circuits
- How to Make Cloud Dough
- How to Make Kinetic Sand
- How to Make Oobleck: Science with Dr. Seuss!
- Cauliflower Brain Model With Labels + Free Brain Diagram
- Pretend Play Anatomy Lab: A Hands-On Halloween Science Activity
And for more creative ways to combine art and science, take a look at my Science Art and Drawing Games for Kids book!

Learning anatomy doesn’t have to mean memorizing a long list of body parts. When kids get to build the organs themselves, they have an opportunity to explore how the different parts fit together and ask questions about how their bodies work.
I hope you have fun creating your own play dough human anatomy models!






What a fun idea! I just got a human anatomy book for our bookshelf. Looking forward to trying this with the kids this school year. Pinned!
This is so genius!! I love when kids love to learn, and you’re really good at making it engaging and fun! Play dough is definitely a hit with all kids, and this is something I’m going to keep in mind. Thanks for sharing!
Thanks so much!! Glad you like it. 🙂