Pressed Flower Art for Kids (Nature Craft Project)
This post may contain affiliate links.
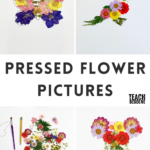
Looking for a simple and beautiful way to bring nature into your home? These pressed flower pictures are a timeless art project that combines nature, science, and creativity into one meaningful activity.
Kids will love collecting flowers, pressing them, and turning them into stunning works of art you can display, gift, or keep as a memory of the season.

What Is Pressed Flower Art?
Pressed flower art is the process of preserving flowers by flattening and drying them, then arranging them into designs or pictures.
It’s a wonderful way to:
- Preserve the beauty of nature
- Slow down and observe the outdoors
- Create meaningful, handmade art
Supplies You’ll Need
- Fresh flowers and leaves
- Large heavy books
- Parchment paper (or wax paper)
- Paper for your artwork- I recommend cardstock
- Pencil
- Glue (school glue or craft glue)
- Small paintbrush (optional, for glue application)
- Grab a Flower Press to make it even easier!
How to Press Flowers
1. Collect Flowers
Head outside and gather a variety of flowers and leaves. Look for different:
- Colors
- Shapes
- Sizes
Take time to notice and identify what you find—this adds a wonderful learning element to the activity. If it is off season, or you do not have a lot of flowers nearby, you can purchased pre-pressed flowers.
2. Prepare for Pressing
Place flowers between sheets of parchment paper and tuck them inside a large book. Try not to overlap them so they dry evenly.
3. Wait for Them to Dry
Leave the flowers pressed for 1–2 weeks until completely dry.
(This part takes patience—but it’s worth it!)

How to Make Pressed Flower Pictures
1. Plan Your Design
Draw or lightly sketch your design on paper.
Some ideas:
- Animals
- Butterflies
- Flowers
- Nature scenes
- Abstract designs

2. Arrange the Flowers
Lay out your pressed flowers to match your design.
Encourage kids to experiment before gluing.

3. Glue Them Down
Use a small amount of glue to attach the flowers.
You can:
- Brush glue onto the paper
- Or lightly coat the back of the flowers
4. Let Dry & Display
Allow your artwork to dry completely.
Then:
- Frame it
- Turn it into cards
- Add it to a nature journal

The Science Behind Pressed Flowers
This activity ties beautifully into botany, the study of plants.
As kids collect and press flowers, they can learn:
- The parts of a flower
- Different plant types
- How plants grow and reproduce
Pressing removes moisture from the plant, helping preserve its shape and color.
Add a Little Math (Optional)
You can easily incorporate math into this activity:
- How many flowers fill the space?
- Can you create symmetry in your design?
- What shapes do you see in the petals and leaves?

Tips for Success
- Use flat flowers for best results
- Avoid thick stems (they don’t press well)
- Let flowers dry completely before using
- Handle dried flowers gently—they are fragile

Don’t Want to Wait?
You can also use pre-pressed flowers if you want to skip the drying time or you don’t have a lot of flowers near you. You start creating right away!
A Perfect Spring Nature Activity
This is a wonderful project for:
- Spring and summer
- Nature study lessons
- Homeschool art
- Quiet creative time
It’s simple, meaningful, and creates something truly beautiful.
See More Nature Inspired Activities
You may also enjoy:
- Insect Hotel: Nature Science
- Nature Hunt~ Leaf Matching Game
- Microscope for Kids: Guessing Game
- Nature Study Notebooking
Also be sure to check out my Science Art Book with even more Science-Art themed ideas!
![]()