Printable Paper Insect Display: Hands-On Entomology for Kids
This post may contain affiliate links.
I’ve always been fascinated by those glass-topped insect displays with pinned specimens and tiny labels. They’re both scientific and artistic—but collecting, preserving, and pinning real insects? That’s a no for me. So I created the next best thing: a Printable Paper Insect Display!
This educational and creative project lets kids explore entomology in a clean, cruelty-free way. It’s hands-on, visually engaging, and a great opportunity to learn insect names, body parts, and species varieties.
What’s Included in the Paper Insect Display Printable Set:
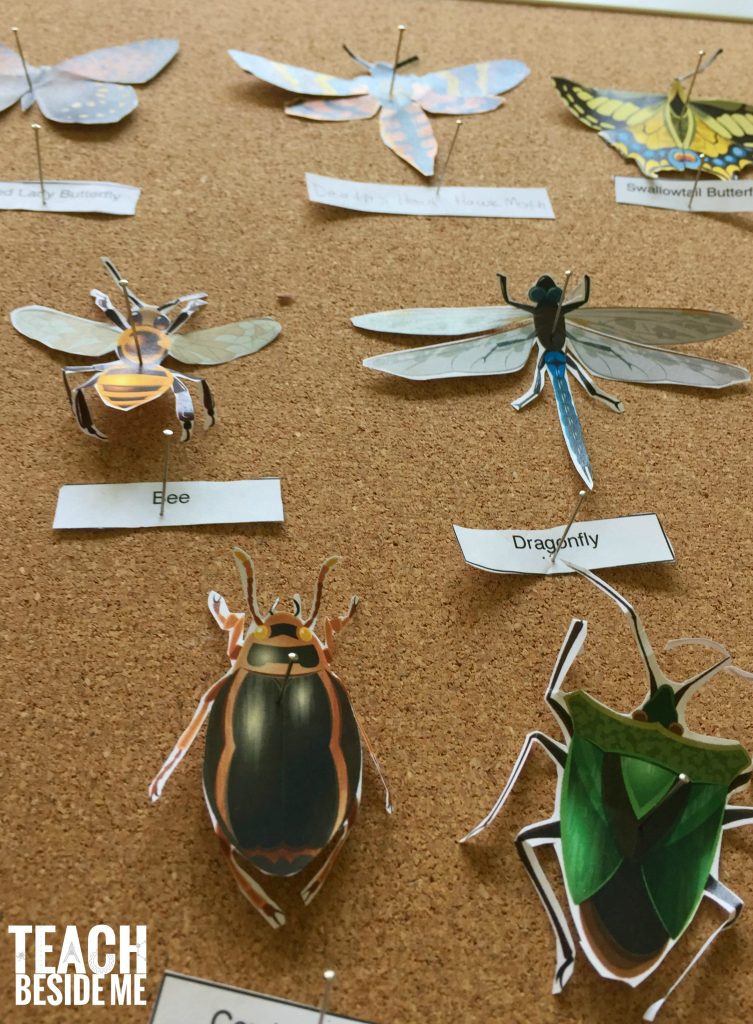
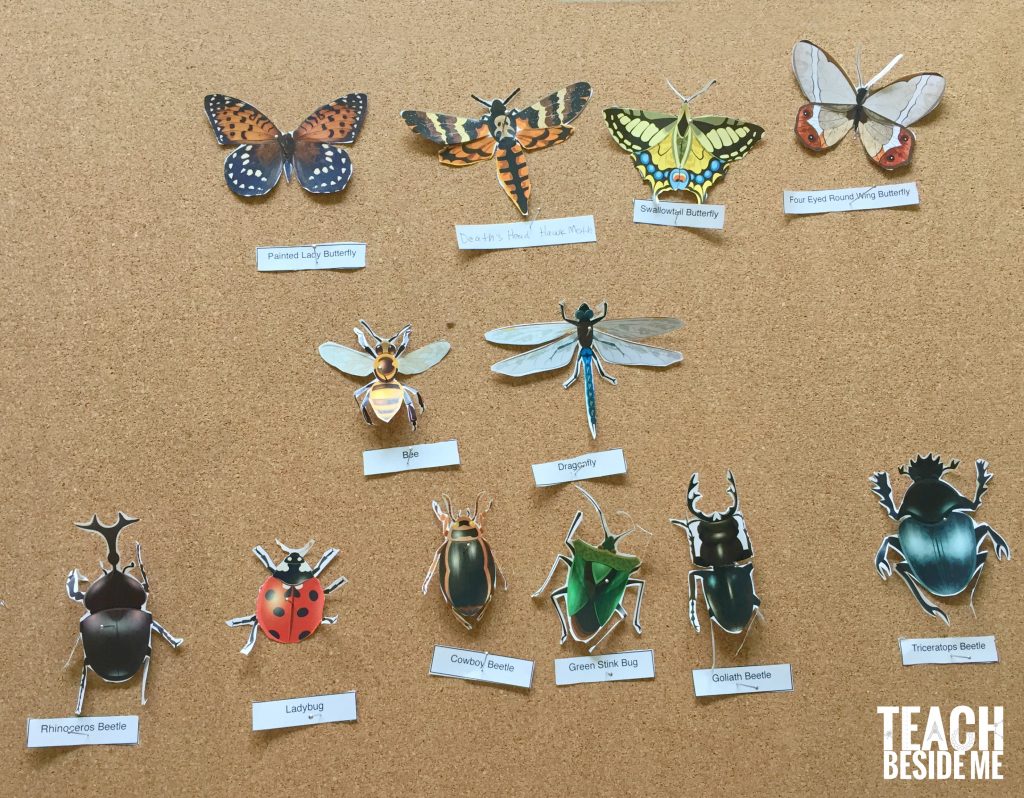
This printable pack features 12 different insects, including:
- Butterflies (multiple varieties)
- Beetles
- Dragonfly
- Honeybee
- Ladybug
Each insect is illustrated and labeled, ready to cut, mount, and display!
How to Make the Paper Insect Display:
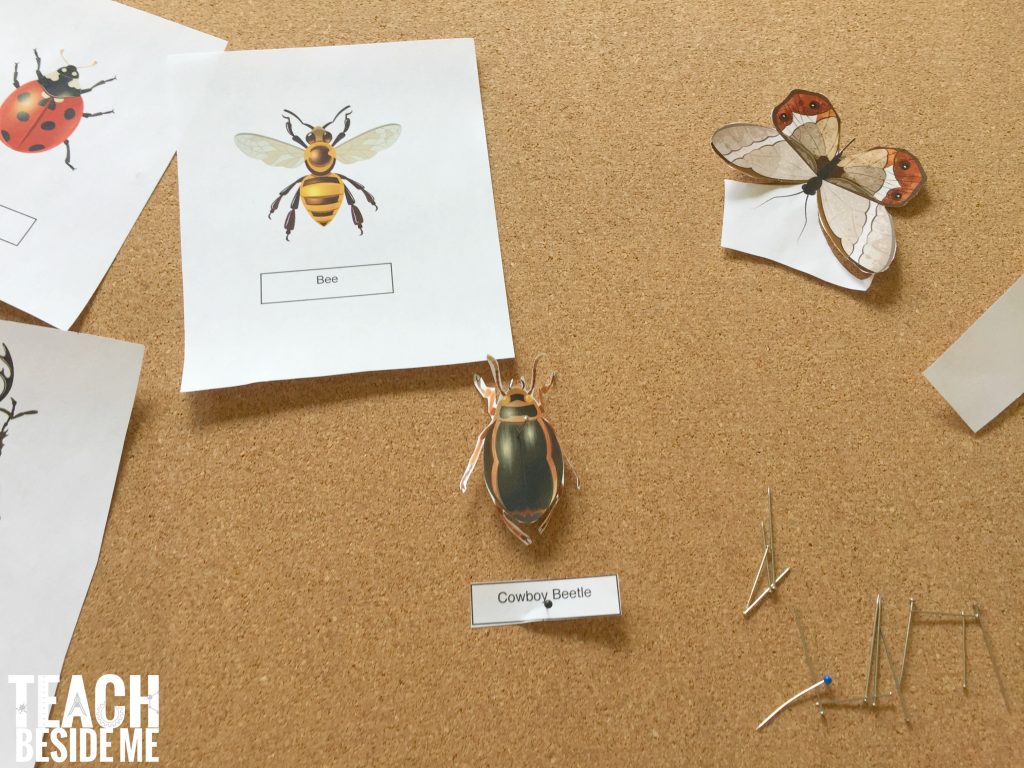
- Print the insect pages on heavy cardstock for best results.
- Cut out each insect carefully. (Younger kids can cut the larger shapes while you help with the legs and antennae.)
- Use straight pins to attach each insect to a cork board, styrofoam block, or inside a shadow box.
- For a true museum-style display, attach the labels for each insect beneath the pins.
- Hang your finished piece to display!
Learning Opportunities:
- Practice observation and fine motor skills
- Learn insect body parts and names
- Introduce kids to classification and specimen display
- Foster curiosity about bugs and outdoor exploration
Bonus Tip: After completing the display, challenge your kids to find each insect in real life throughout the season!
Science Behind Insect Collecting & Displays:
Insects are the most diverse group of animals on Earth, with over a million known species and countless more yet to be discovered. Scientists who study insects are called entomologists, and they often create pinned insect displays to help identify, classify, and preserve specimens for research and education.
Traditional insect displays involve:
- Collecting: Specimens are found in nature using traps, nets, or by hand.
- Preserving: Insects are frozen or placed in alcohol to prevent decay.
- Pinning: Insects are carefully positioned with pins on styrofoam or cork boards to show key body parts.
- Labeling: Tags include scientific names, collection location, and date.
These displays are used in museums, universities, and nature centers to study insect biodiversity, anatomy, behavior, and ecological importance.
With this paper version, kids can still learn key entomological practices—like identifying body parts (head, thorax, abdomen), wing types, and species variation—without needing real specimens. It’s a perfect way to introduce STEM learning through art and nature.
Get the Printable Paper Insect Display Here
![]()
$3.50Add to cart
Check out some of our other insect projects:
Pitfall Insect Trap
Insect Hotel
Roll a Beetle Game
Spring Insect Study
Book Tie-In:
This week’s activity was inspired by The Very Hungry Caterpillar by Eric Carle, one of our favorite springtime reads.

More Butterfly & Bug Fun from Fellow Bloggers:
Butterfly Food Challenge – Preschool Powol Packets
How to Start a Butterfly Garden – Inspiration Laboratories
Easy Sparkly Spin Art Butterflies- Toddler Approved
Pom Pom Caterpillar to Colorful Butterfly Craft – Artsy Momma
Caterpillar to Butterfly Craft – Mama Smiles
Exploring Shapes on Mats with a Butterfly Theme -JDaniel4’s Mom


My computer is made for seniors and will not allow me to download but I can print pages that say print. Is there a way I can print without downloading?
I’m having the same issue. I really would love to have these little insects for my preschool class but I can’t download.
All the downloads are located IN the subscriber library. Once you have subscribed, check your email for details on how to get there. 🙂
thank you
Are these insect printouts still available and free?