Homemade Thermometer Science Experiment
This post may contain affiliate links.

Did you know you can make a homemade thermometer? It’s a simple and engaging science experiment that you can try at home or in the classroom with kids. With just a few basic supplies, you can create a working thermometer to observe thermal expansion and contraction in action!
This homemade thermometer experiment is a great way to help kids understand how temperature changes affect liquids and how traditional thermometers function. While we mostly use digital thermometers today, liquid-based thermometers have been used for centuries and remain a fascinating subject of study.
Supplies Needed
- Modeling clay
- Red food coloring (optional, for visibility)
- Water
- Clear straw
- Rubbing alcohol
- Small clear bottle with a narrow neck
- Thermometer (optional, for comparison)
How to Make a Homemade Thermometer
Step 1: Prepare the Liquid
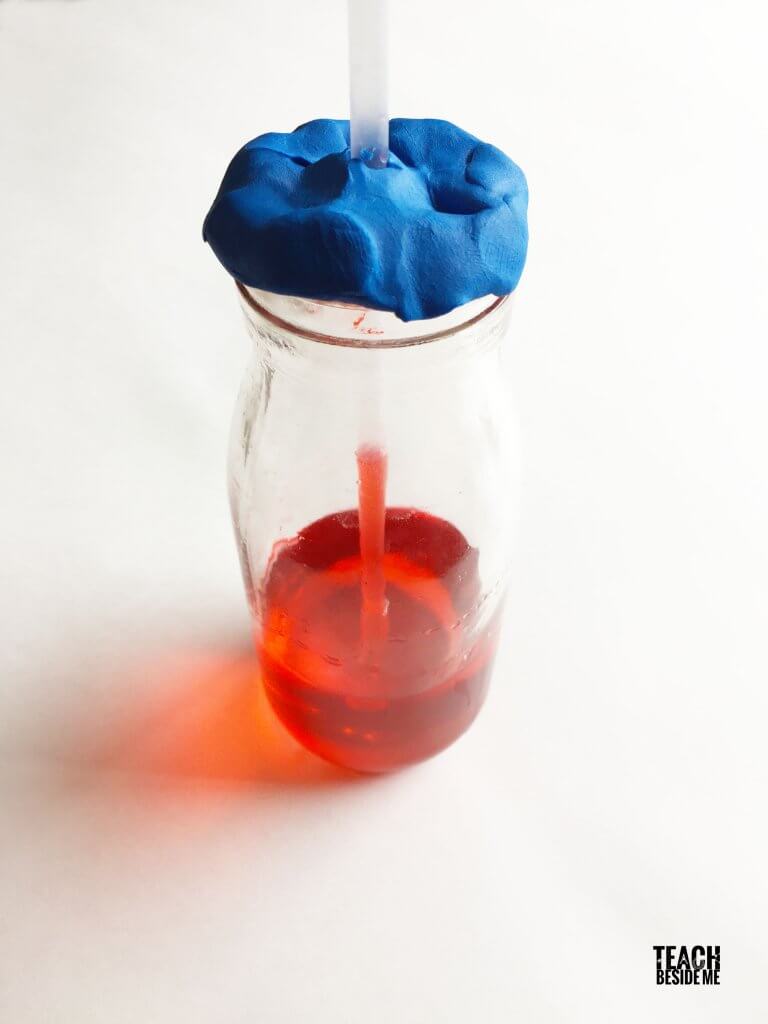
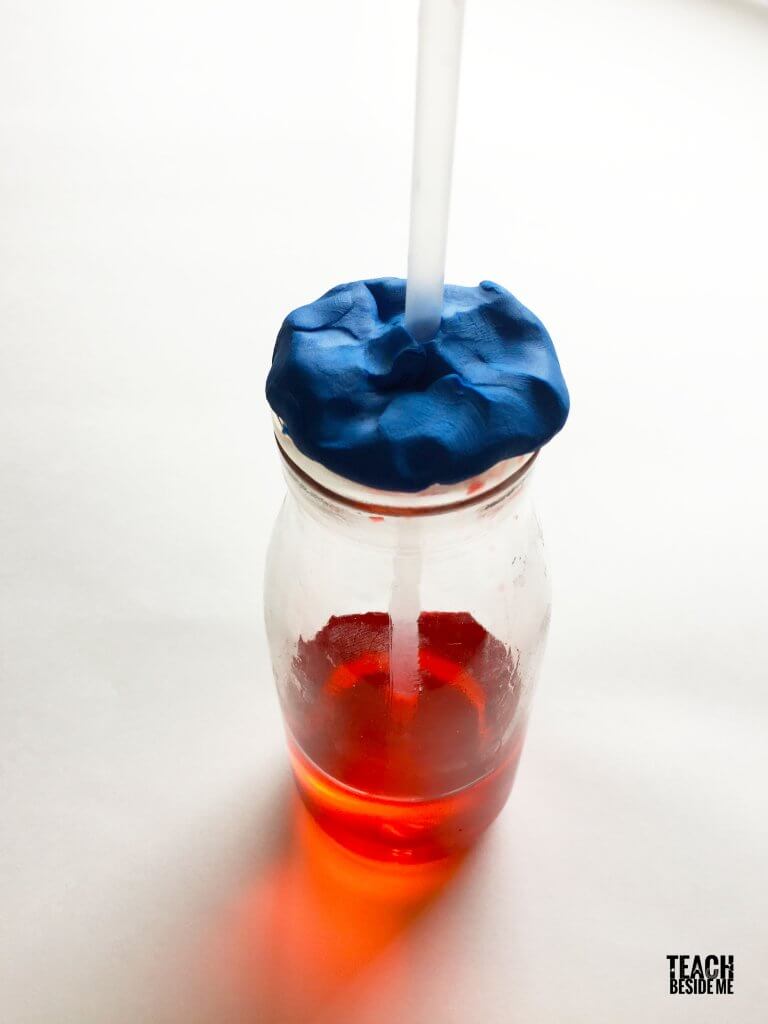
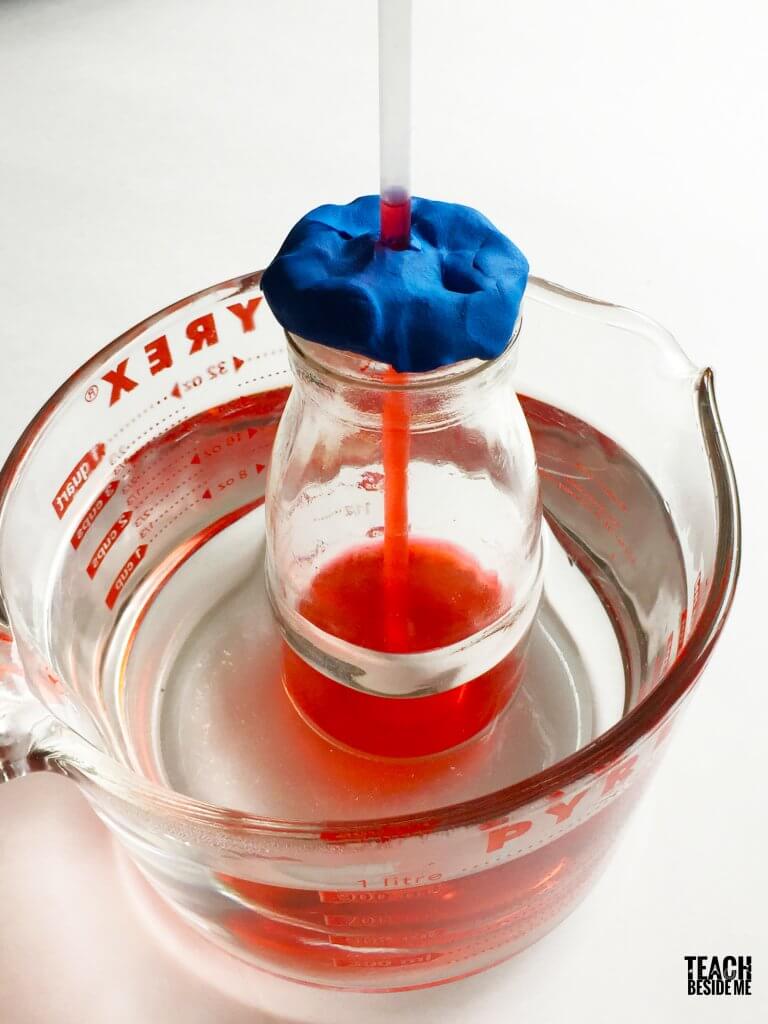
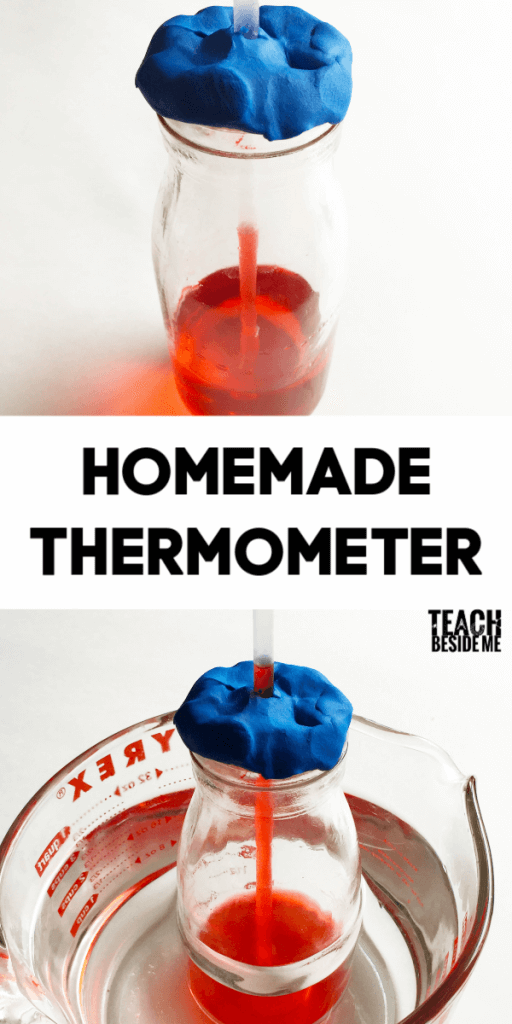
- Pour equal amounts of water and rubbing alcohol into the bottle until it is about 1/4 full.
- Add a few drops of red food coloring to make the liquid more visible—this helps simulate a traditional thermometer.
Step 2: Insert the Straw
- Place the straw into the bottle, ensuring the straw does not touch the bottom of the bottle.
- Seal the opening tightly with modeling clay, securing the straw in place while leaving the top of the straw open to the air.

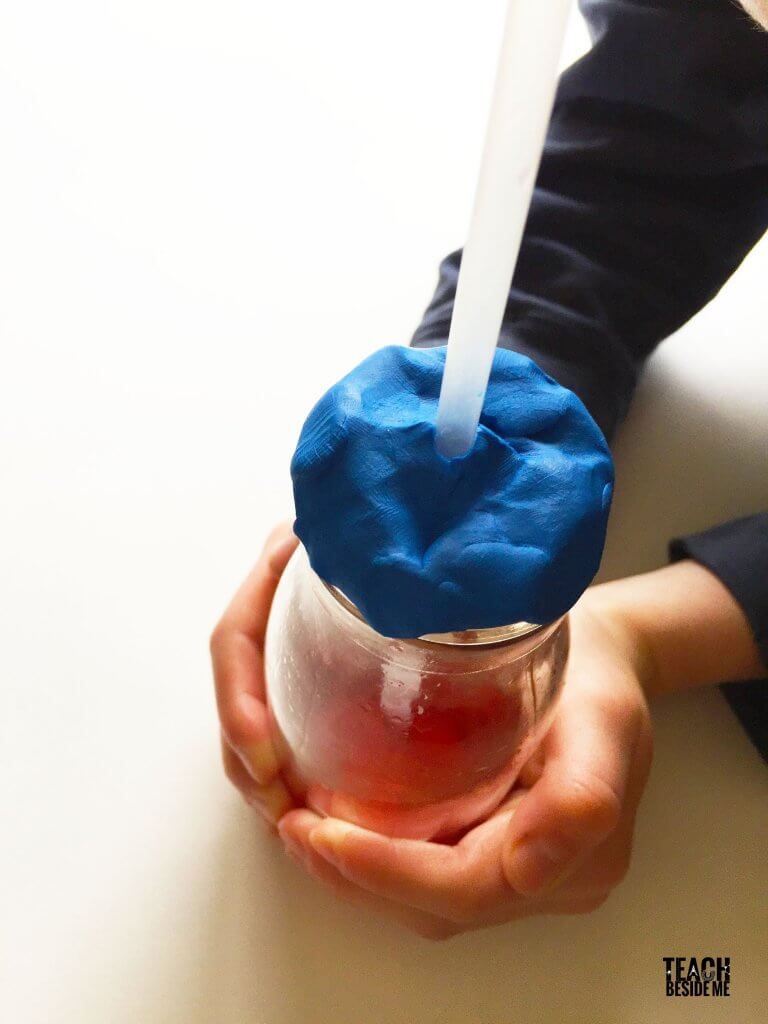
Step 3: Test the Thermometer!
Hold the bottle in your hands to see if the liquid level rises. Your body heat will cause a small reaction.
Place the thermometer in a bowl of hot water and observe how the water level rises in the straw as the temperature increases.
Put your DIY thermometer in the freezer and watch how the liquid moves down as the temperature decreases.
Test it outdoors in different air temperatures to see how it reacts in hot and cold weather. Try putting it in the shade for a while then switch it to direct sunlight. How does it differ?
The Science Behind the Homemade Thermometer
This experiment demonstrates the concept of thermal expansion and contraction:
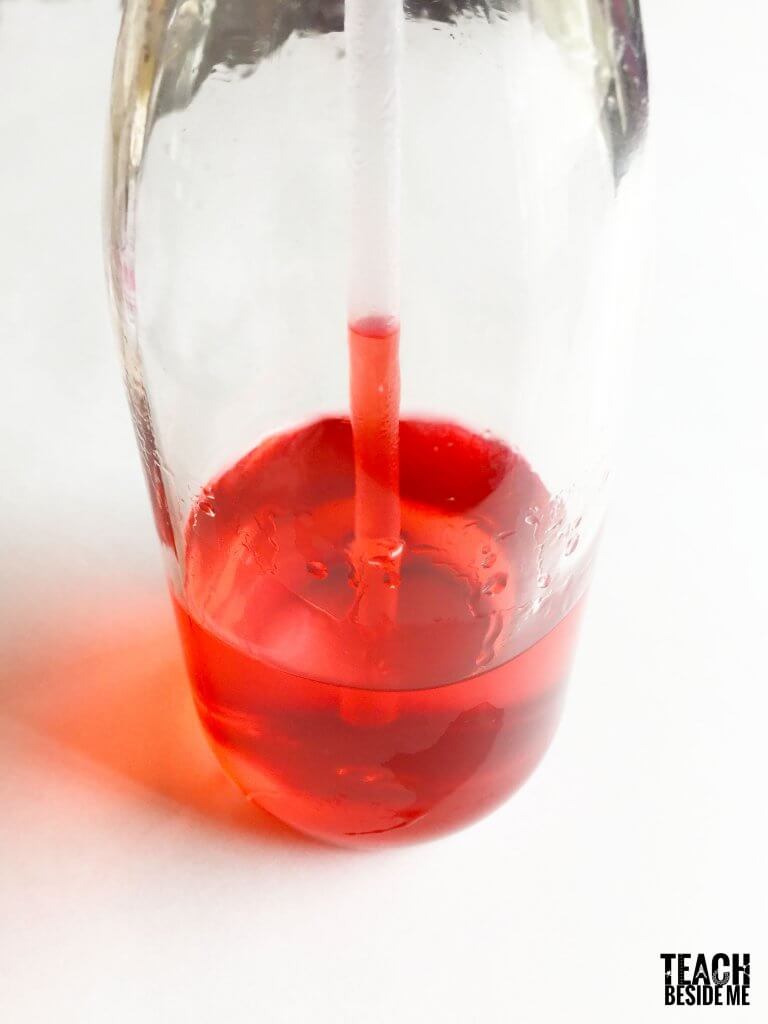
- When the alcohol and water mixture heats up, the liquid expands, increasing the pressure inside the bottle. Since the clay seal prevents air from escaping, the liquid is pushed up the straw.
- When the temperature drops, the liquid contracts and moves back down the straw.
This same principle is used in real thermometers, where substances like mercury or alcohol expand and contract based on temperature changes.
Further Exploration & Questions to Ask Kids
How hot would it need to be for the liquid to rise out of the straw?
Does the thermometer react differently in various locations? Try it in the sun, shade, or indoors.
Can you create a temperature scale? Use a store-bought thermometer to measure the current temperature and mark a line on your homemade thermometer’s straw. Repeat this process in different environments to create a basic scale.
This DIY thermometer is a simple yet powerful way to introduce kids of all ages to temperature changes, pressure, and scientific observation. It’s a fun, hands-on experiment that encourages curiosity and critical thinking. If you try it, let me know how it works for you! Happy experimenting!
Want to Learn More About Thermometers?
Check out my Thermometer Math Activity for a fun way to integrate science and math!
Also explore more awesome Science Experiments for Kids to keep the learning going.
Learn about density with this fun activity: Sink or Float: Density of Salt Water


Love the idea for homemade thermometers! Just wondering if it would still work with isopropyl alcohol?