How to Make a Cereal Box Drawbridge (STEM Engineering for Kids)
This post may contain affiliate links.
Looking for a fun, hands-on way to explore engineering with your kids? Try making a cereal box drawbridge! This simple STEM project teaches kids how drawbridges work — and doubles as an imaginative play space for action figures, toy knights, or LEGO characters.
It’s part craft, part engineering lesson, and a great way to reuse materials you already have at home.

What Kids Learn from This Project
This activity introduces basic engineering concepts such as:
-
Mechanical movement
-
Force and tension
-
Simple machines (pulleys & levers)
-
Recycling and reusing materials
You can easily pair it with a book about castles or bridges for a complete learning unit!
Supplies You’ll Need
-
1 empty cereal box
-
Yarn or string
-
1 paper or plastic straw
-
Hole punch
-
Scissors
-
Glue
-
Paper (for covering/decorating)
-
Markers, crayons, or paint for decoration
Step-by-Step: How to Make a Cereal Box Drawbridge
1. Cover and Decorate the Box
-
Cover the outside of the cereal box with paper and glue it in place.
-
Let the glue dry completely.
-
Trim any excess paper, then decorate! We drew stone bricks to give it a medieval castle look, but you could also paint it.
Tip: If you want the inside covered too, cut the box before gluing the paper on.

2. Cut the Drawbridge Flap
-
On the front of the cereal box, cut down the two side edges — but leave the bottom edge attached to act as a hinge.
-
This will become the front drawbridge flap.

3. Punch the Holes
-
Use a hole punch to make two holes near the top of the drawbridge flap.
-
Punch two more holes in the back/top of the cereal box.

4. Thread the String Mechanism
-
Cut your straw to fit across the back of the box. This will act as a turning handle.
-
Thread a long piece of yarn through the straw and then through the back holes of the cereal box.
-
Tie the two ends of the string to the holes on the drawbridge flap.

The string should be long enough for the flap to lie flat when opened, and taut enough to lift when pulled from the straw handle.

Time to Play and Explore
Your drawbridge is ready to go! Kids can now:
-
Pull the straw to raise and lower the drawbridge
-
Use it as a pretend-play castle entrance
-
Explore how the tension in the string lifts the flap
Pair with toy knights, dragons, or action figures for hours of creative fun.

Extend the Learning
Here are a few extension ideas to explore with older kids:
-
Ask: What happens if the string is too short or too long?
-
Explore friction by trying different string materials
-
Design a double drawbridge with two flaps
-
Challenge them to build a moat around it with LEGO or blocks
Book Pairing Ideas
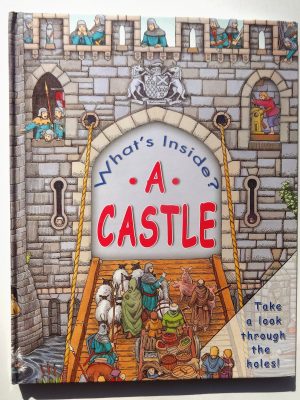
We paired our drawbridge activity with two of our favorite castle-themed books:
These help bring the medieval theme to life and add an educational storytelling layer to your engineering project.

More Hands-On STEM Engineering Projects
If your kids loved this drawbridge activity, check out these related engineering challenges:
Paper Bridge: Easy Engineering Experiment!
STEM Engineering for Kids: Make a Bubble Blower Machine
Engineering: Make Paper Hold Up Books!
Homemade Pantograph Drawing Machine
Three Little Pigs STEM Project for Kids
This cereal box drawbridge is a great way to combine engineering, creativity, and play — all while using materials you already have around the house. Whether you’re homeschooling or just looking for a rainy-day project, it’s a fantastic way to spark curiosity and hands-on learning.


I love how you incorporated an activity along with your books! Something I often try to do.
A super project. We used to make all kinds of stuff from cardboard boxes when I was a kid. Used the old Childcraft books.