Marble Painting for Kids: A Fun Process Art Activity
This post may contain affiliate links.
Looking for an engaging, low-prep art project for kids? Marble painting is a classic process art activity that combines creativity with a little bit of science. Kids love watching the marbles roll and swirl through paint to create unexpected patterns and designs. Best of all, it’s simple to set up, easy to clean, and endlessly adaptable.
This post will walk you through everything you need to know about marble painting: how to set it up, the educational benefits, fun variations to try, and even some teacher tips to make it a go-to activity for home or classroom use.
What Is Marble Painting?
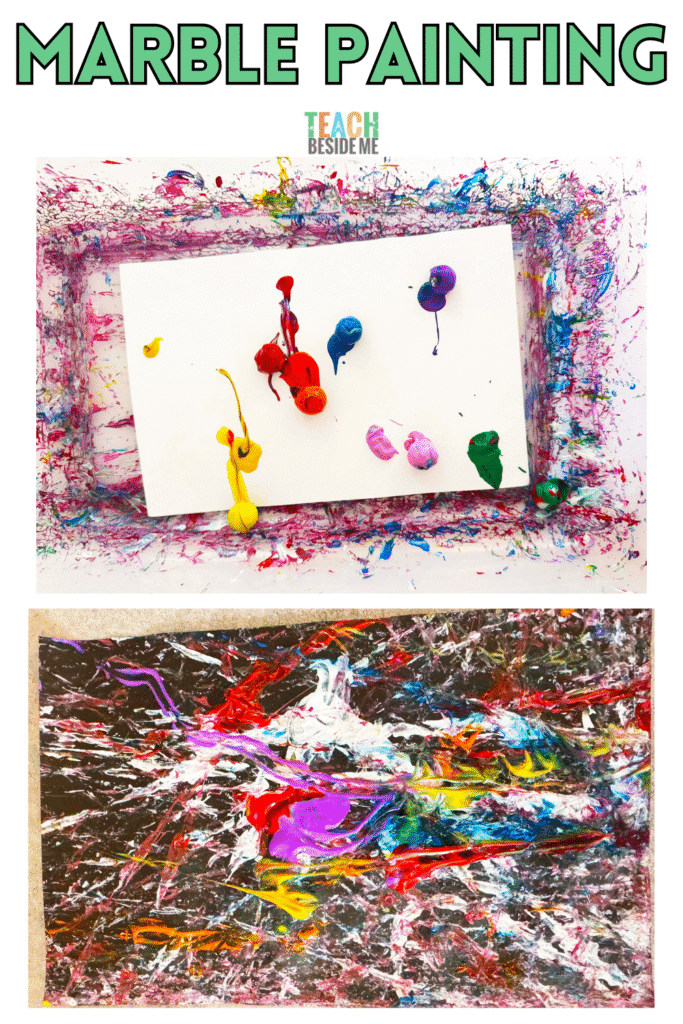
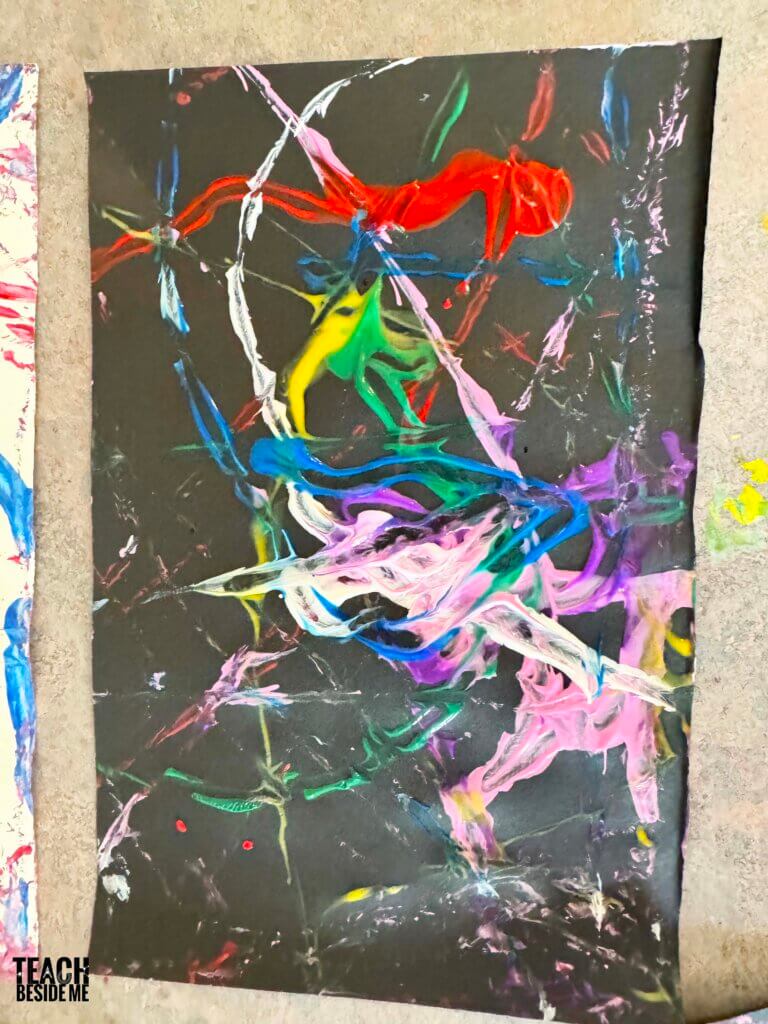
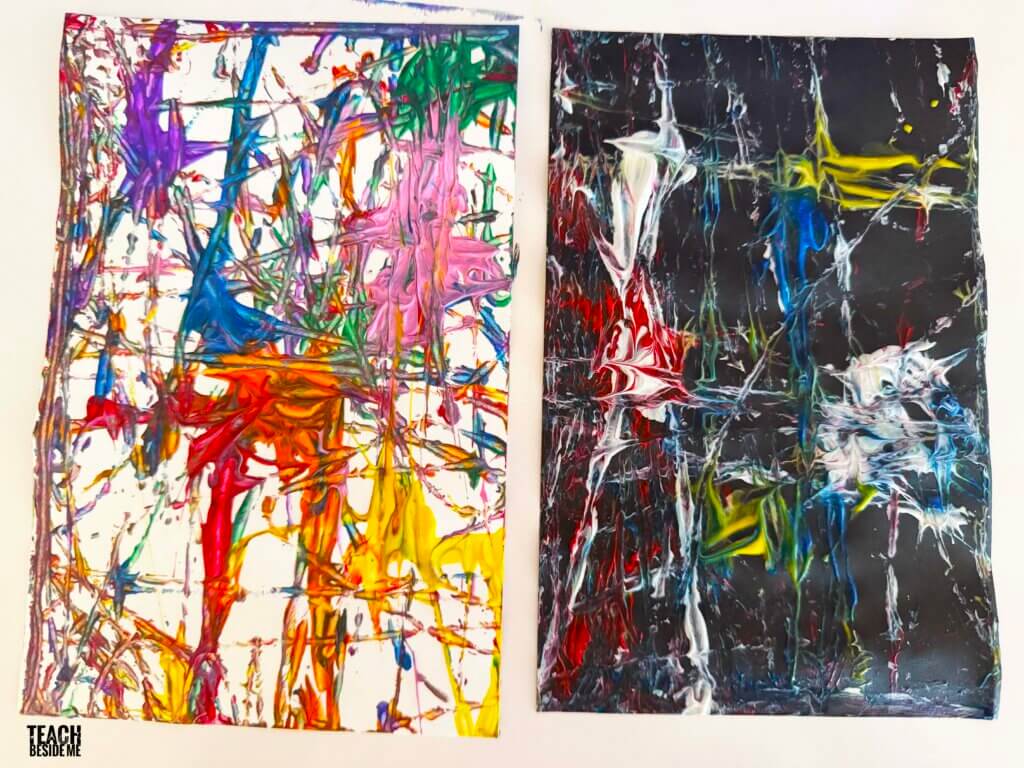
Marble painting is an art activity where children roll paint-covered marbles (or other small balls) across a piece of paper. The marbles leave colorful trails behind, creating a unique abstract masterpiece.
Unlike structured crafts, marble painting is all about the process—experimenting with color, movement, and pattern—rather than trying to achieve a perfect finished product. That makes it ideal for young children, who often learn best through hands-on, exploratory play. I’m teaching a class right now at our homeschool co-op to 5-6 year olds and they LOVED this project!
Supplies You’ll Need
You don’t need fancy materials for this project. Chances are, you already have most of these supplies at home.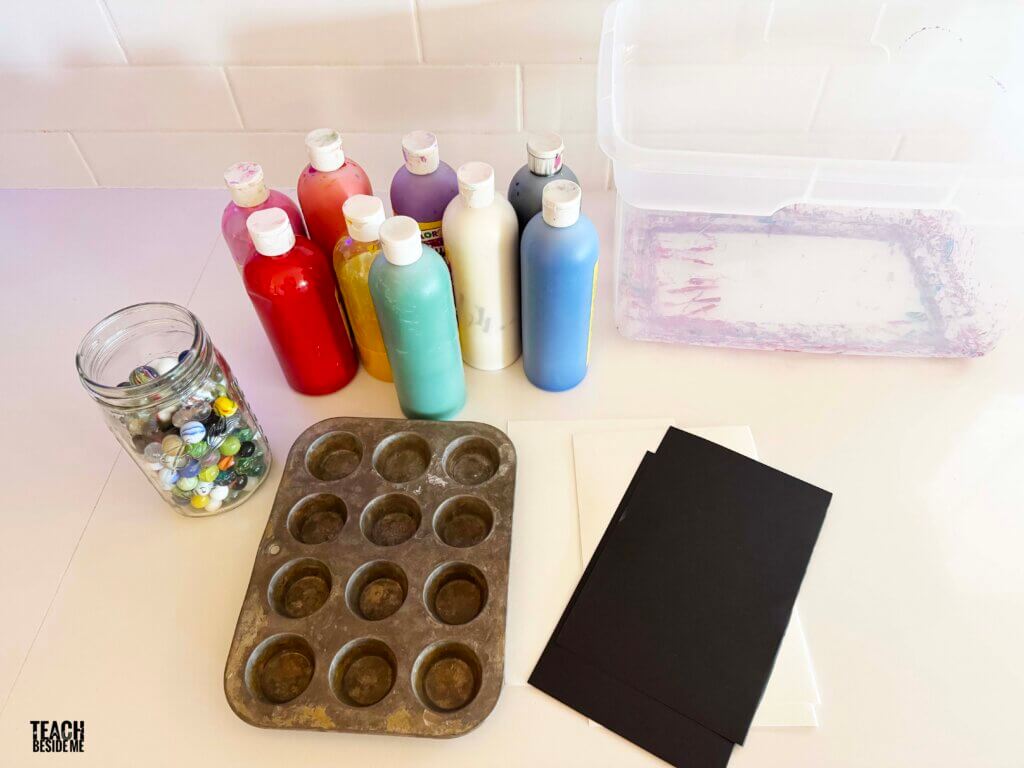
-
A shallow box or plastic bin
-
Cardstock or construction paper- we used both black and white
-
Marbles (ping pong balls or bouncy balls could also work)
-
Spoons or tongs (optional for less mess)
-
Paper towels or wet wipes for clean-up
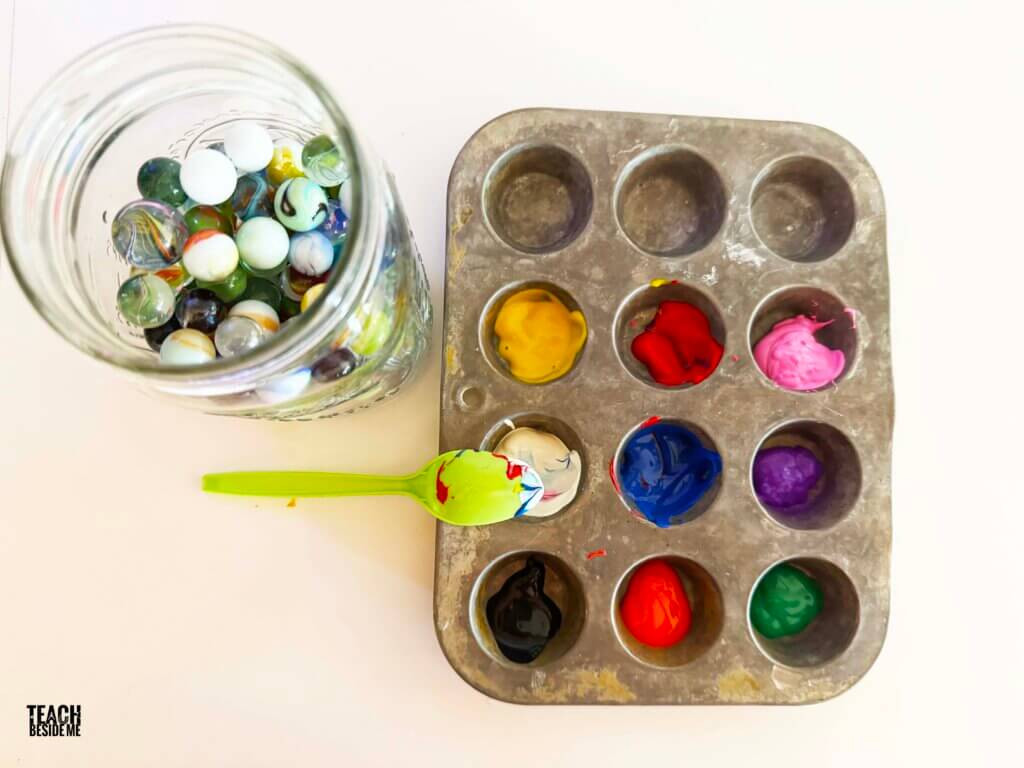
- Small bowls or muffin tins for paint
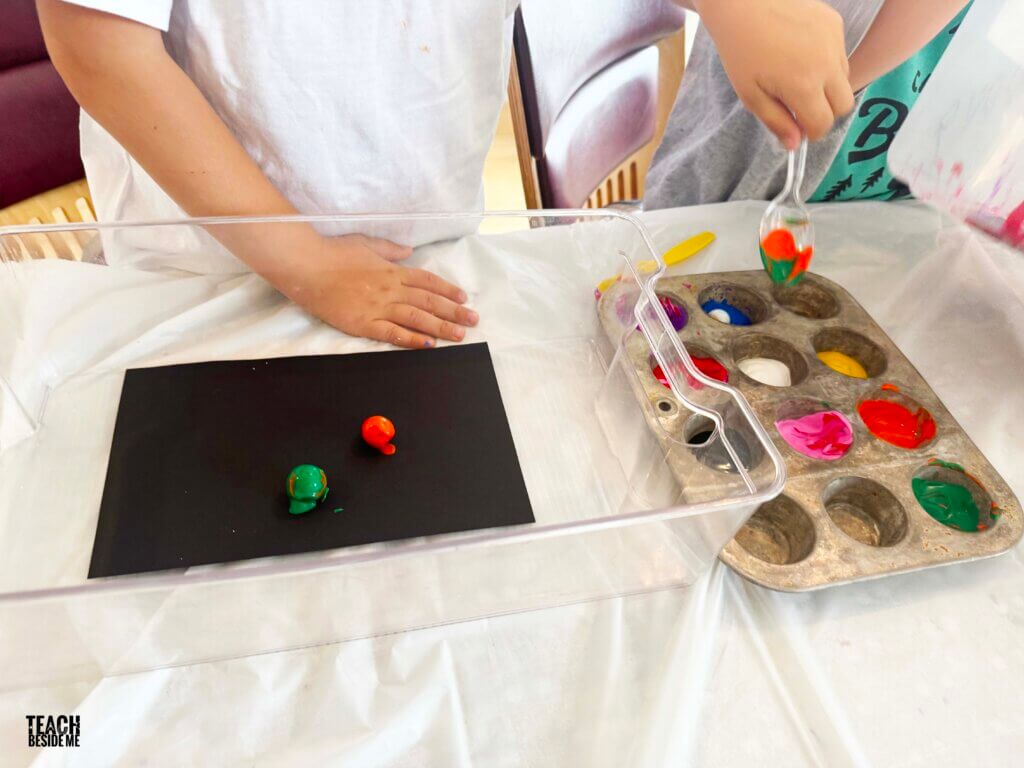
Instructions for Marble Painting
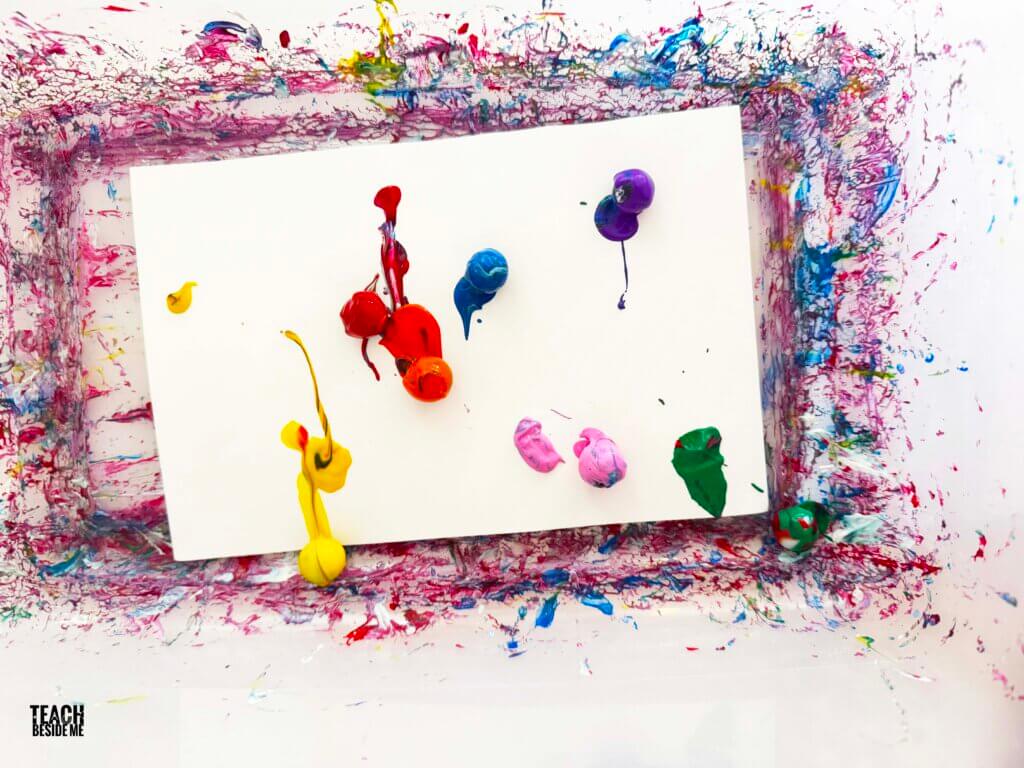
-
Prepare your tray: Place a sheet of paper inside a shallow box or tray. The box keeps the marbles contained while rolling.

-
Add the paint: Dip the marbles into the paint. We used mini muffin tins and spoons, but small cups or bowls would also work well. You could also squeeze drops of paint into the edges of the bin or box, too.
-
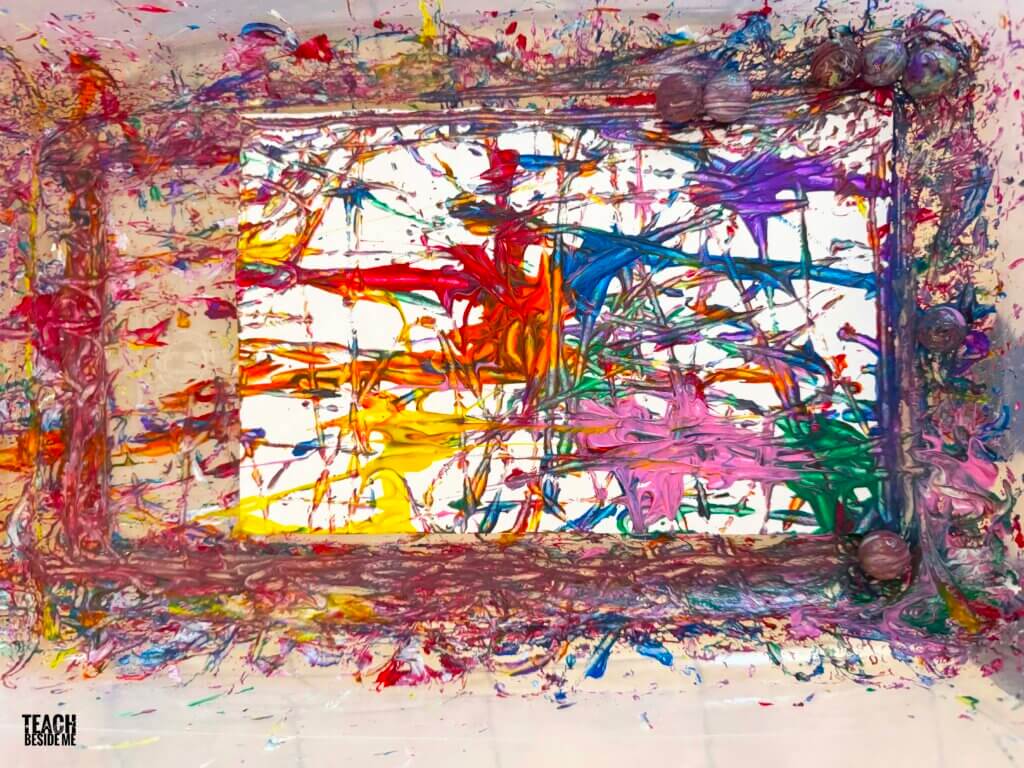
Roll the marbles: Drop the marbles into the tray and gently tilt or shake it so the marbles roll across the paper.
-
Watch the magic: As the marbles move, they leave behind colorful trails and splatters.
-
Repeat: Swap out papers, add new colors, or layer designs.
Educational Benefits of Marble Painting
Marble painting is more than just a fun art project—it’s a sneaky learning opportunity! Here’s what kids can gain from the process:
-
Fine motor skills: Tilting the tray and scooping marbles helps strengthen small hand muscles.
-
Color mixing: Kids see how red and yellow become orange, or blue and red make purple, right before their eyes.
-
Cause and effect: Rolling the tray gently versus shaking it hard leads to very different results.
-
Observation and prediction: Kids can guess which way the marbles will roll and see if they’re right.
-
Creative expression: Every artwork turns out different, encouraging confidence and originality.
For older kids, marble painting can also lead into discussions about motion and force in physics or abstract art in history.
Classroom and Homeschool Tie-Ins
If you’re a teacher or homeschool parent, marble painting can be a versatile addition to your curriculum.
-
Preschool & Kindergarten: Use it as a sensory art activity that builds early motor skills.
-
Elementary Science: Connect it to physics lessons about motion, speed, and direction.
-
Art History: Pair it with lessons on abstract artists like Jackson Pollock.
Variations to Try
Want to mix things up? Try one of these fun twists:
Holiday Themes: Use stencil shapes to add variety.
- Valentine’s Day → use red and pink paper and glue on some hearts
-
Fourth of July → red, white, and blue fireworks
-
Halloween → Use orange and black paper or paints and try to make spider webs
-
Nature-Inspired: Roll pinecones, acorns, or even toy cars through the paint for different textures.
-
Glitter & Glow: Dip marbles in glitter paint or glow-in-the-dark paint for an exciting finish.
-
Collaborative Art: Use a giant piece of paper in a big box and let several kids roll marbles together for a group mural.
-
STEM Twist: Have kids test different tray angles or surfaces (smooth vs. rough paper) and compare how the marbles roll.
Clean-Up Tips
-
Use washable paints for easier cleanup.
-
Use cardboard boxes for quick disposal.
-
Keep a damp towel or baby wipes nearby for messy fingers.
-
Have kids wear aprons or old T-shirts to protect clothing.
Frequently Asked Questions
What age is marble painting good for?
It’s best for ages 3 and up. Toddlers can do it with supervision, but make sure they don’t put marbles in their mouths.
What kind of paint works best?
Washable tempera or acrylic works well. Tempera is the easiest to clean up with kids.
Can you use something other than marbles?
Yes! Try golf balls, toy cars, or bouncy balls for different effects.
Is it messy?
It can be, but using a tray or box helps contain the mess. Washable paint and aprons make cleanup simple.
Why Kids Love It
Marble painting combines movement, surprise, and creativity—all things that keep kids engaged. Since every picture turns out differently, kids love doing it again and again.
It’s also a wonderful project to set out for a group: low-prep, quick setup, and adaptable for any age.
Marble painting may be a classic, but it’s a timeless favorite for a reason. It’s fun, fast to set up, and filled with creative learning opportunities. Whether you’re looking for a rainy-day activity, a preschool art project, or a classroom science tie-in, this process art activity is a winner.
So grab a box of marbles and some paint—you’ll be amazed at what your kids create!
See More fun Art Projects for Kids:
Science Art: Chromatography Coffee Filter Flowers
Science Art: Spin Art Painting Flower Craft
Chihuly Art Project for Kids with Melted Plates