How to Make a Rhombicuboctahedron: A Fun 3D Geometry Craft for Kids
This post may contain affiliate links.
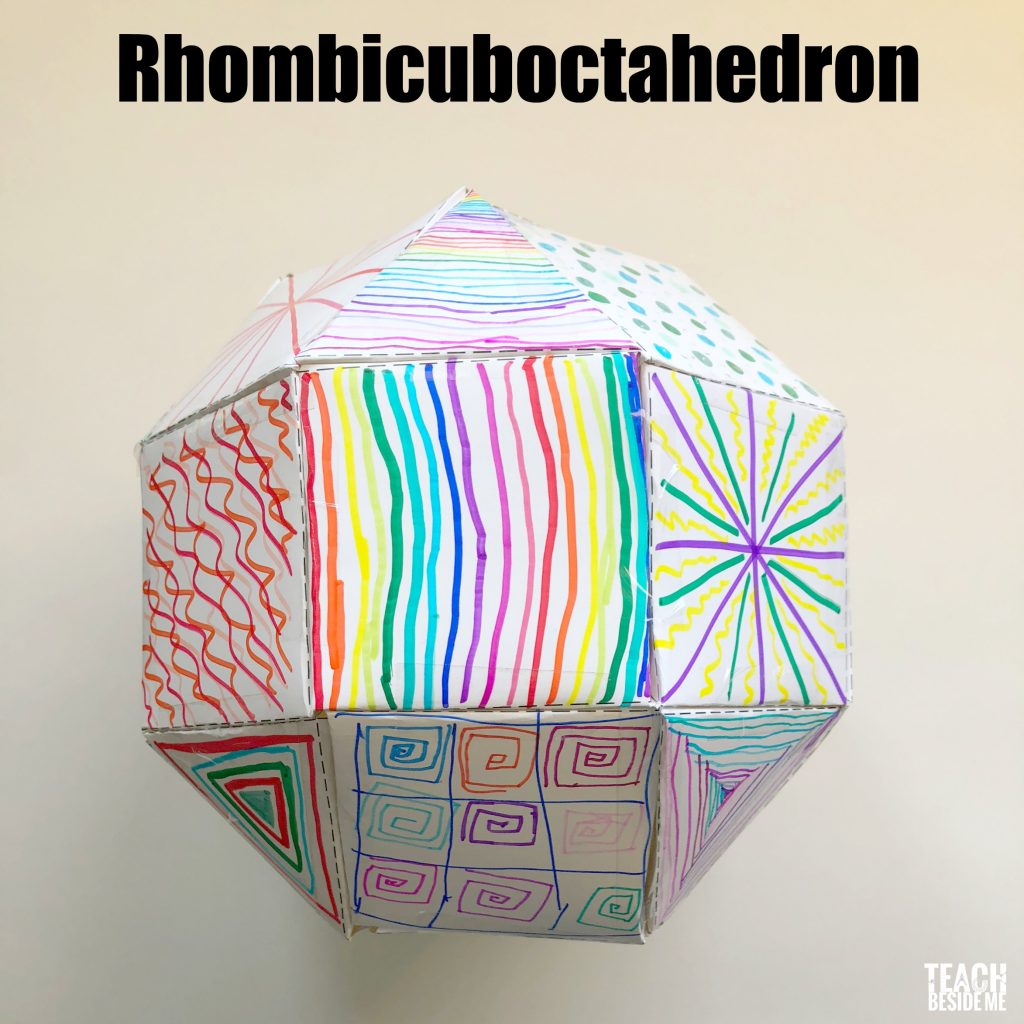
If your kids enjoy hands-on math activities, you’re going to love building this impressive 3D geometric shape: the rhombicuboctahedron! (Even spellcheck doesn’t recognize it!) This unusual solid has 8 triangular faces and 18 square faces—a fantastic way to bring geometry to life.
This shape was named in the 1600s by astronomer and mathematician Johannes Kepler. Its full (and far less pronounceable) name is truncated cuboctahedral rhombus, but we’ll stick with rhombicuboctahedron!

What Is a Rhombicuboctahedron?
- A 3D solid shape made of 8 equilateral triangles and 18 squares.
- One of the Archimedean solids, meaning it has regular polygons as faces and the same arrangement of faces at each vertex.
- A great geometry challenge for older kids and teens!

We like to make our shapes pretty, so my daughter and I colored it, of course!

She is in love with her pretty creation. I am in love with her.
Supplies Needed:
- Printable template (available in my shop)
- Cardstock paper for durability
- Scissors
- Clear tape or glue
- Markers or colored pencils (optional, for decorating)
Don’t worry! I have a printable template for you at the end of the post!
Color or decorate to your heart’s delight. Get yourself some fun markers. We LOVE our fine point Sharpies.
Step-by-Step Instructions
1. Print the Template
You’ll need:
- 18 square faces (9 pages)
- 8 triangle faces (4 pages)
Print on cardstock for best results.
2. Decorate (Optional)
Use markers or colored pencils to decorate the faces before cutting. We used fine-point Sharpies to add fun designs and color. My daughter loved personalizing her creation!

3. Cut & Fold
Carefully cut out each shape. Fold along all the tab lines inward.
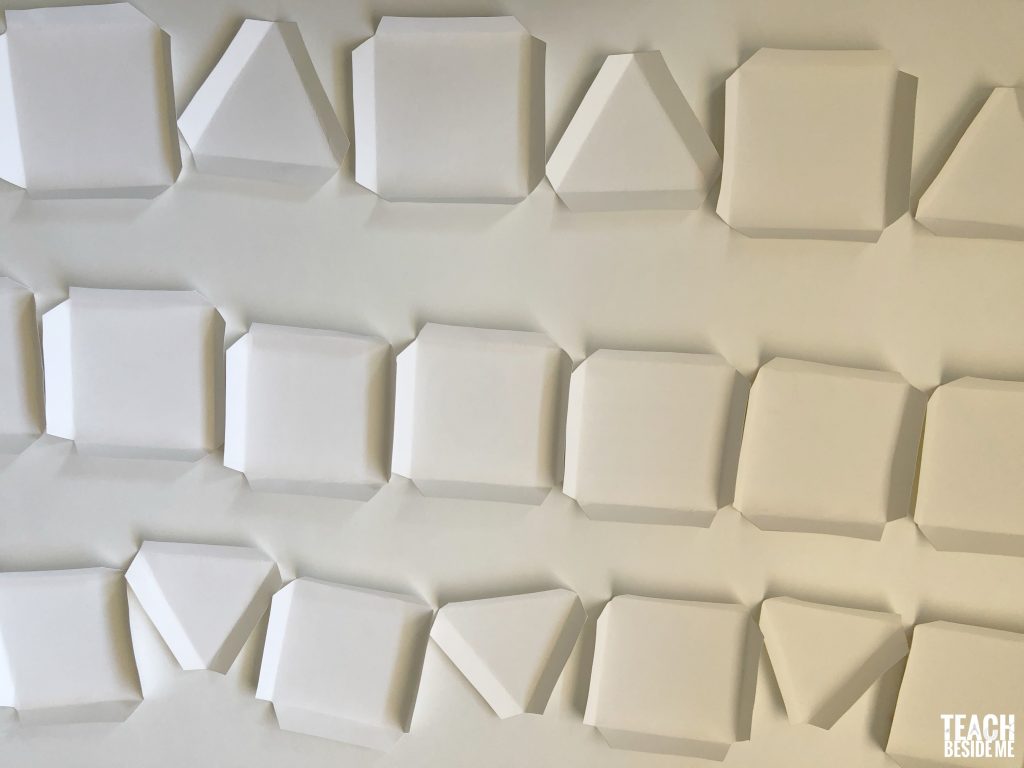
4. Assemble in Rows
Lay out your pieces in three horizontal rows:
- Top row: Alternating squares and triangles (4 of each), starting with a square. The triangles should point upward.
- Middle row: 8 squares in a row.
- Bottom row: Alternating triangles and squares (4 of each), starting with a triangle. The triangles should point downward.
You will have 2 square faces left—these will be used to close the top and bottom of the model.

5. Attach the Middle Row
Use tape or glue to connect the 8 squares into one long strip. Form the strip into a loop (a ring of squares) and secure it.

6. Attach the Top and Bottom Rows
Connect the top row to one edge of the square ring. Then attach the bottom row to the other edge.

7. Close the Shape
Fold and attach all the faces upward and inward until the shape closes. Finally, attach the last two square faces to complete the shape.
You’ve now built your own rhombicuboctahedron!

Geometry and Learning Connections
- Hands-on spatial reasoning
- Shape recognition
- Fine motor skills
- Math vocabulary enrichment
This project is perfect for upper elementary through middle school and makes a fantastic classroom or homeschool activity.
My kids have been making this shape out of their magformer toys for a while and had to compare!

See more of our 3-D Shape projects:
Stellated Dodecahedron, Icosahedron, and 3-D Paper Shapes
Want the Rhombicuboctahedron Template?
The full printable template is available in my shop! It includes the triangle and square face pieces, plus folding tabs for easy construction.
Find it here:
![]()
![]()
![]()
Check out my new Math Art Book!


School Principal always looking for resources
Looks like interesting projects I could use in my class.
What age kids would you say this is good for? Thanks!