Cauliflower Brain Model With Labels + Free Brain Diagram
This post may contain affiliate links.
Looking for a creative way to make a brain model for a science or human anatomy lesson? Grab a head of cauliflower!
A cauliflower makes a surprisingly fun base for creating a 3D brain model. Its rounded shape and bumpy surface are visually reminiscent of the folds of the human brain, and when you cut it in half, you can use one side to model the external parts of the brain and the other to explore some of the structures found inside.
In this hands-on brain anatomy activity, we’ll make both an external and internal brain model, paint the major regions, and add labels to identify the different parts.
I’ve also created printable brain diagrams to go along with the activity. You can download a set of free labeled brain diagrams below.
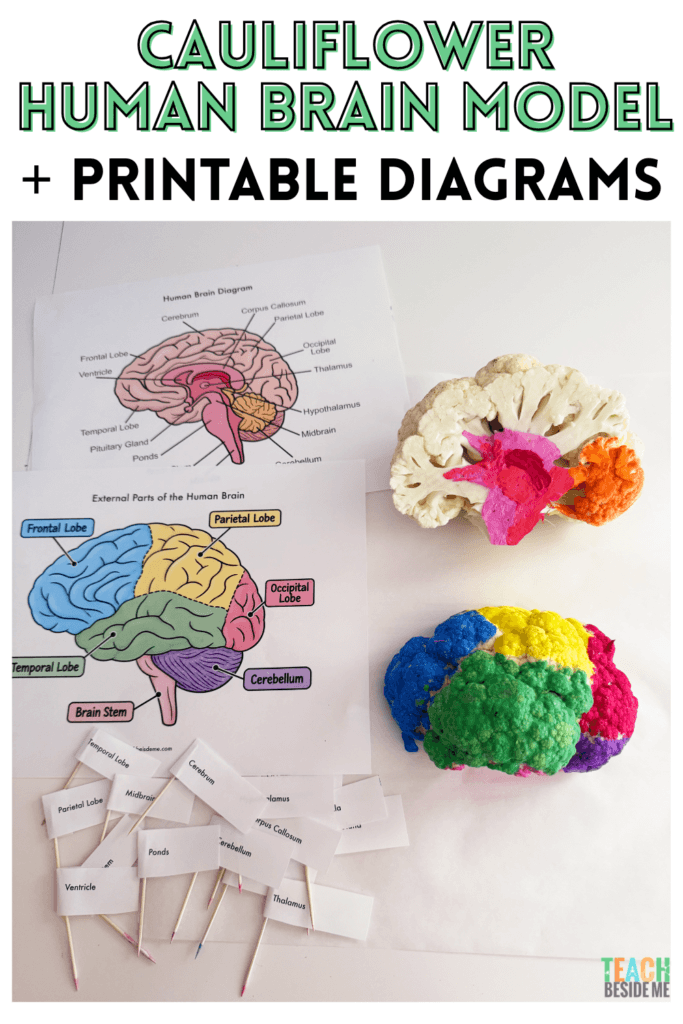
Make a 3D Brain Model With a Cauliflower
I love using everyday objects to help kids visualize science concepts. A cauliflower is particularly fun for a brain model because its overall shape and highly textured surface immediately makes you think of a brain.
Of course, a cauliflower isn’t perfectly structured like a human brain. The human cerebrum has a folded outer layer called the cerebral cortex, with raised folds called gyri and grooves called sulci. The bumps of a cauliflower aren’t equivalent to these structures. But, a cauliflower is great as a scientific model!
Supplies for the Cauliflower Brain Model
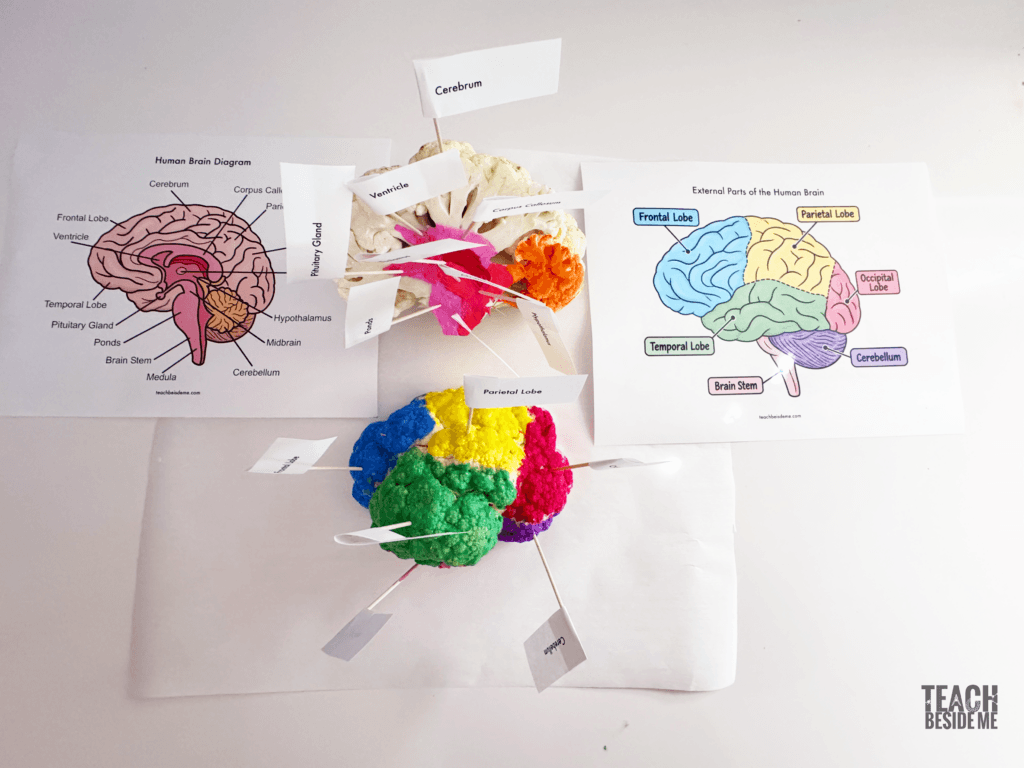
To make your cauliflower brain model, you’ll need:
- One whole head of cauliflower
- Washable or acrylic paints
- Paintbrushes
- Toothpicks
- Scissors
- Tape
- Printable brain labels
- Labeled brain diagrams for reference
- Knife and cutting board
- Parchment paper or another protected work surface
The printable labels from my Brain Anatomy Printable Pack can be cut out and attached to toothpicks to create little flags for labeling the finished models.
Cut the Cauliflower in Half
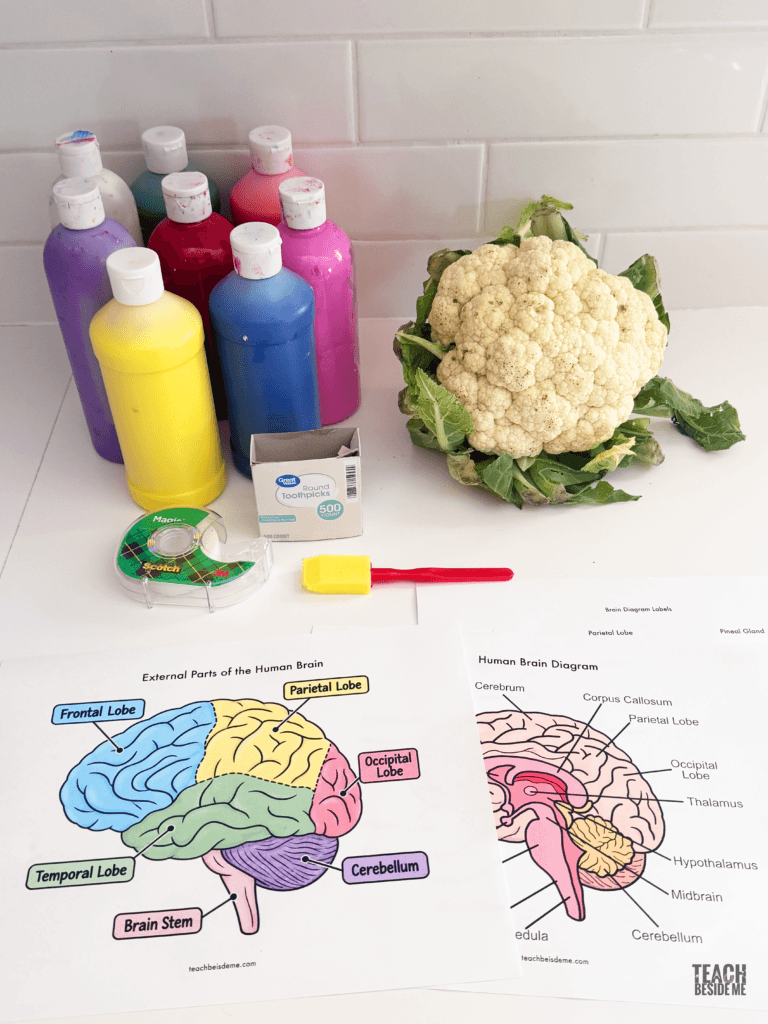
Start by having an adult cut the cauliflower in half from top to bottom.
You’ll use one half to make an external brain model and the other half to make an internal brain model. This makes it possible to create both models with just one head of cauliflower.
Place both halves on parchment paper or another protected work surface while you paint.
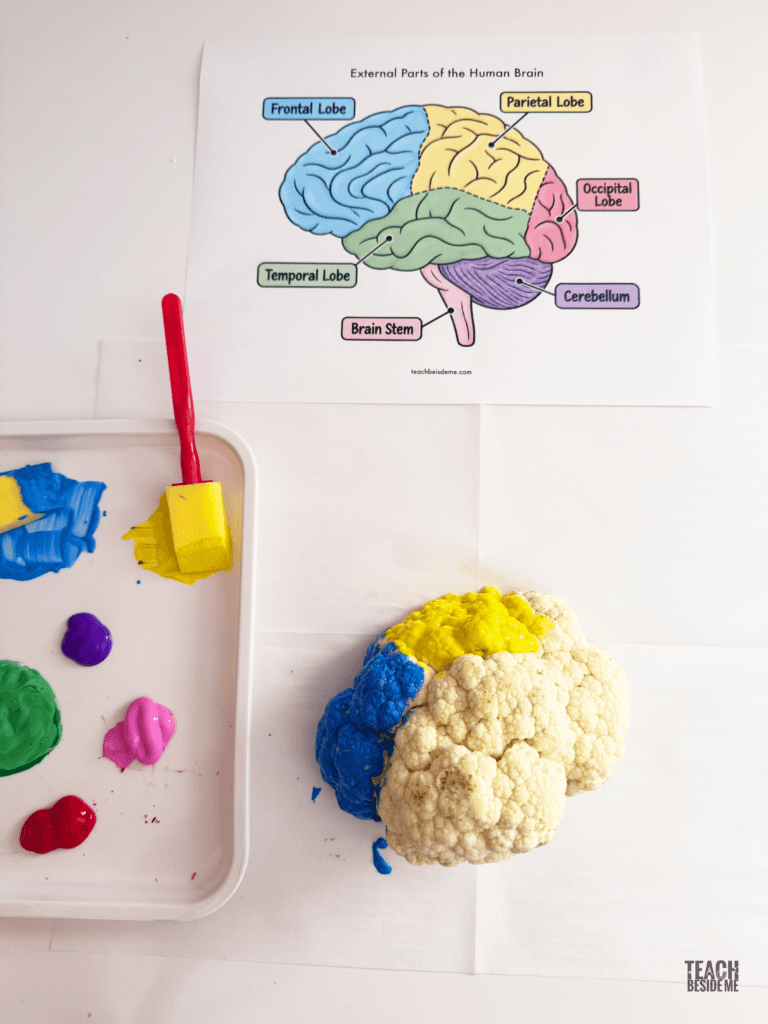
Part 1: Make an External Brain Model
Take one cauliflower half and place it with the rounded side facing up.
The cerebrum is the largest part of the brain and is divided into two cerebral hemispheres. Each hemisphere can also be divided into four major lobes: the frontal, parietal, temporal, and occipital lobes.
For our model, we’re going to use different colors to represent these major regions.
Frontal Lobe – Blue
The frontal lobe is located toward the front of the brain. It is involved in planning, decision-making, voluntary movement, problem solving, and many aspects of thinking and behavior.
Use your external brain diagram as a guide and paint the front portion of the cauliflower blue.
Parietal Lobe – Yellow
The parietal lobe is located behind the frontal lobe toward the upper part of the brain. It helps process sensory information such as touch and contributes to spatial awareness.
Paint this upper region yellow.
Temporal Lobe – Green
The temporal lobe is found along the lower sides of the brain. It plays important roles in hearing, language, and memory.
Paint the lower side region green.
Occipital Lobe – Red
The occipital lobe is located toward the back of the brain and is primarily responsible for processing visual information.
Paint the back portion of the model red.
Cerebellum – Purple
The cerebellum is located underneath the back portion of the cerebrum. It plays an important role in balance, coordination, posture, and movement.
Use purple to represent the cerebellum.
Brain Stem – Pink
The brain stem connects the brain to the spinal cord. It helps control essential automatic functions that happen without us consciously thinking about them.
Use pink to represent the brain stem.
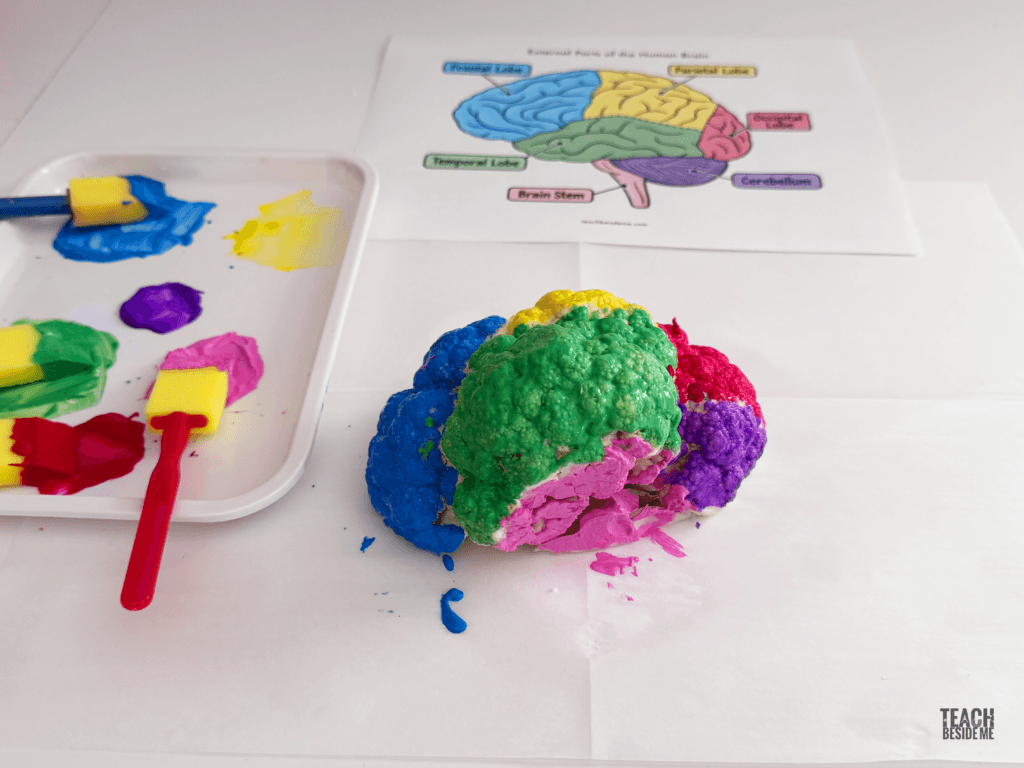
A Note About Our Cauliflower Brain
The natural sections of your cauliflower don’t correspond to the actual regions of a human brain. A real brain has anatomical landmarks that help define the boundaries between its lobes. Our cauliflower doesn’t.
The colored sections are simplified representations. Use an accurate brain diagram as your guide rather than treating the natural divisions of the cauliflower as actual brain structures.
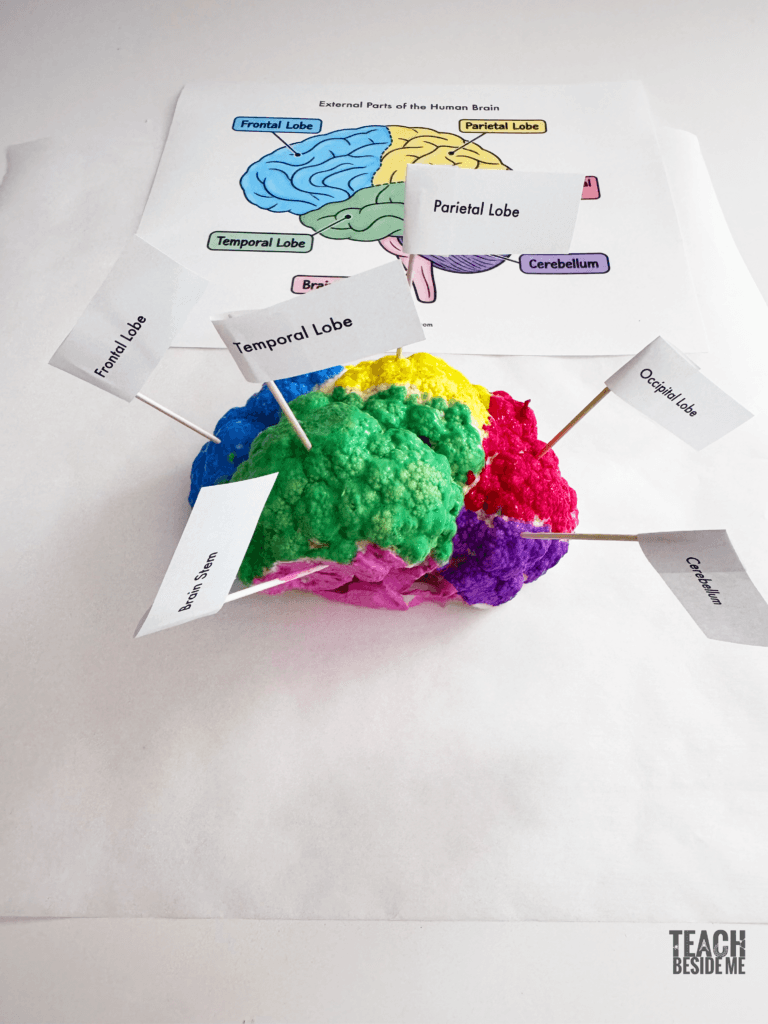
Add Labels to the External Brain Model
Now it’s time to label your cauliflower brain model.
Cut apart the printable labels and attach them to toothpicks using tape to make small flags. Then use your labeled brain diagram to determine where each flag belongs.
The external diagram has the following:
- Cerebrum
- Frontal Lobe
- Parietal Lobe
- Temporal Lobe
- Occipital Lobe
- Cerebellum
- Brain Stem
Give kids the labeled brain diagram and let them figure out where each one belongs.
Part 2: Make an Internal Brain Model
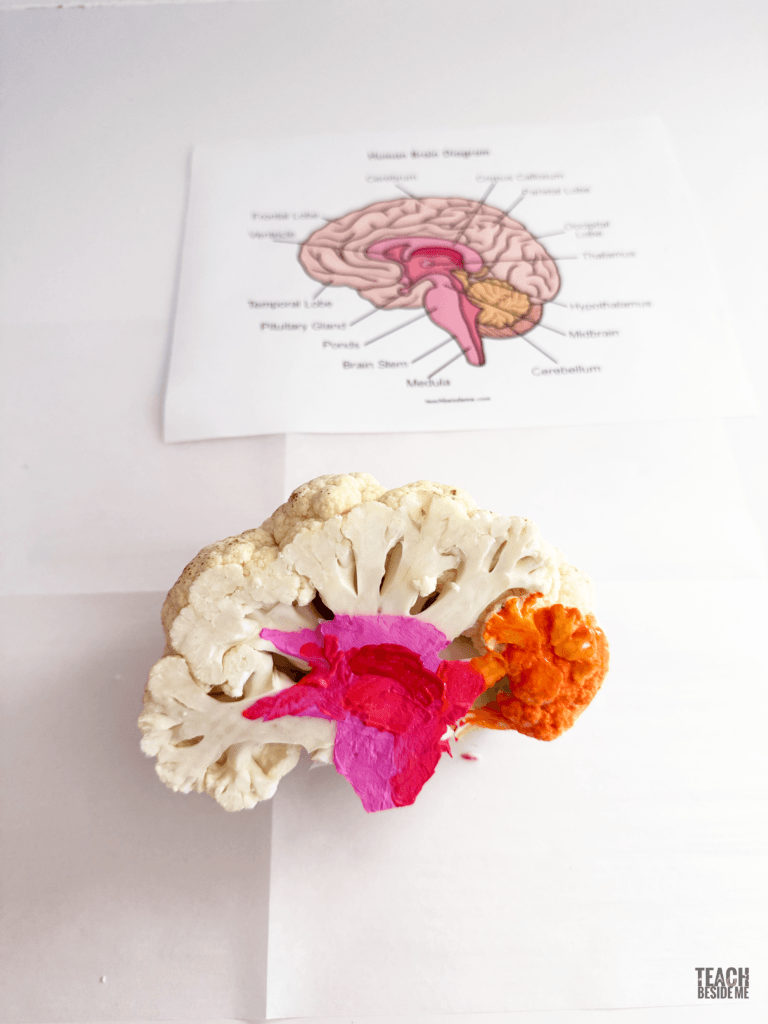
Now take the other cauliflower half and turn it cut-side up.
The flat interior of the cauliflower becomes a canvas for creating an internal view of the brain.
Compare the cut cauliflower with the internal brain diagram in the printable pack. When we look at a cross-section of a human brain, we can identify structures that we can’t see in the same way from an external view.
Using the diagram as your guide, paint simplified representations of the internal brain structures onto the flat surface of the cauliflower.
You don’t necessarily have to cover the entire cut surface with paint. You can leave some of the natural cauliflower showing and use color to highlight the structures you want students to identify.
Learning About the Internal Parts of the Brain
As you paint and label the model, talk about what the different structures do.
For example, the corpus callosum is a large bundle of nerve fibers that connects the brain’s left and right cerebral hemispheres, allowing information to pass between them.
The ventricles are interconnected spaces in the brain that contain cerebrospinal fluid.
The thalamus helps relay much of the sensory information traveling to the cerebral cortex, while the hypothalamus helps regulate important functions including body temperature, hunger, thirst, sleep, and hormone activity.
The pituitary gland produces and releases hormones involved in growth and many other body processes and works closely with the hypothalamus.
The brain stem connects the brain with the spinal cord and is involved in essential automatic body functions. The medulla, located in the lower portion of the brain stem, helps regulate functions such as breathing, heart rate, and blood pressure.
And the cerebellum, found at the lower back of the brain, plays an important role in balance, posture, coordination, and movement.
Use the terms included on your printable diagram to decide how detailed you want your internal model to be.
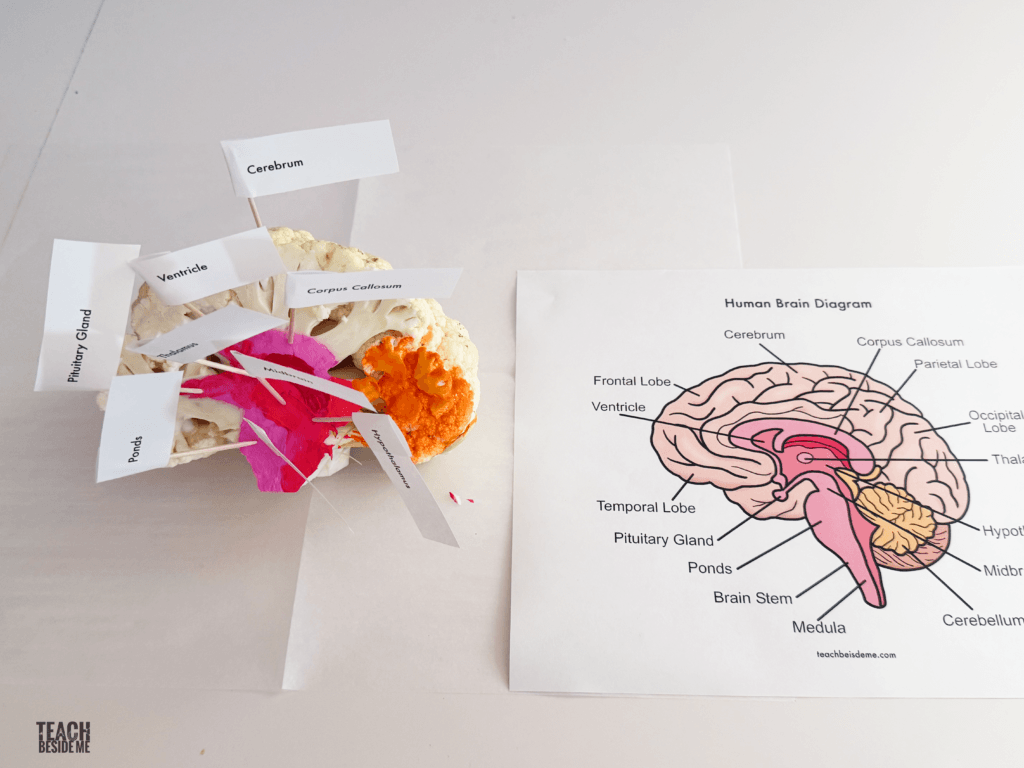
Add Labels to the Internal Brain Model
Once your internal model is painted, add the toothpick flags just as you did with the external brain.
Have students compare the model with the labeled internal brain diagram to determine where each label belongs.
Printing tip: Some structures are shown on both the external and internal brain diagrams. If you’re labeling both cauliflower models at the same time, you may want to print two copies of the cut-apart labels so you’ll have duplicates of those terms.
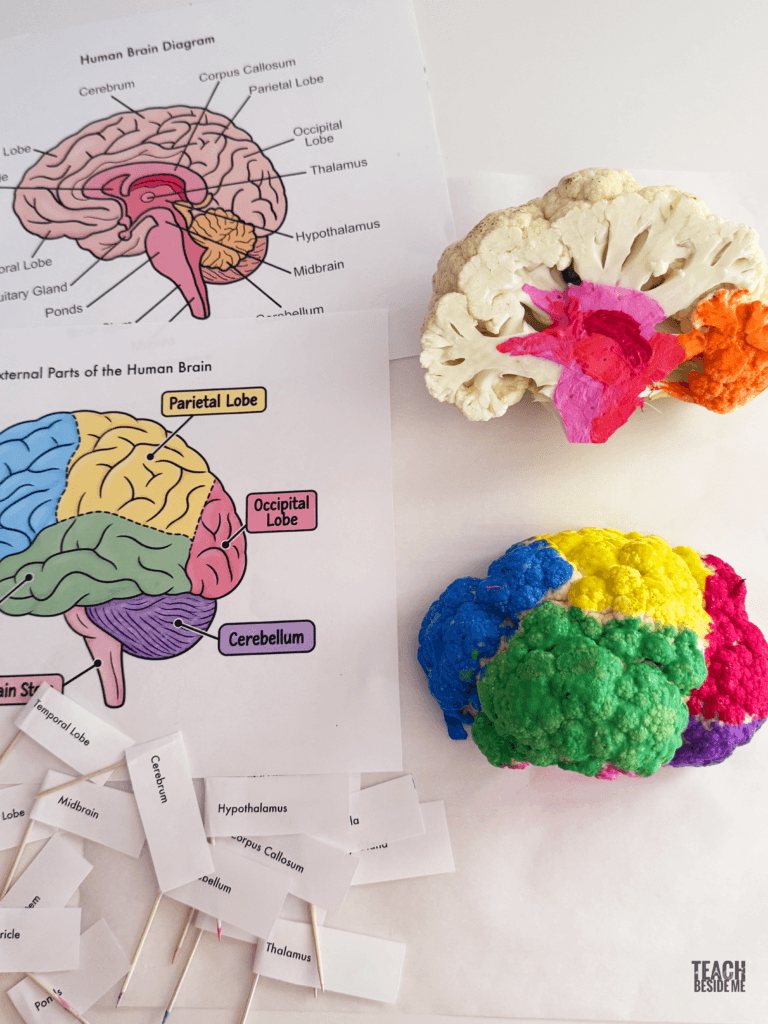
Free Labeled Brain Diagram
Want a simple reference to use while learning about brain anatomy?
Kids can use the diagram as a reference while painting their brain model, identifying structures, or studying the basic anatomy of the human brain.
I created the Brain Anatomy Printable Pack to make it easy to extend this hands-on activity into a more complete brain anatomy lesson.
The 7-page printable set includes:
- Labeled exterior brain diagram in color and black & white
- Unlabeled exterior brain diagram in black & white
- Labeled interior brain diagram in color and black & white
- Unlabeled interior brain diagram in black & white
- Cut-apart labels for the cauliflower brain model
GET THE COMPLETE BRAIN ANATOMY PRINTABLE PACK HERE
The diagrams can also be used completely independently of the cauliflower activity, making them useful for human body units, anatomy lessons, homeschool science, classrooms, or science centers.
Brain Anatomy Labeling Activity
You don’t have to build the cauliflower model to use the printable diagrams.
After students have studied the labeled versions, give them an unlabeled brain diagram and have them identify the structures themselves.
You can provide the labels as a word bank for younger students or have older students write the terms independently.
Then have students compare their completed diagrams with the labeled versions to check their work.
You could also reverse the process: let students attempt the unlabeled diagram first, build the cauliflower brain, and then return to their original diagram afterward to see what they can now identify.
Teach the Functions of the Brain, Too
Identifying the structures is only part of learning brain anatomy. As kids paint and label their models, keep asking:
What does this part of the brain do?
For younger students, you can keep the functions very simple:
- Frontal lobe – thinking, planning, and movement
- Parietal lobe – touch and spatial awareness
- Temporal lobe – hearing, language, and memory
- Occipital lobe – vision
- Cerebellum – balance and coordination
- Brain stem – essential automatic body functions
For older students, use the descriptions throughout this post to go into greater detail about structures such as the thalamus, hypothalamus, corpus callosum, pituitary gland, and medulla.
You could even have students choose several labels on their finished cauliflower brain and explain aloud what each structure does.
That turns the model from a simple labeling activity into a lesson about how the different parts of the brain work together.
Kids aren’t just learning the parts of the brain. They’re also learning how scientists use models to represent and study things that are difficult to observe directly.
More Human Body Activities
If you’re studying human anatomy, pair this brain model with some of my other hands-on human body activities and printable resources.
Playing Doctor: DIY Doctor Play Set for Kids (With Printable X-Rays)