How to Make a Water Bottle Rocket (Easy 2-Liter Bottle STEM Project)
This post may contain affiliate links.
Can you launch a soda bottle over your house using only water and air? This exciting water bottle rocket experiment is one of the most memorable STEM activities for kids. Using a recycled 2-liter bottle, water, and a bike pump, children can build and launch their own rocket while learning about air pressure, propulsion, engineering, and Newton’s Laws of Motion.
Whether you’re planning a summer science activity, homeschool lesson, STEM camp project, or backyard experiment, kids will love watching their homemade rocket blast into the sky.
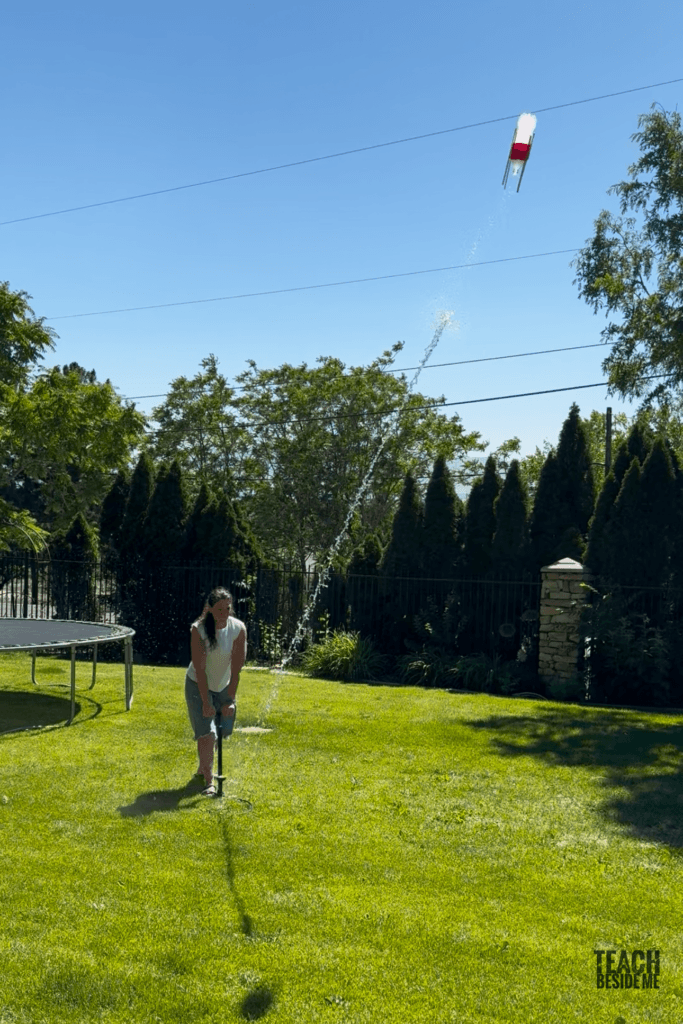
Funny story. The first time I tested this, I knew the rocket worked when it disappeared.
It shot high into the air and vanished completely. I ended up running down the street, peering through bushes, and scanning the sky before finally spotting it lodged at the very top of the tallest tree in our yard. Needless to say, that rocket was not coming back down!
Why Kids Love Water Bottle Rockets
Water bottle rockets combine science, engineering, and outdoor play in one exciting activity. Kids get to design their rocket, make predictions, test different variables, and watch the results in real time.
This activity teaches:
- Air pressure
- Forces and motion
- Newton’s Laws of Motion
- Engineering design
- Problem-solving
- Scientific observation
Plus, it’s just plain fun!
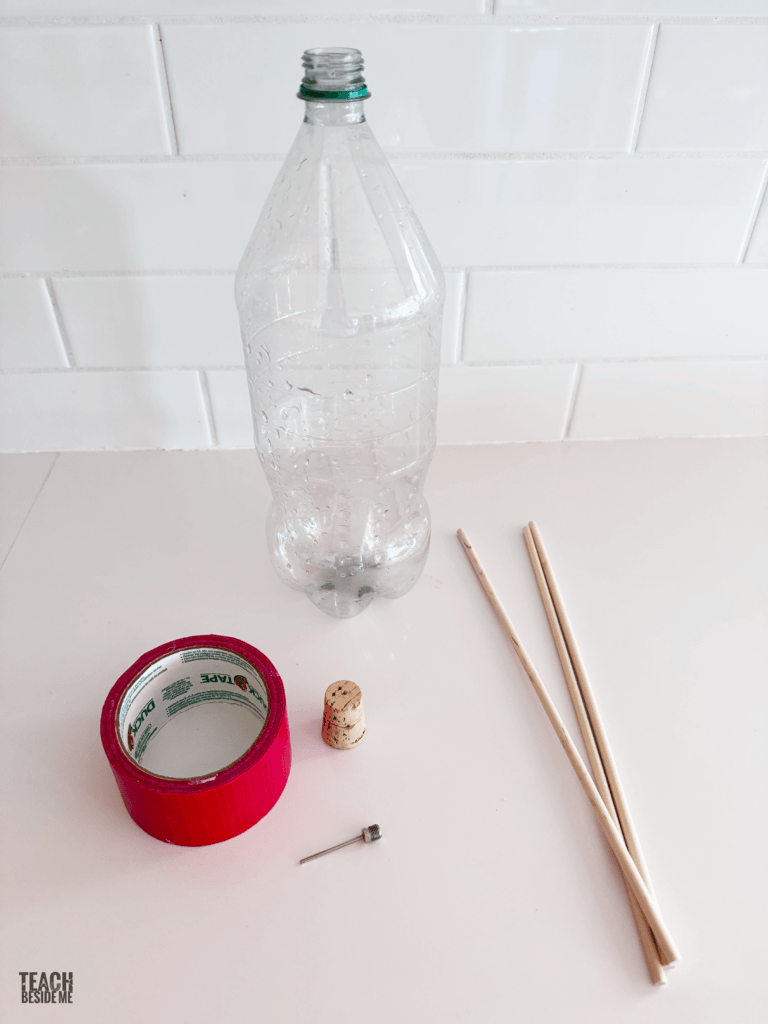
Materials Needed
- Empty 2-liter plastic soda bottles
- Water
- Rubber stopper or cork that fits tightly into the bottle opening
- Bike pump with needle attachment
- Drill, skewer, or nail
- Duct tape
- Cardboard or craft foam- Optional for decorating
- Straws, wooden skewers, or pencils
- Rocket Lab Sheet- Optional, but fun! Download below!
How to Build a Water Bottle Rocket
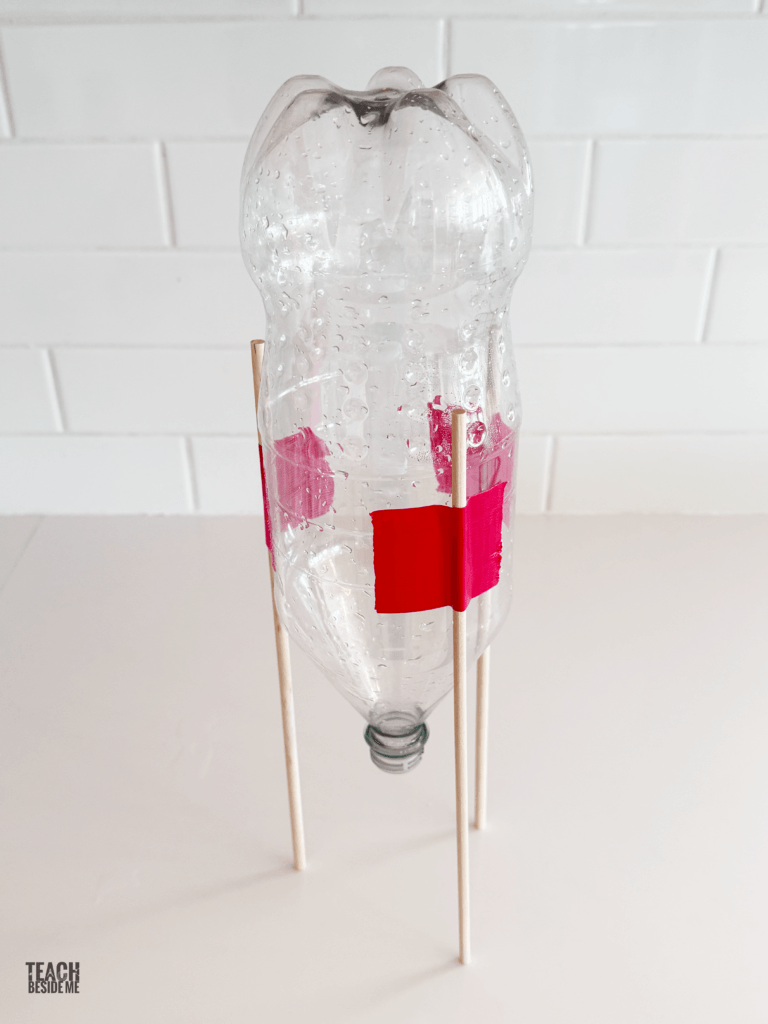
Step 1: Design and Stabilize Your Rocket
Remove labels from the bottle.
Optional- Decorate the bottle if desired and add fins or a nose cone using cardboard, foam sheets, or recycled materials. It’s not necessary, just fun if kids want to!
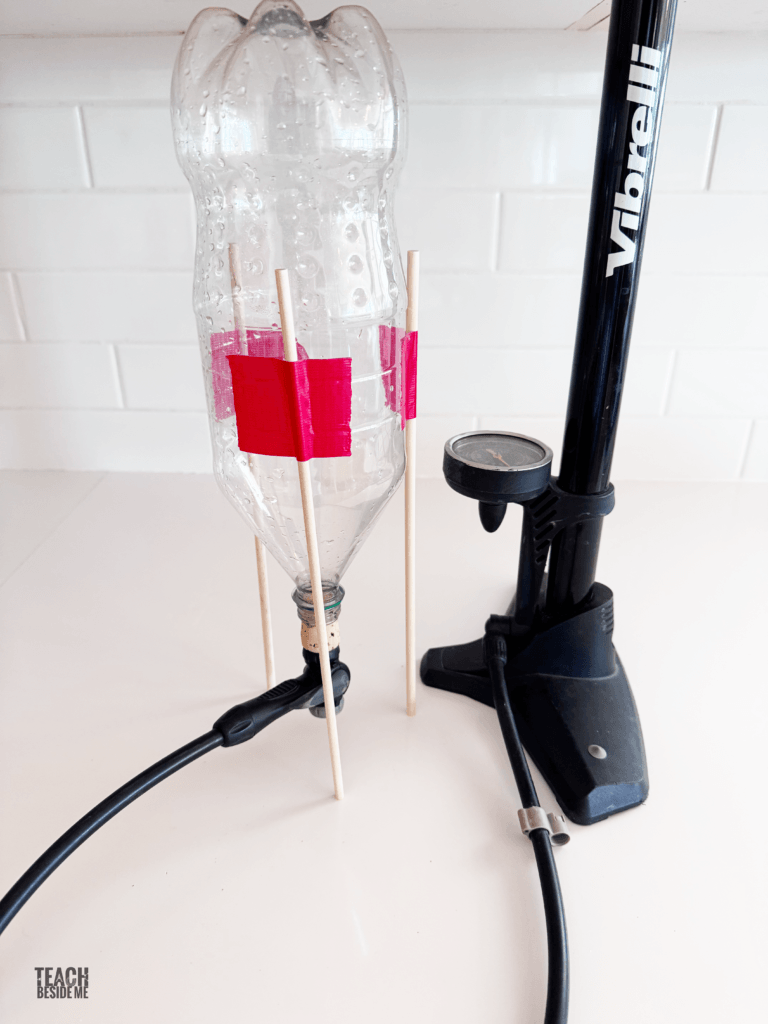
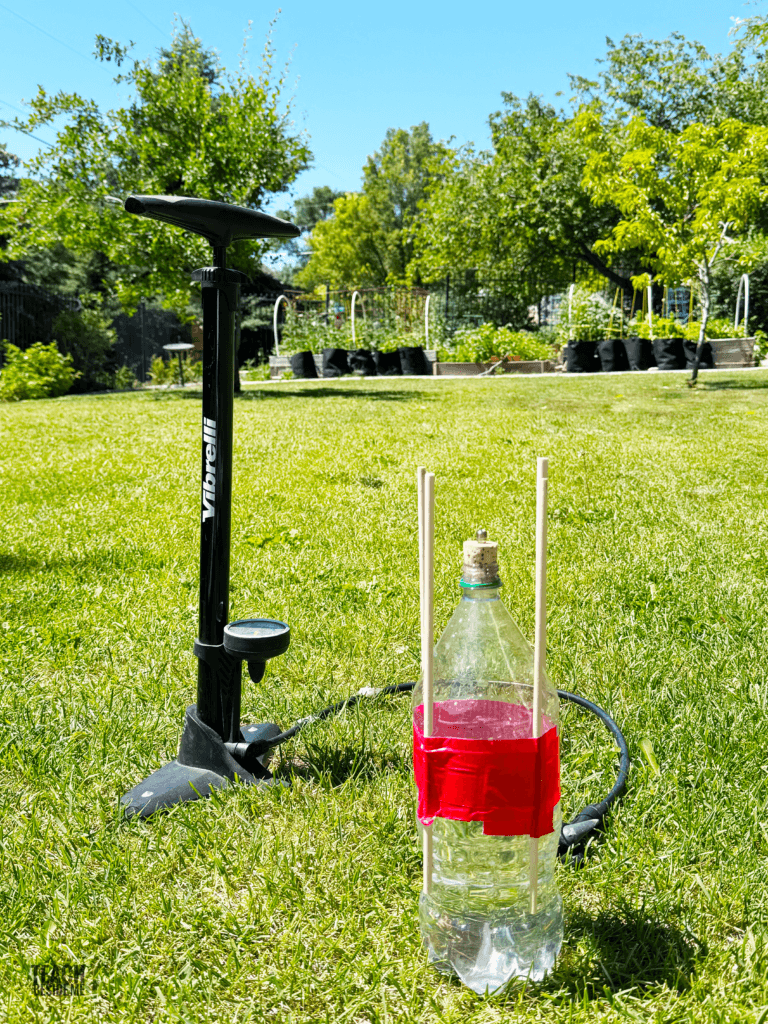
Using duct tape, attach wooden skewers, pencils or straws to the sides of the bottle so it can stand up on its own.
Pictured you will see three wooden dowels. I ended up adding a fourth so it would balance better on the grass. I also secured them better by wrapping more tape around them.
Remember: the bottle launches upside down, so the bottom becomes the top of your rocket.
Step 2: Create the Launch Plug
Drill a small hole through the center of the cork or rubber stopper. I used a tiny screw driver and just twisted it right through the cork with no problem.
Insert the bicycle pump needle through the hole. The fit should be snug enough to prevent air from leaking.
Step 3: Add Water
Fill the bottle about one-third full with water. Use a pitcher or a hose to fill your bottle outside.
This is often the best starting point because it provides enough reaction mass while still leaving room for compressed air.
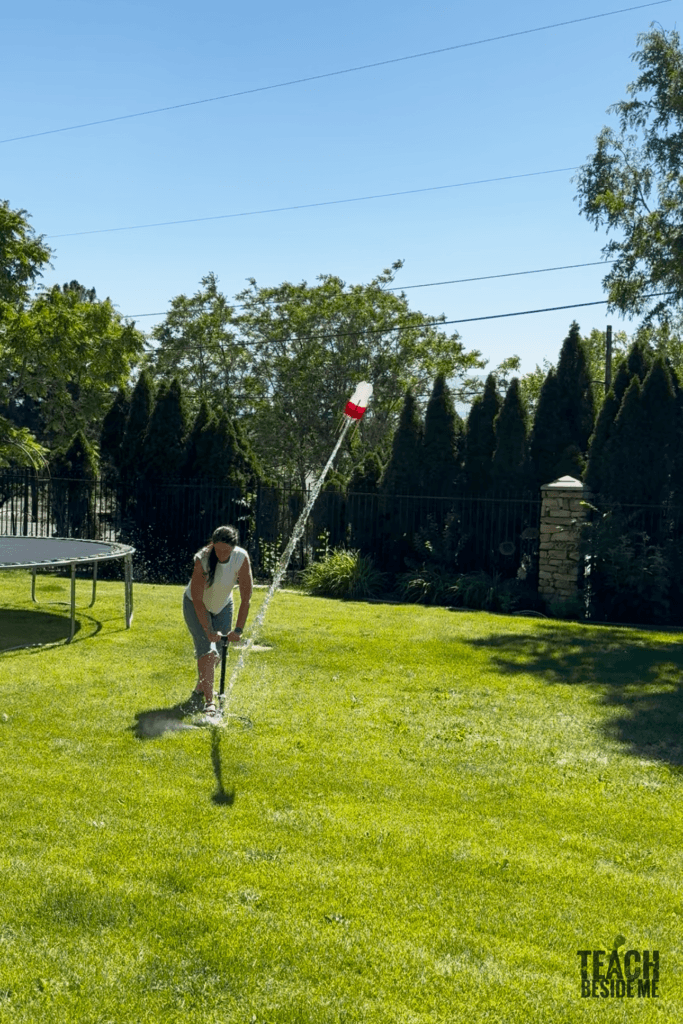
Step 4: Prepare for Launch
Insert the stopper tightly into the bottle opening.
For your launch site, move to an open outdoor area away from people, vehicles, buildings, and power lines.
Place the bottle upside down. You will want it to balance, so make sure your dowels are level.

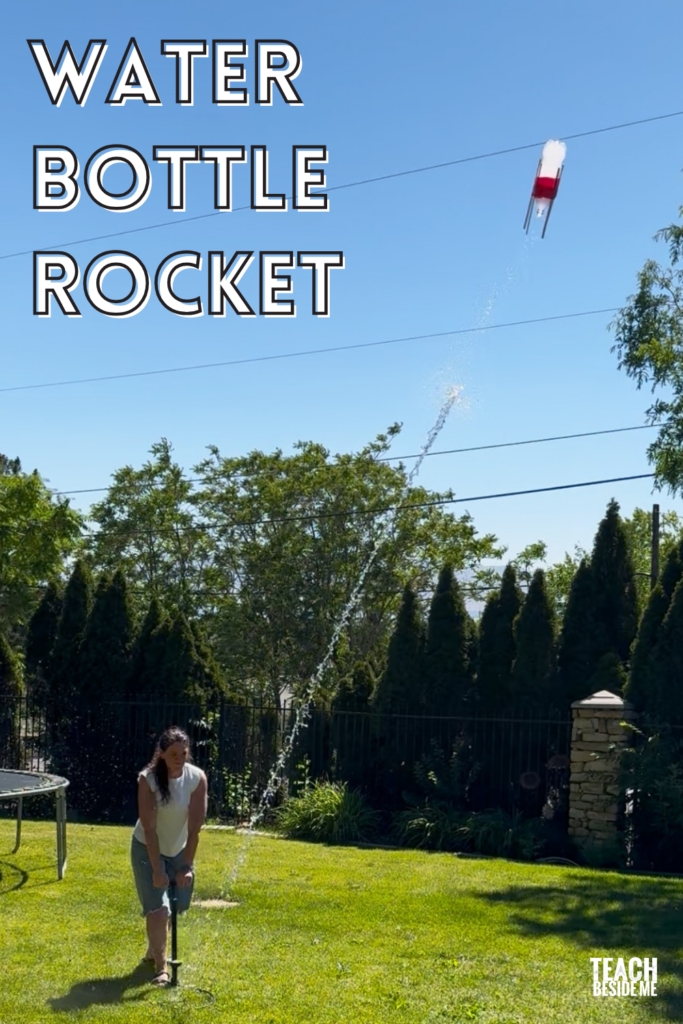
Step 5: Launch Your Rocket
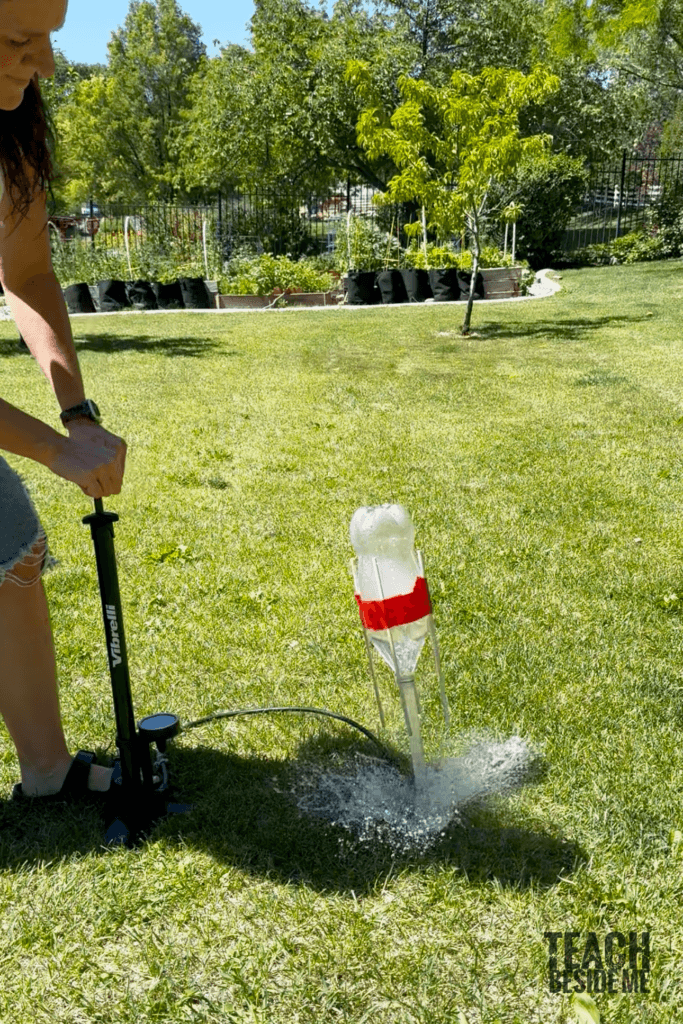
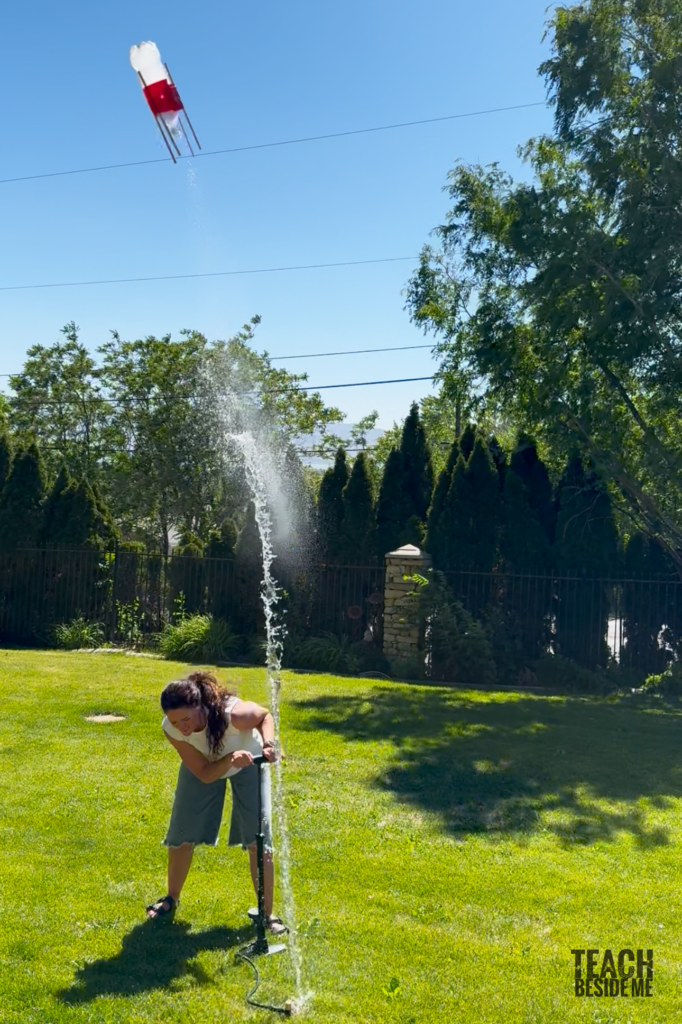
Begin pumping air into the bottle.
As pressure builds, the stopper will suddenly release. Water shoots downward and the rocket launches upward.
Stand back and enjoy the blastoff!
What Is the Best Amount of Water for a Water Bottle Rocket?
One of the most common questions students ask is how much water should be placed inside the rocket. For most 2-liter bottle rockets, filling the bottle about one-third full works best.
Heads up, you may get a little wet!
Too little water may not provide enough thrust. Too much water leaves less room for compressed air and can reduce performance.
Try experimenting with different amounts:
- 1/4 full
- 1/3 full
- 1/2 full
Record which launch reaches the greatest height.
Do Water Bottle Rockets Need Fins?
Fins can help improve the rocket’s stability during flight.
Without fins, a bottle rocket may wobble, spin, or tumble through the air. Fins can help keep the rocket pointed upward and flying in a straighter path.
Try building one rocket with fins and one without. Which design flies farther? Which one stays more stable?
This simple comparison turns your rocket launch into an engineering experiment.
How High Can a Water Bottle Rocket Fly?
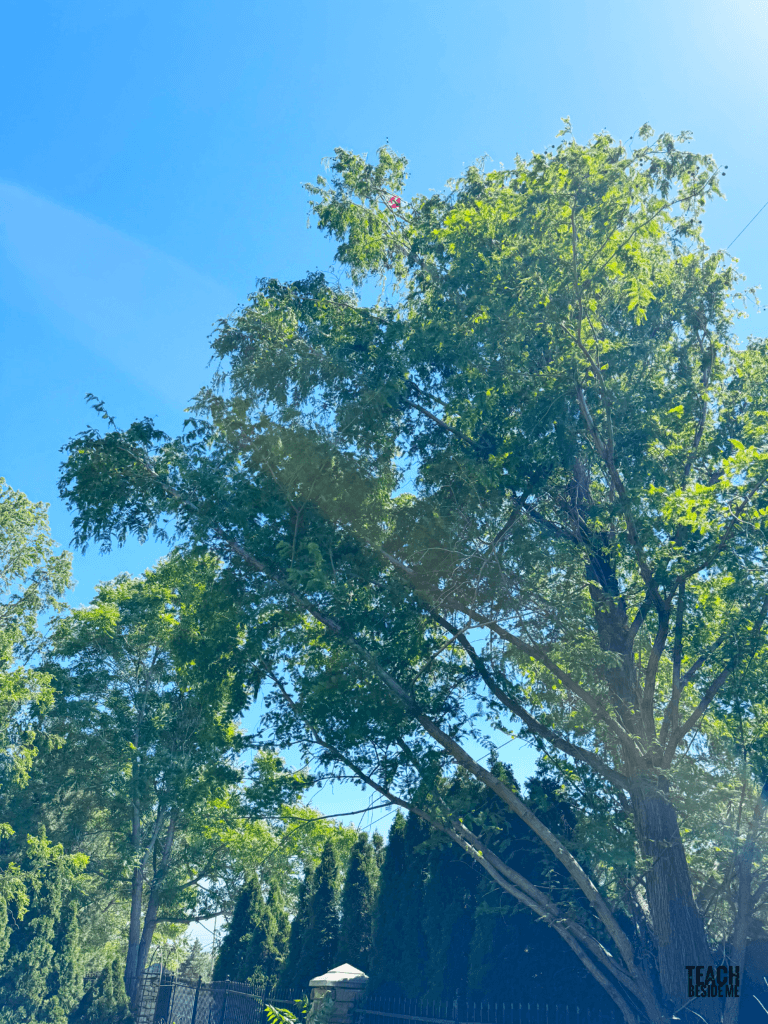
My first rocket launched straight into the top of a tree. I could not find it for a while. I was so surprised at how high it flew! See if you can spot it at the top of the tree pictured!
The height depends on several factors:
- Bottle size
- Water amount
- Air pressure
- Rocket design
- Weather conditions
Many homemade water bottle rockets can easily reach heights of 50–100 feet or more. Some designs can travel even higher.
Extend the Learning with a Rocket Lab Sheet

Want to turn this activity into a complete STEM lesson? Download my free Rocket Lab Sheet to help kids make predictions, record observations, and analyze their rocket launches. It’s the perfect companion for this experiment and can be used with any of my rocket activities.
Grab your free Rocket Lab Sheet below!
The Science Behind Water Bottle Rockets
Newton’s First Law of Motion
An object at rest remains at rest until acted upon by an outside force.
The rocket stays on the ground until pressure builds and creates enough force to launch it.
Newton’s Second Law of Motion
The greater the force acting on an object, the greater its acceleration.
More pressure creates a stronger launch force.
Newton’s Third Law of Motion
For every action, there is an equal and opposite reaction.
As water shoots downward out of the bottle, the rocket is pushed upward into the air.
Air Pressure
Pumping air into the bottle increases pressure inside the rocket.
When the stopper releases, the compressed air rapidly forces the water out, creating thrust.
Potential and Kinetic Energy
Compressed air stores potential energy.
When the rocket launches, that stored energy becomes kinetic energy, creating motion.
Water Bottle Rocket Design Ideas
Looking for water rocket designs using 2-liter bottles? Try some of these creative variations.
- Classic Rocket– Add three fins and a simple nose cone.
- Space Shuttle Rocket– Create larger side fins and decorate like a shuttle.
- Shark Rocket– Turn the bottle into a shark with fins and a tail.
- Patriotic Rocket– Decorate with red, white, and blue colors for summer celebrations.
- Recycled Materials Rocket– Use cardboard scraps, bottle caps, and recycled materials to build your design.
- Competition Rocket– Focus on creating the lightest, most aerodynamic rocket possible.
Compare different designs and see which one flies highest.
Water Bottle Rocket STEM Challenge
Turn this activity into a real engineering project.
Challenge kids to investigate:
- Which water level launches highest?
- Which fin design flies straightest?
- Does adding weight improve flight?
- How does air pressure affect height?
- Which rocket design stays stable the longest?
Encourage students to make predictions before testing.
Safety Tips
- Always launch outdoors in a wide-open area.
- Stand at a safe distance away, at least 10–15 feet, during launch.
- Never stand directly above the rocket.
- If the rocket does not launch, carefully release pressure before approaching.
More Rocket Activities for Kids
If your kids loved this project, I have a lot of fun options! Try some of these other rocket-themed STEM activities:
- Balloon Rockets
- Film Canister Rockets
- Straw Rockets
- Ribbon Rockets
- Tea Bag Rockets
- Alka-Seltzer Rockets
- Quick Bottle Rockets With Baking Soda & Vinegar
- Cardboard Tube Rocket Launcher
- Bathtub Bottle Rocket
Water bottle rockets are one of the best outdoor STEM activities because they combine science, engineering, creativity, and excitement. Kids will have so much fun experimenting with their rocket designs that they won’t even realize how much science they’re learning.


