Rock Candy Geodes – A Sweet Science + Geology Project
This post may contain affiliate links.
Rock Candy Geodes are the perfect edible science project for kids!
Have you ever cracked open a geode to find sparkling crystals inside? On a recent family trip to Moab, Utah, we visited a local rock shop where my kids had the chance to do just that. They were amazed by the hidden beauty inside what looked like ordinary rocks!
That experience inspired our next edible science experiment—Rock Candy Geodes! This creative project combines baking, candy-making, and a fun hands-on way to learn about crystals and geodes. Whether you’re studying geology, doing a homeschool science unit, or just want an exciting kitchen craft, this is one your kids will remember.

What Are Geodes? (The Real Ones!)
Geodes are round rocks with hollow cavities lined with crystals. They usually form in volcanic or sedimentary rocks when mineral-rich water enters a cavity or bubble and slowly deposits layers of minerals like quartz, calcite, or amethyst. Over time (sometimes millions of years!), these minerals build up into the stunning crystals we see when geodes are cracked open.
When we make rock candy geodes, we’re mimicking this natural process—just much faster and sweeter!
How to Make Rock Candy Geodes
✨ Supplies Needed:
-
Fondant (store-bought or homemade – recipe below)
-
Small bowls or ramekins
-
Aluminum foil
-
Saucepan
-
Sugar and water
-
Optional: edible glitter or sugar crystals for extra sparkle

Marshmallow Fondant Recipe (Homemade and Kid-Friendly)
Ingredients:
-
1 lb marshmallows
-
4 Tbsp water (divided)
-
2 lbs powdered sugar
-
½ cup shortening (for greasing hands & surfaces)
Instructions:
-
In a large microwave-safe bowl, melt marshmallows with 2 Tbsp water. Heat 30 seconds at a time, stirring in between, until fully melted (about 2½ minutes total).
-
Stir in half of the powdered sugar. Grease your hands and knead in the rest by hand.
-
If the mixture is too dry, add the remaining water a bit at a time. If it’s too sticky, add more powdered sugar. You want a smooth, play-dough-like texture.
If it is really sticky, add little more powdered sugar.. If it is really dry, add in the remaining water. It should be about the consistency of play-dough when you are done.
Create the “Rock” Shell
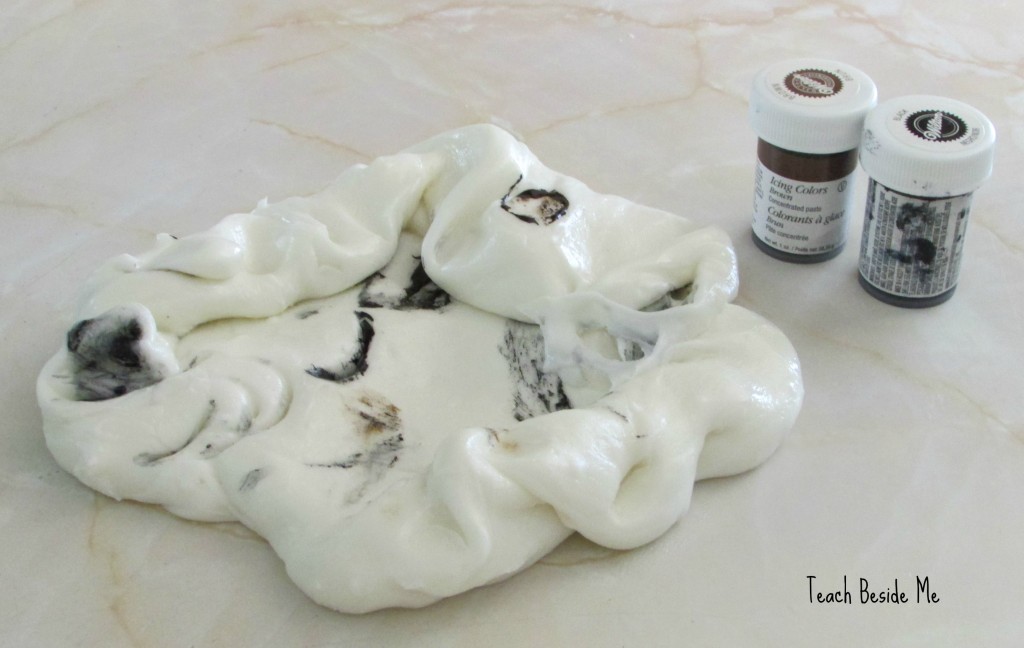
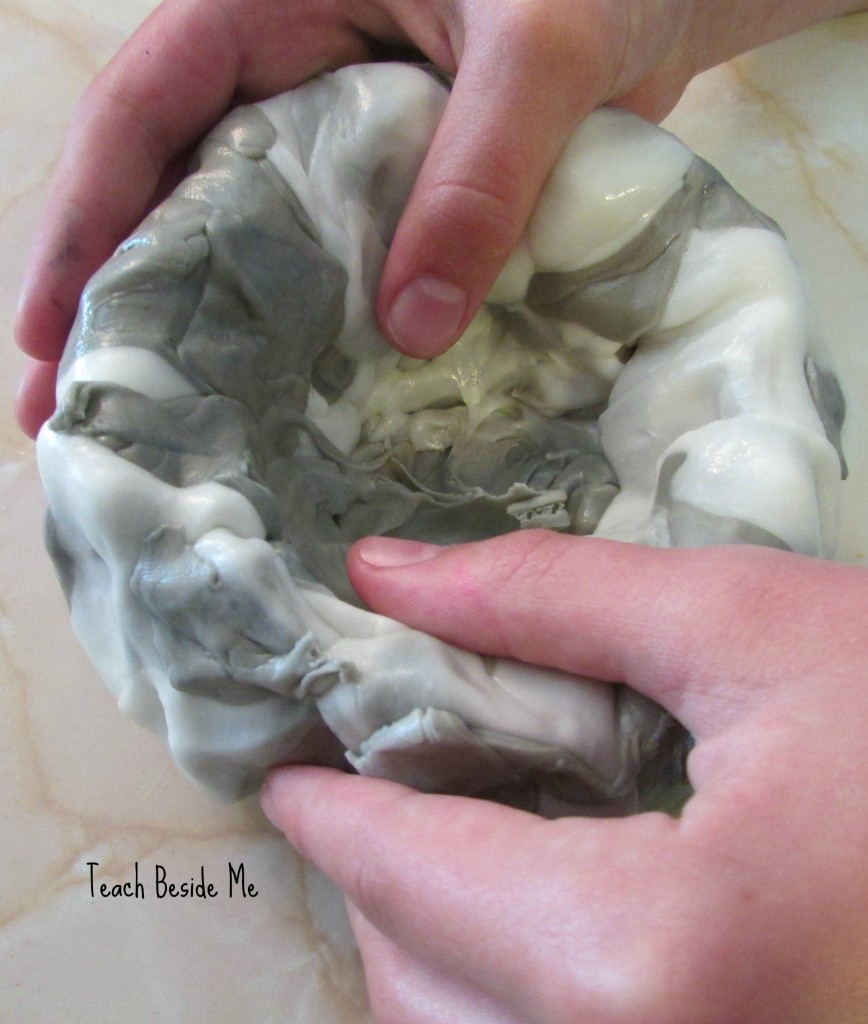
Divide your fondant in half. Leave one half white, and color the other half with gel food coloring to resemble real rock—mix black and brown for a natural look. Mix the two fondants together for a marbled effect.

Line small ramekins or bowls with foil. Press the fondant mixture inside to form a hollow bowl shape—this is your geode shell.
Make the Sugar Crystal “Geode” Center
-
In a small saucepan, combine 1 cup water and 2 cups white sugar. Heat over medium heat until the sugar is fully dissolved.
-
Add food coloring if desired and let it cool slightly.
-
Pour the sugar solution into the hollow center of each fondant bowl.
Tip: To make multiple colors, divide the syrup before adding color.
Wrap the bowls in foil and let them sit, undisturbed, for about 3 days. After 2–3 days, carefully pour out any extra liquid and let the geodes air dry until solid.

Tips for Success
-
Be careful when peeking—they spill easily!
-
Drying longer = better crystals.
-
Try edible glitter or sanding sugar for added shimmer.

The Science Behind the Rock Candy Geodes
This edible rock candy geode project is a great way to introduce kids to:
-
Crystallization – the sugar solution becomes supersaturated, and crystals form as the solution cools and evaporates. See also my How to Make Rock Candy Crystals with Kool-Aid
-
Geode formation – just like real geodes form in volcanic bubbles or hollow spaces, your fondant bowl acts as the “host rock.”
-
Observation and patience – kids can check daily and document changes!

Extend the Learning!
Pair this activity with more science fun:
-
Identify Rocks With Kids – Includes a printable rock identification chart
-
100 Edible Education Ideas – A giant list of fun, hands-on learning through food
-
Try decorating your geodes with candy gems or using edible metallic paint for realism
-
Create a science journal page with observations: size of crystals, drying time, color changes

This Rock Candy Geode activity is a perfect blend of science, art, and sugar! It’s a wonderful way to reinforce scientific principles in a way that’s both memorable and delicious. Whether you’re learning about crystals, rock cycles, or just doing a creative kitchen STEM day, your kids will love cracking open their own edible geodes!


This is awesome!!!! My son loves rocks and geodes. How cool to make it out of candy!
I used to use a range of edible projects to teach some geology – very popular for the boys I taught to do at home or in class.
1) Sedimentary rocks -just wet some coloured sugar enough to get it to stick like wet sand. Mold in a cup or little cake mold and tip out to dry over night. Instant sedimentary rock, just the way it really forms in nature, just a few million years faster.
2) basalt vs rhyolite lava – cook up some golden syrup as for hokey pokey candy
100 grams caster sugar
4 tablespoons golden syrup
1 ½ teaspoons bicarbonate of soda via Nigella Lawson
slowly bring to a boil. Pour out a little bit on greased foil – runs like basalt lava.
add baking soda and pour out immediately – stiff and foamy like rhyolite
3) heat circulation inside the earth – bring a small pot of water to the boil. Throw in a handful of uncooked rice or macaroni. Observe the way the rice/pasta moves up, around, then down, like the circulation that moves the tectonic plates over the earth.
4) metamorphic rocks transformed by heat – any good cookie recipe for molded cookies or ones you can press a pattern into. If you layer vanilla and chocolate dough, you can apply a little pressure from the side or use the tines of a fork to form anticline and syncline forms.
5) fossil casts – sugar as for sedimentary rocks, put into a patty and then a shape pushed in to make the cast. Let dry and eat!
Interesting experiments – fun. I wonder if there is a way to teach health with them in addition. I cringed when I saw shortening as an ingredient – hoping the kids weren’t eating trans fats. I guess calcium alginate in the froodles is an OK food. Very creative lessons. The kids must love your classes.
Awesome! I teach once a week so I would have to take them home and bring them back the following week for the kids. Do you think they would hold-up that long? Thanks!
Yes, definitely!